Thanks Dave! Glad to have you stop by. Happy to provide you a sneak-peek into the wonders of Bronco kits. ![]()
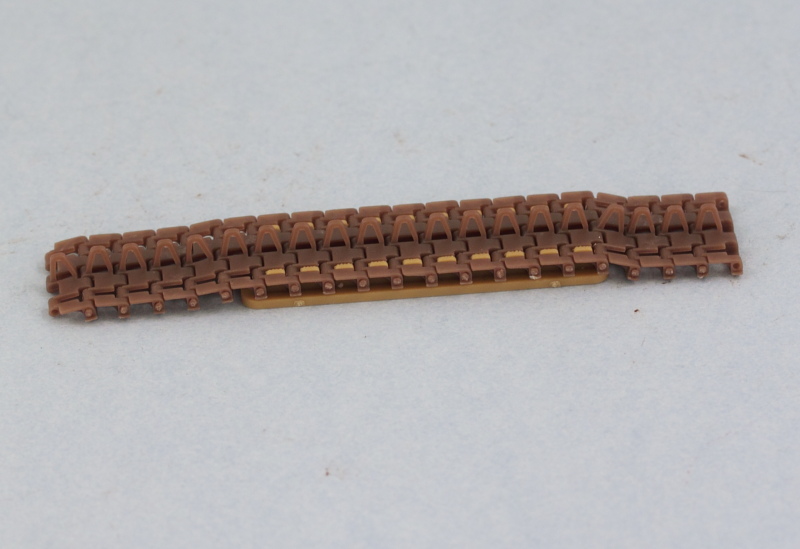
While the last update dealt with the interior parts, today’s efforts focused on the workable tracks. Bronco provides an excellent set of workable tracks in the kit, so no need to resort to my usual trusty MK replacement strategy. The kit calls for 66 links per side but until I get the hull built and suspension in place, I only worked on 60 links to be safe. The pins for the links are molded a little funny…to save on total sprue space I guess, some of the pins are separate along the sides of the sprue while the middle run has pins in a double set. The tracks are handed, so it’s important to keep track of which pins are which. Using the kit-provided jig, I assembled the runs one link at a time, cutting the pins free of the sprues and using the nub as a ‘handle’ to insert the pins then cutting it away after the glue had started to set on the head of the pin. 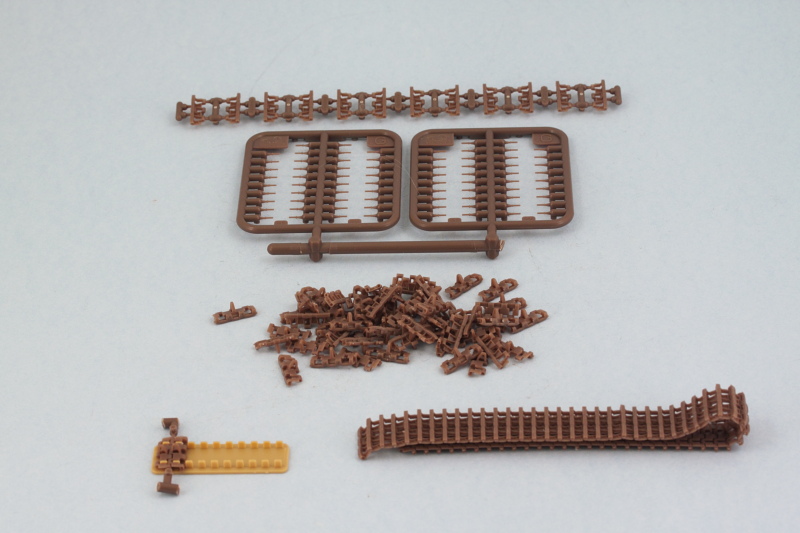 120 links later, we have two nice workable runs to play with in the future.
 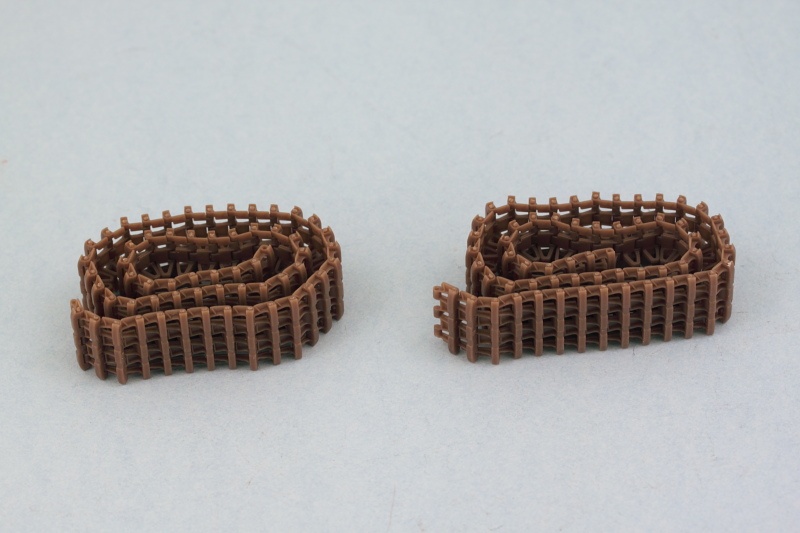 May not look like much, but this is a major step in the construction 95% complete until the suspension is available to test the number needed for the right sag/tension arrangement.
Nice work Bill. So I guess these go together in the same was as Fruils with the pins instead of wire. Does that little jig come with the kit.
Thanks Bish! The pins are two per link (one per side) and yes, the jig is kit-supplied, definitely makes things go together smoothly. [;)]
Those tracks are kit supplied?
NICE!!!
Bronco is fast becoming one of my favorite manufacturer!
Yes indeed J-M! I was very impressed by this as it saved me another $30 or so that I would normally spend on workables. [;)]
Finally managed to drag myself online… !http://www.animateit.net/data/media/smiley712/desertsmile.gif**!http://img.photobucket.com/albums/v481/ladyelle/Most%20used%20emots/shame.gif
(been busy with problems in life).
Now, that’s the most sensible and efficient appearing jig I’ve yet to see.
It’s gonna look great Bill!
Thanks Steve! It definitely makes it easier to assemble the tracks for sure! [B]
Sweeeeet tracks Bill! Better watch out MK…Bronco’s got your number!
Ernest, your last comment slipped by me, apologies for that! I hear you about the quality of those tracks, very impressive. [B] Here’s the latest: Spent the day working on the bulk interior painting to get things ready to move into the detail and assembly stage for that area. First up was an airbrush treatment of Model Master enamel Panzer Interior Buff to all the applicable hull areas and units. Because I hate to scrape paint, I used a combination of masking tape and poster blue-tack putty to mask off the hull floor and side joins to make life a little easier when the hull comes together down the road. 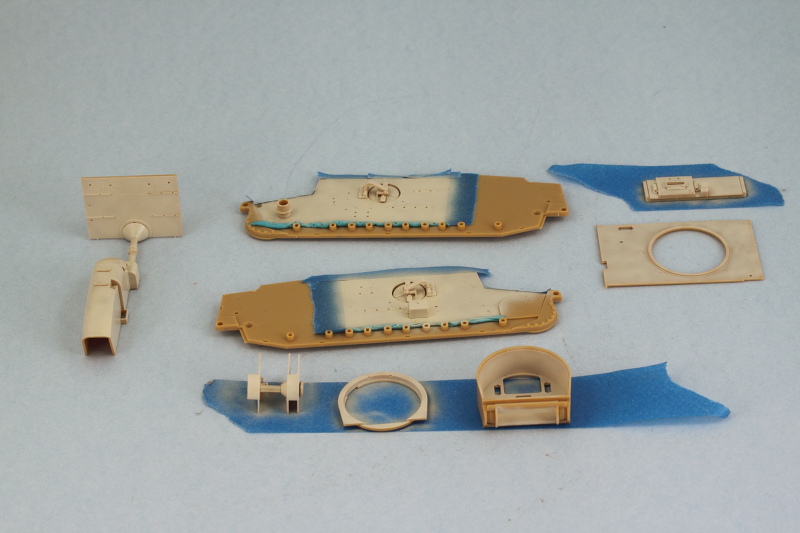 Ordinarily it’s not worth the trouble to airbrush small detail parts but since the interior has so many, I decided this time around that the airbrush would be the better method vs. hand painting. The compartment floor was airbrushed with a custom mix of ‘primer red’ that I keep around but don’t quite remember the exact mix ratio on…I do know it contains Insignia Red, Flat Black, and a touch of Light Gray…and a little bit goes a long way! Radio received some Gunship Gray, the seat mounts and other odd bits of gear were airbrushed with Khaki. The Gurtsacks and crew canteens are largely made of cloth or have cloth covers so I used a different shade for them, trying out some Faded Olive Drab as their base color, and have to say I was happy with the shade tone that produces.
 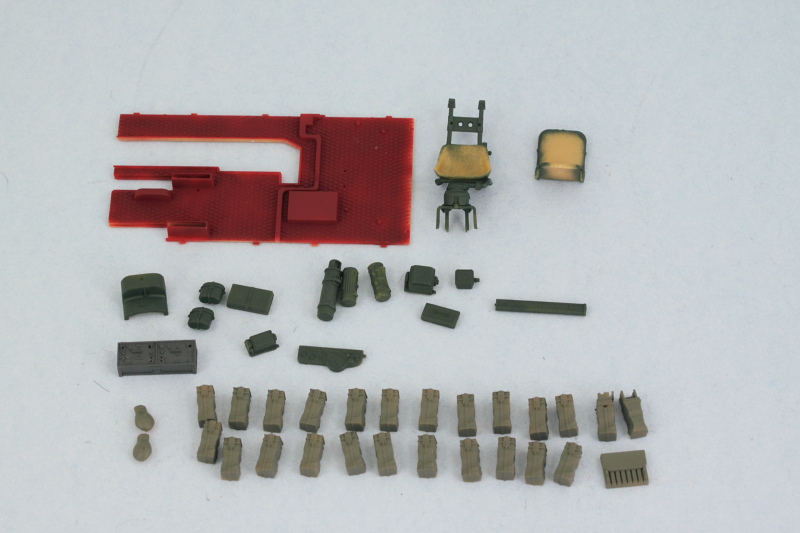 This will all get the chance to cure before the next round of detail painting and the weathering process begins on the interior. Hope everyone had a Happy Easter!
Nice detail painting Bill! Yep, sometimes its worth it to bust out the AB for work like that! Like your color choices!
Thanks Ernest! Now the fun begins in terms of pulling all that interior together. [;)]
Very cool choice, Bill! I just saw one of these in Kubinka! I did an RPM or Alan ? version of this–something like that; a nice little kit, but nowhere near as crisp as this offering. A neat little panzer! I’m sure you’ll do it proud!
Thanks Karl! Having fun with it so far. [B]
Holy Excrement…I saw the posts on FB but i missed it here, that’s what old age does to you, modelers dementia. Up to your old tricks and looking good. Glad to see you back in armor…though I am still going to hold you to hitting the cycle [;)]
Rounds Complete!!
No worries Mike, glad you found it! You never know about the full cycle…but for now I’m back on familiar ground at least for a little bit. [;)]
The devil’s always in the details and that’s where this session’s attention focused on. Continuing on from last week, I went to work hand detailing all the various bits of gear that go into the fighting compartment interior. First up were the 24 ammo sacks, the MP40 ammo pouch, the canteens, mess tins, and the first aid box for the floor. Bronco provides some excellent molded-in ‘cloth’ detail to the ammo sacks so I dry-brushed some of my 50-50 Light Gray/Panzer Dunkelgelb custom mix that I keep around for three-tone camo to highlight and add some depth to them. 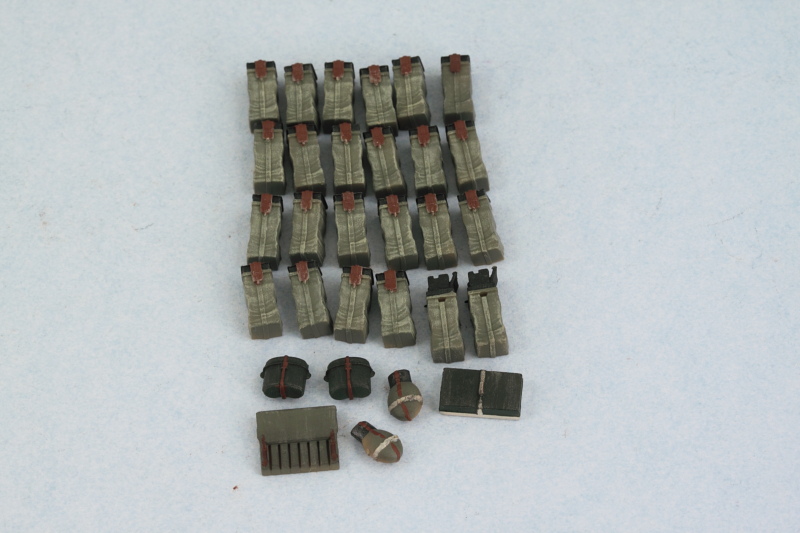 Now comes the tricky part, getting all the stuff to install just right in all the different spots! I started with the rear firewall as it’s the most densely populated spot and also interacts with stuff on the floor and the hull sides. I found that working from the bottom up was the best way to go and did the right side first, checking alignment with things on the floor and the hull side as I added each row of items.
 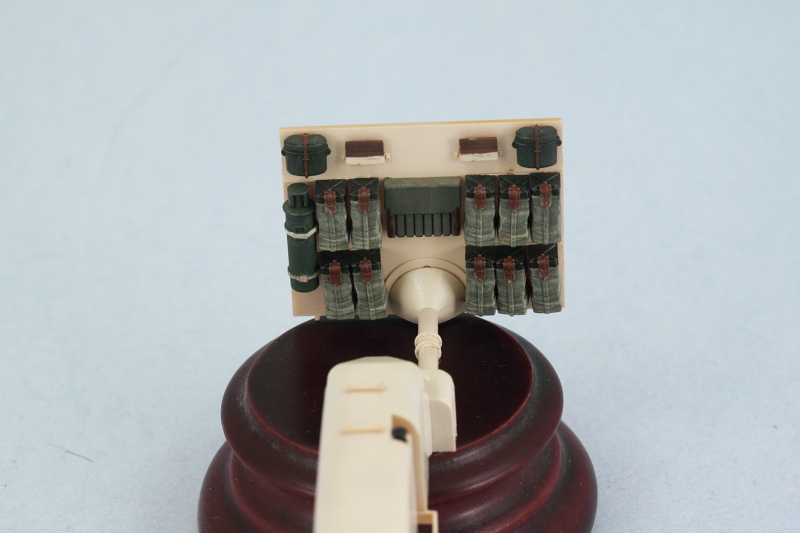 That of course meant that I also worked on the hull sides at the same time. First up was the driver’s side. Ammo sacks and canteen were installed along with the hand-detailed flare gun, flare cartridges and box, and driver’s intercom box and headphones. I added the wiring for the intercom using 0.5mm solder installed in the hole I’d drilled out previously with some CA gel.
 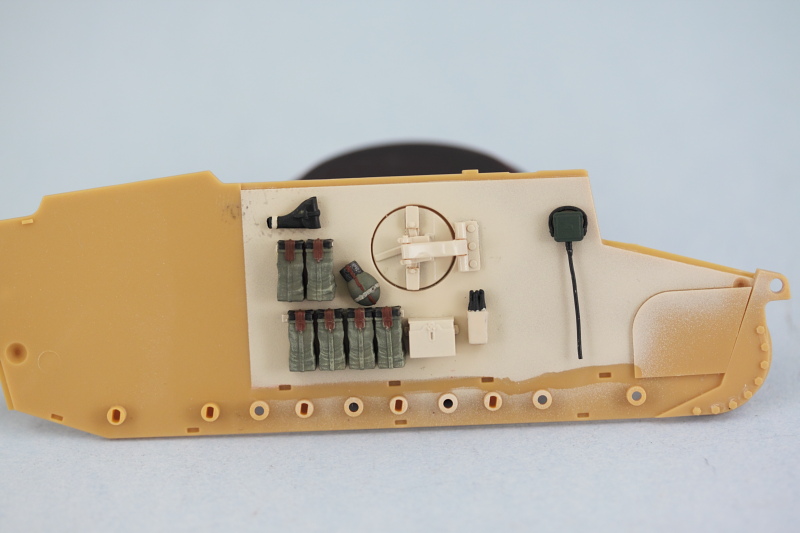 Opposite site received ammo sacks and canteen, gas mask containers, and the radio power transformer units.
 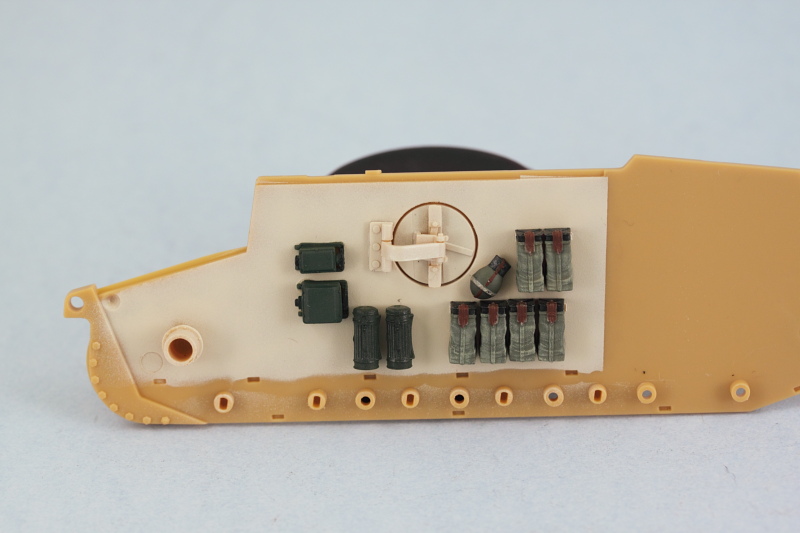 With the firewall squared away, I also added the wiring details to the radios with 0.5mm solder wire and installed it in position along with the spare MG13 barrels case.
 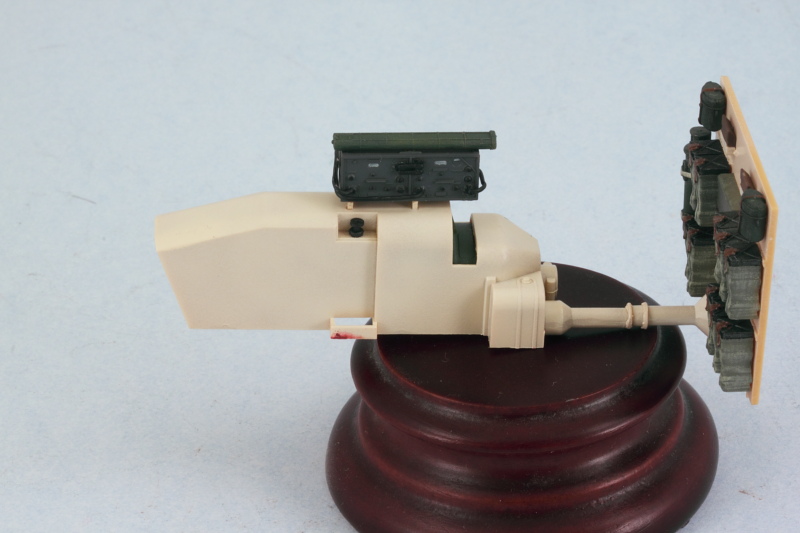 Floor received some weathering attention with a light wash of Raw Sienna applied to simulate some dirt accumulation. Virtually all of this will disappear once the drive-train is installed along with the commander’s seat but enough will show through to add some color variety. I also installed the small tool box and first-aid kit along with the driver’s seat and track control levers.
 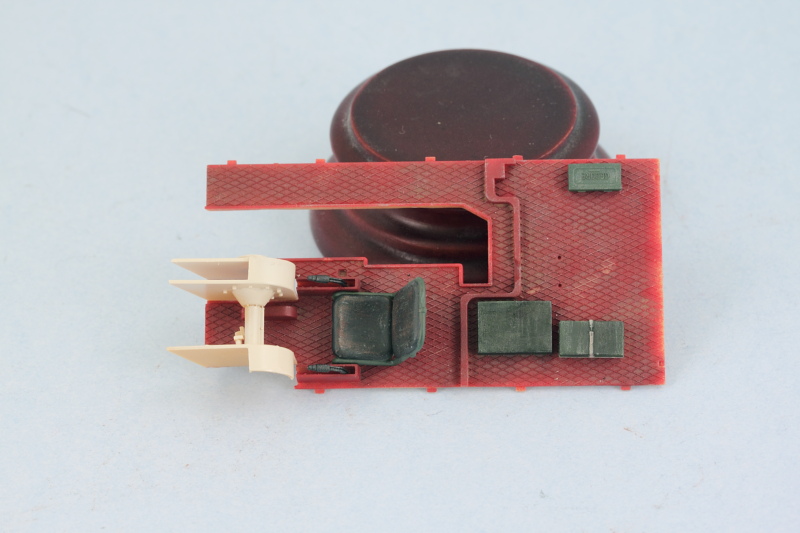 Rounding out the day’s activities, the commander’s seat was detailed along with the driver’s instrument panel and periscope view sights.
 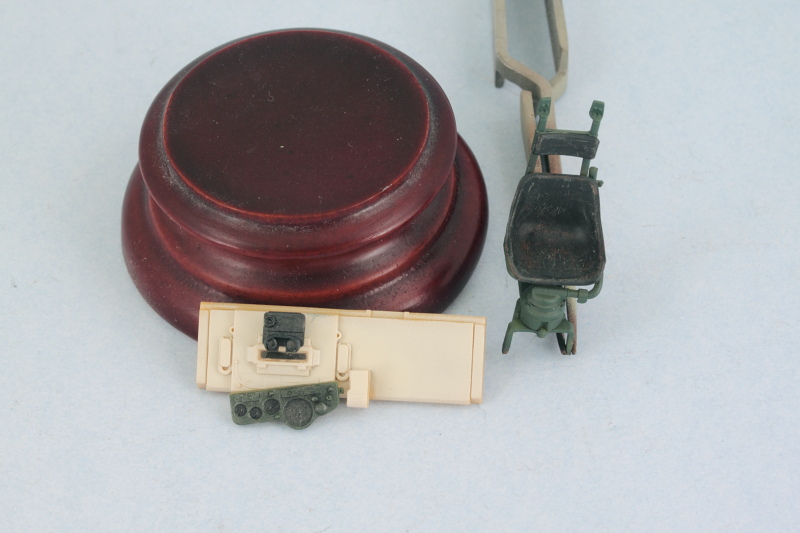 There’s still more to do weathering-wise before the interior is ready to be assembled but it’s definitely closer to ‘the day’ than it was before!
Some realy nice work there Bill. Those ammo sacks do look really nice.
Its hard to believe that they give you so much for the interior.
I was thinking that, I had to go and check that this wasn’t an open topped vehicle.