Some nice progress, love the added little details! As to your question about the sandlines on mine, I managed to make the vinyl ones work at the time but it was an exercise in patience and a lot of cursing along the way.The planned dio you have for this one ought to be a treat to see when you get it all built. [Y]
Great build so far! I was going to ask for this kit for my birthday a few years back, but decided I didn’t have the patience to build it well.
It looks like the detail on the kit parts is pretty good. The wiring you added is going to definitely add to it.
TREAD - Thanks for those pics they should be useful when painting to help show some wear. Even though not the same some of the wear should be the same and I just enjoy looking at them. Agree, the power of steam is amazing and elegant.
Well guys, remember me? It has been a while. Time around here has been a rare thing but have been doing little things a little at a time. Not having the time to sit at the bench, I went ahead and cut parts from the sprue tree, wrote the part number down and threw them into small zip lock bags. Anytime I had a few minutes would just grab a few bags and clean / prep the parts. Eventually had quit a few bags done.

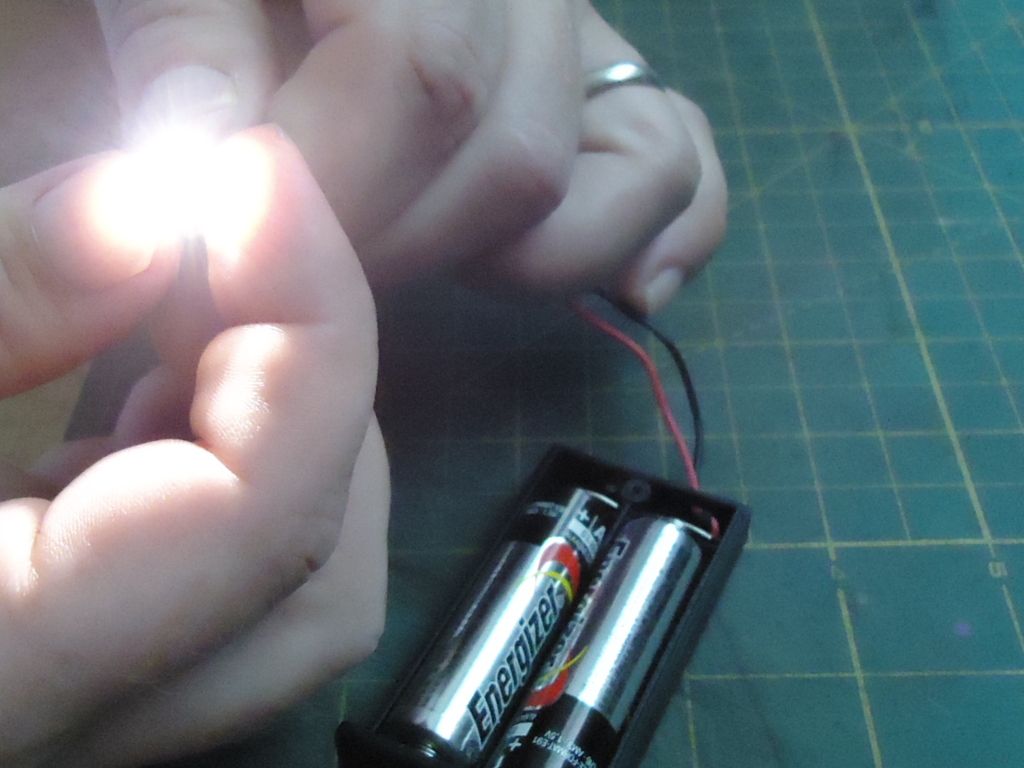
Had worked on and wired all lights…
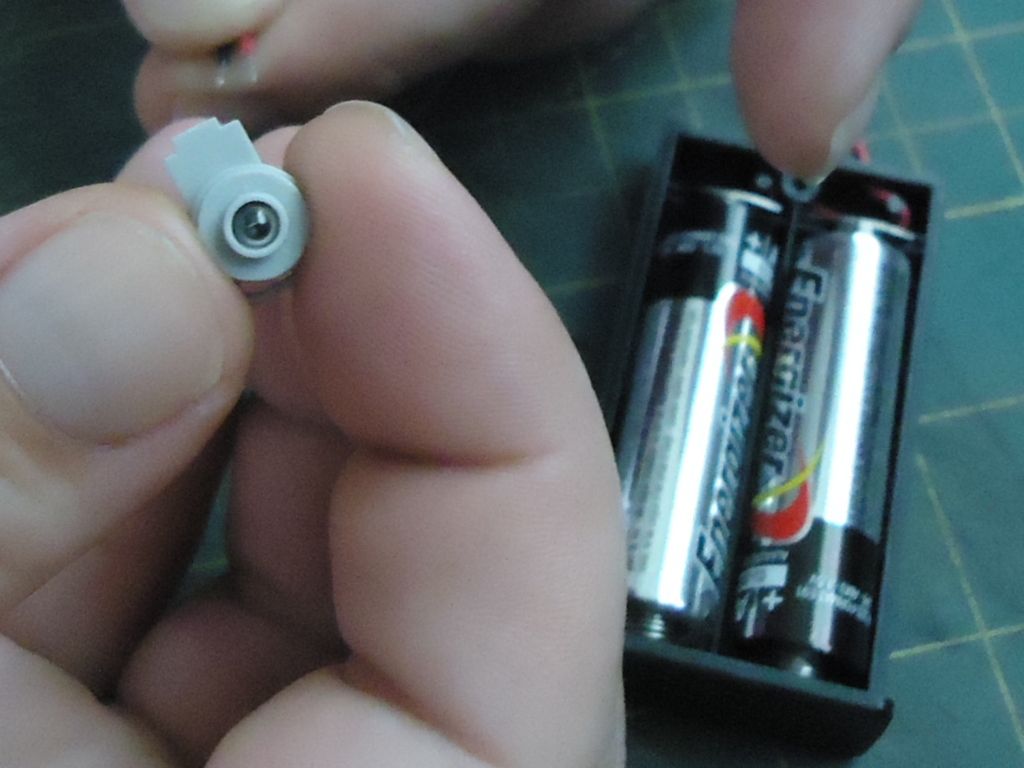
unfortunately the lights were to hot and had fear of damaging the plastic (melting / warping) so they were left in but not hooked to power any longer.
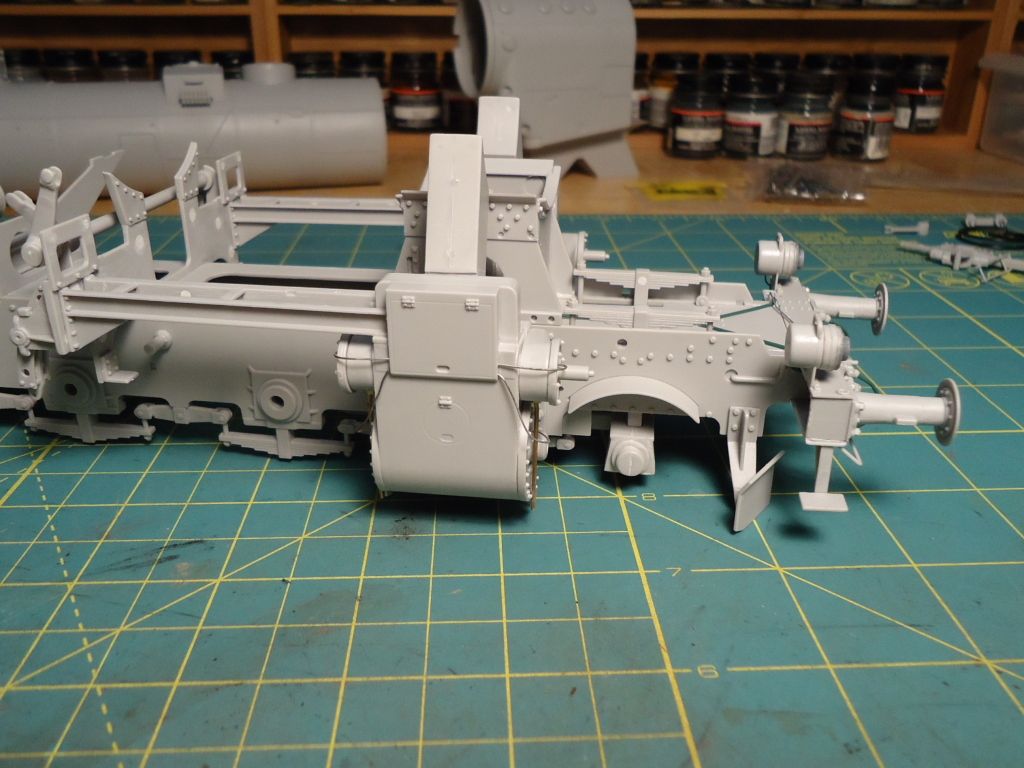
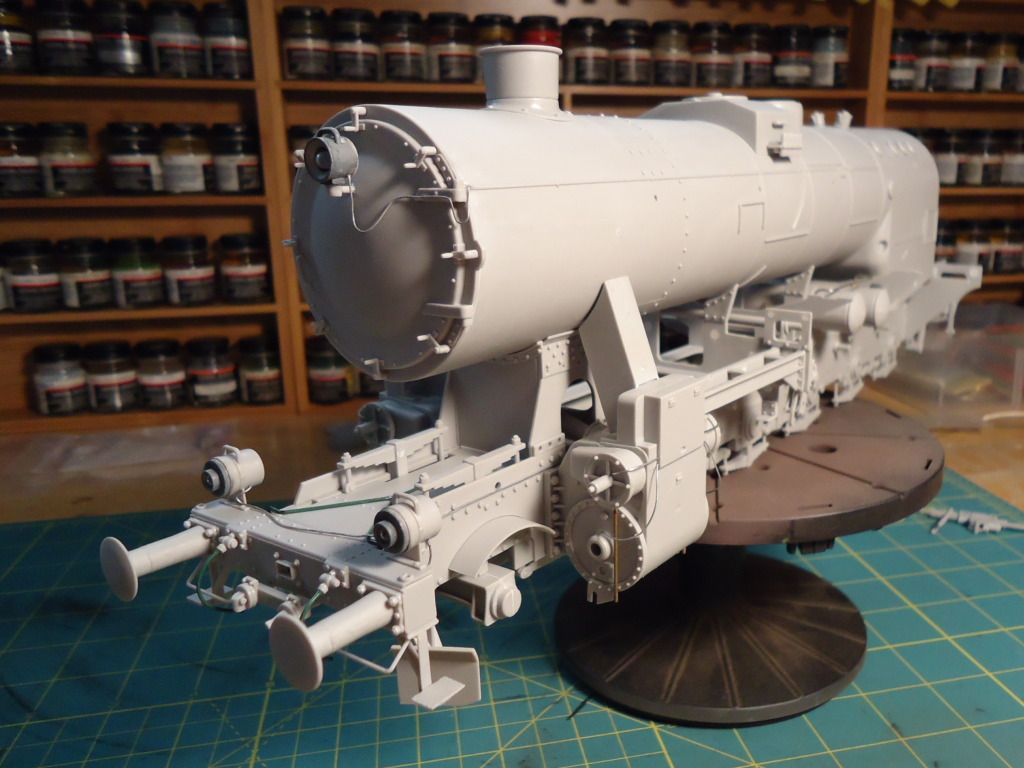
Front area added styrene under the boiler mount to cover a large gap.

Before further assembly, had to fix the steam pipe too the cylinder / piston. The kit part was short at the connection point on both sides so the pipe was extended on both sides. This pic is one side corrected and the the other side is how it originaly came before correcting.
Not a good pic but this is a close up of the installed pipe were it enters into the cylinder.
Having this correction on the steam pipe also holds it in place snugly and is a great help for aligning things up when putting on the boiler.
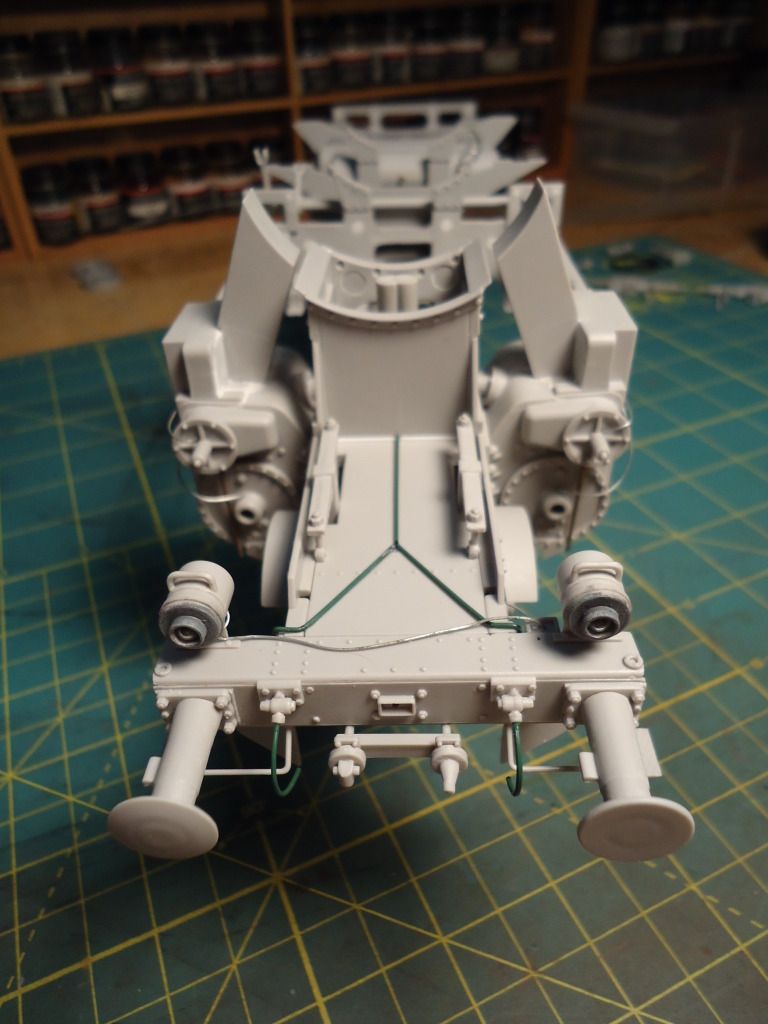
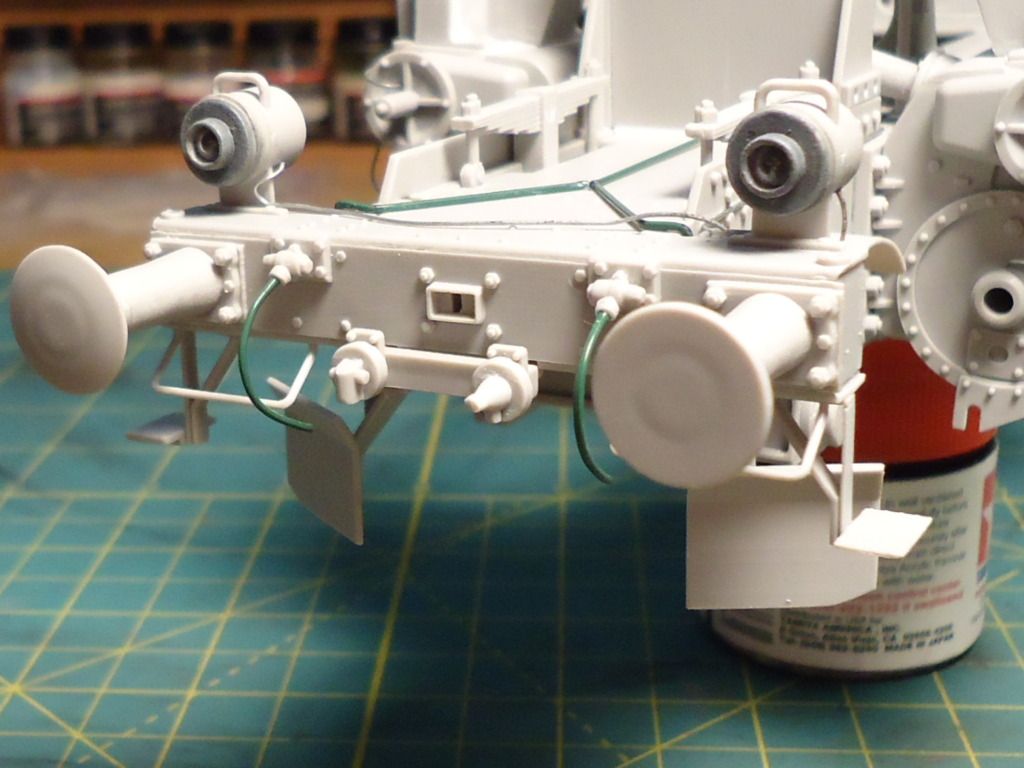
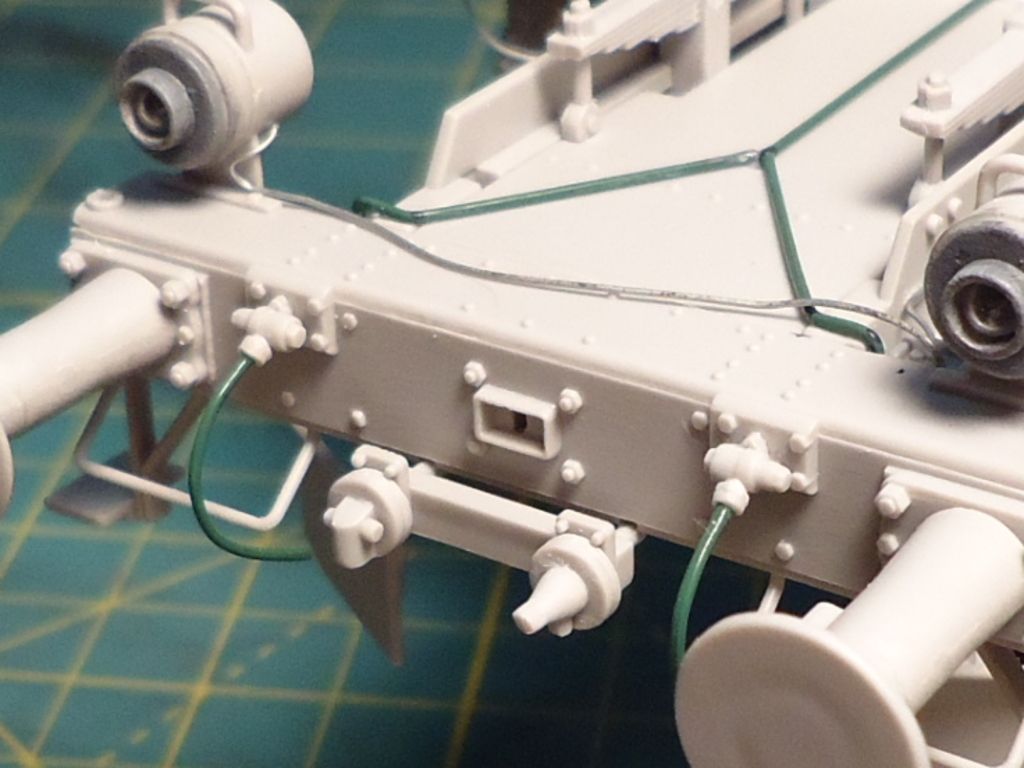
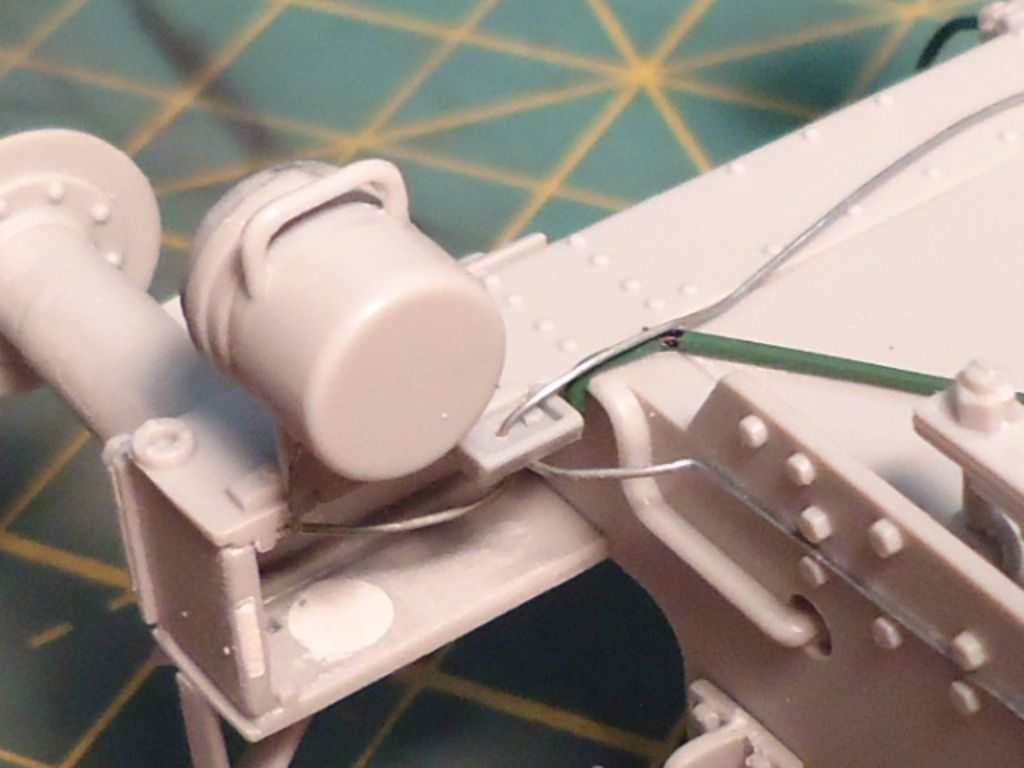
Next added airlines made from wire and added the wireing for the lights. The air connections in the front were modified kit parts. Had cut the plastic air hose off and replaced with wire by drilling into the remaining valve and pushing in the wire. This way can later push rubber tubbing over the wire for a more realistic effect. Will also make it flexable for hooking it up to the futer cars. This is the same procedure had done on my Gondola car for those that remember. Here are the pics of all of that and how she looks in the front now.

Have a few more update pics ready and will post them up shortly.
Thanks all for stopping in [B]
Continued updates…
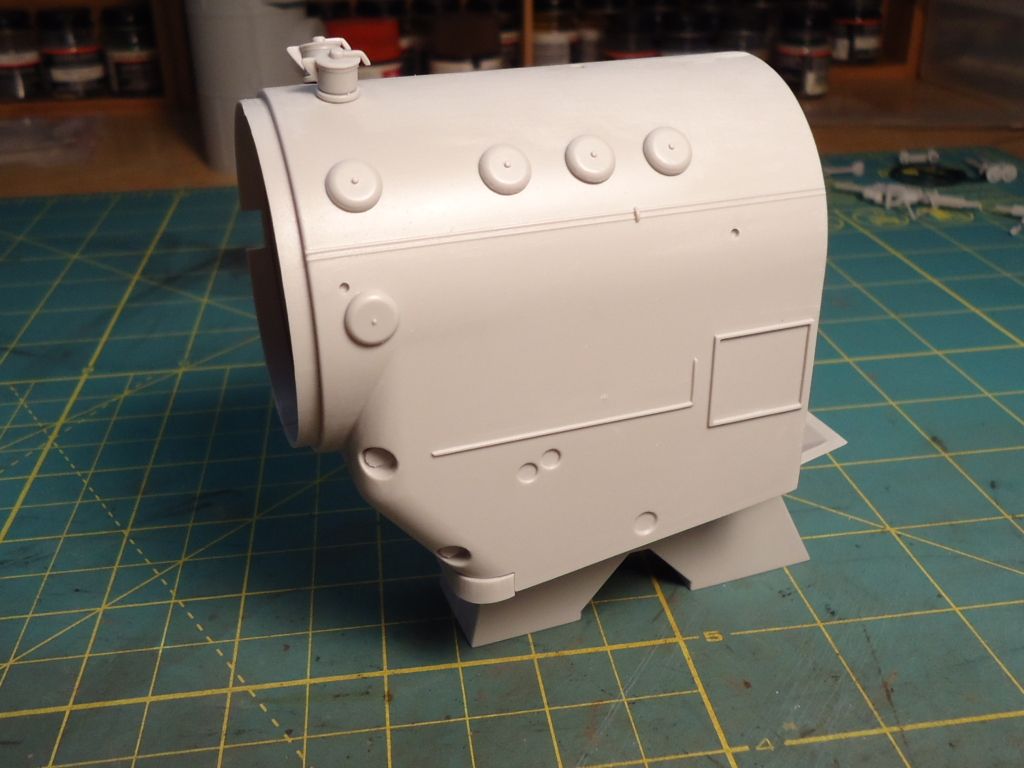
Work was started on the boiler.
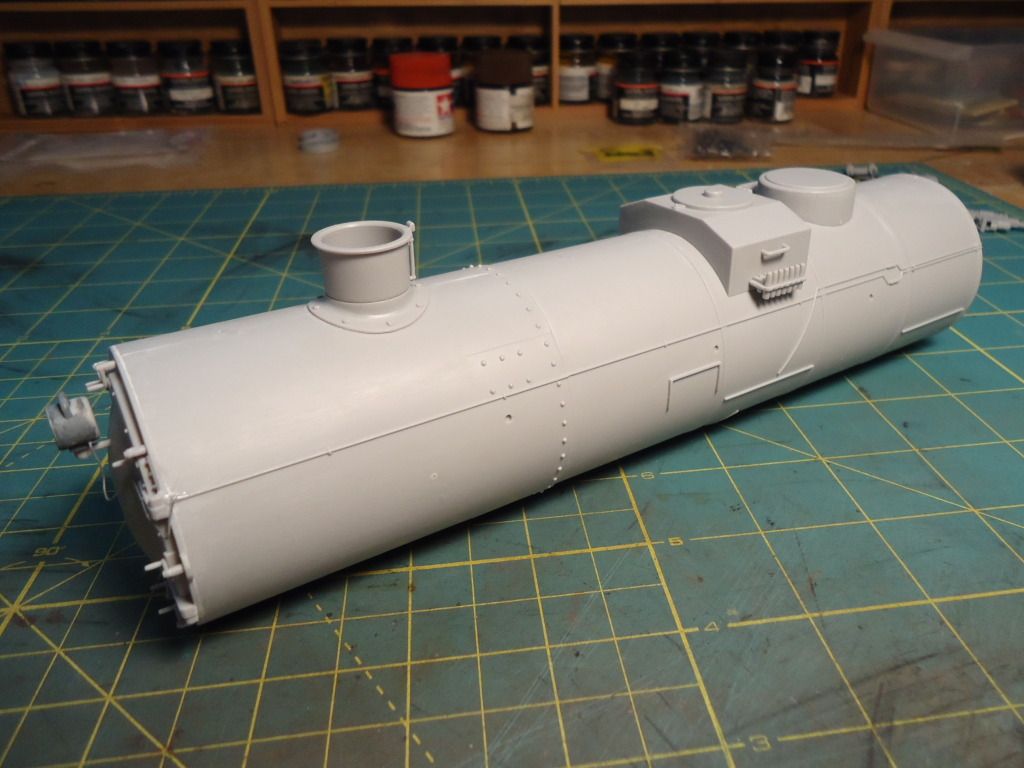
Before gluing the stack on, had drilled it out so not to see the solid shallow bottom.

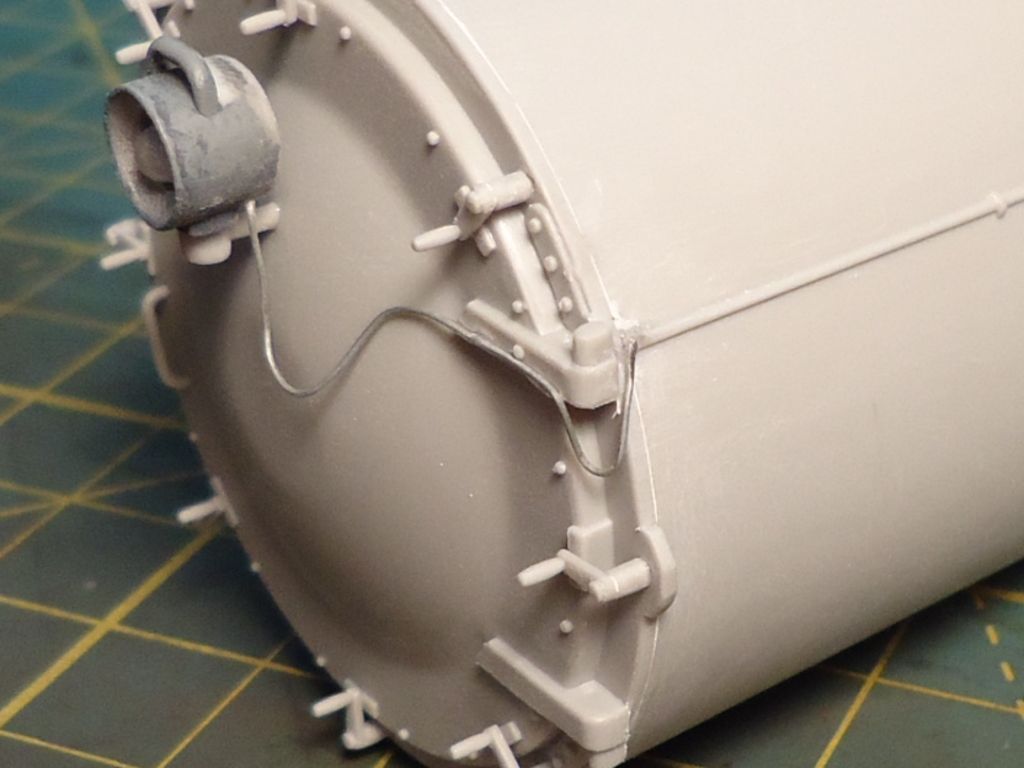
installed the light and wiring on the front of the boiler also.
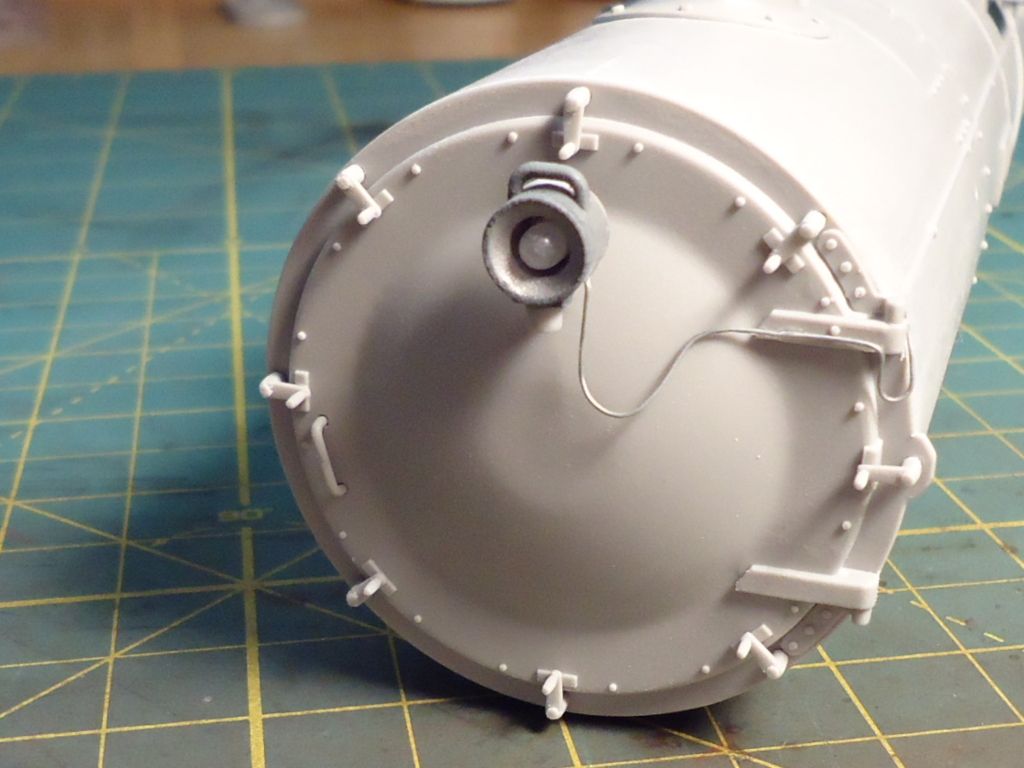
Brought the added light wire to the molded on wireing and tied together with CA glue then sanded it smooth. Should look like a continues wire when painted.
The burner portion of the boiler has also been roughly constructed.
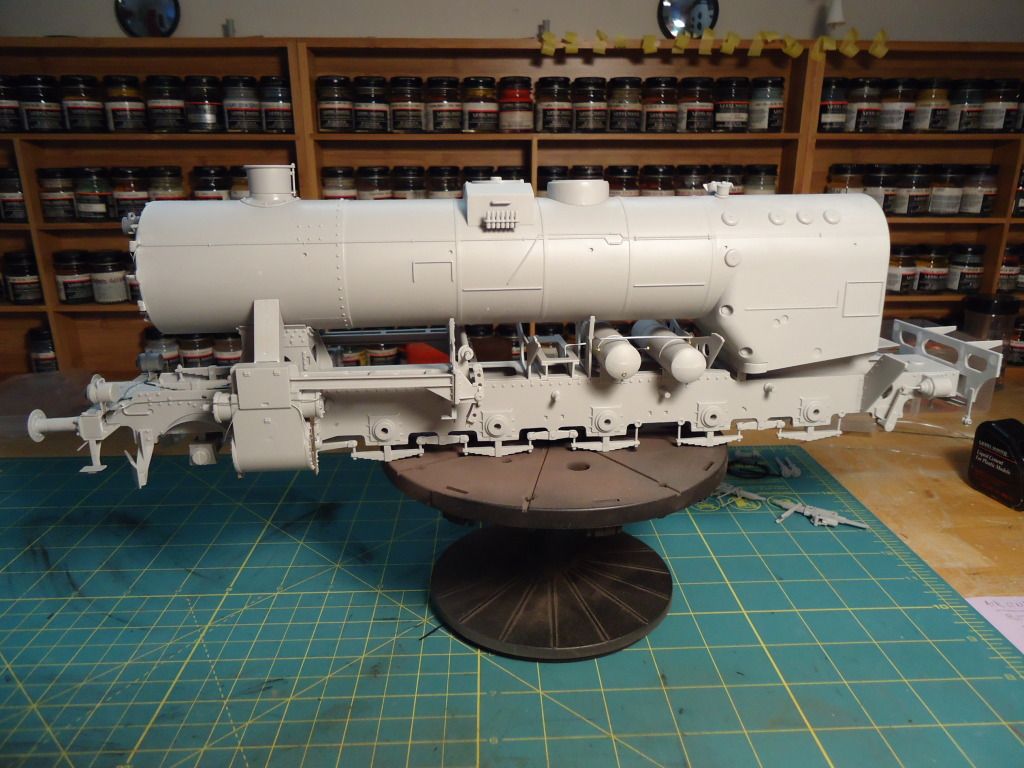
This is the dry fit of the frame and boiler.
Thats it for now. Hope it will not be another month before my next post, will post again as time permits.
Thanks for looking
love it, i think i may buy another one someday and start over,if my vote counts Zig Zag would be cool(that would be my choice right or wrong).with so moch work involved in the prep and sub assy. my sidelined kit would be more work than i want to fix, fantastic build so far looking forward to more.
OMG! Somebody is back… good to hearing from you again! Now it is starting to look like a train… looking real good!
Nice to see you’re making progress on this one Rob! Sharp work on the wiring…too bad about the lights/heat situation…maybe try LEDs?
ARMORNUT - Is your kit really that far gone [:(] I had thoughts of getting another kit so that I could de-rail it and give it some battle damage and show off its under carriage. A thought maybe for yours?
ANDY - Hey buddy…I’ll unfortuantly still be in and out but hopefully more IN. Some good news, I finally ordered my new spray booth and it should be here sometime this coming week [:D] (for those that do not know, my old booth did not make my last recent move [:(])
BILL - It feels good to finally get some work done on this! Had looked for LED’s but was unable to find some small enough. Since putting everything in permanent had found a Fiber Optic set that would have worked perfectly. May get the set for some future project?
No lights is alright anyway, with the black-out order these trains rarely ever used their lights.
Thanks for the comments guys and I think I will be going with the ZIG-ZAG paint job. Thanks for the input about it [Y]
Today’s update, decided to get away from some of the smaller details for a while and built the rough construction of the tender. Even all of these pieces needed much sanding and filling the pin marks. No part so far has gone untouched without filling and sanding [:S]
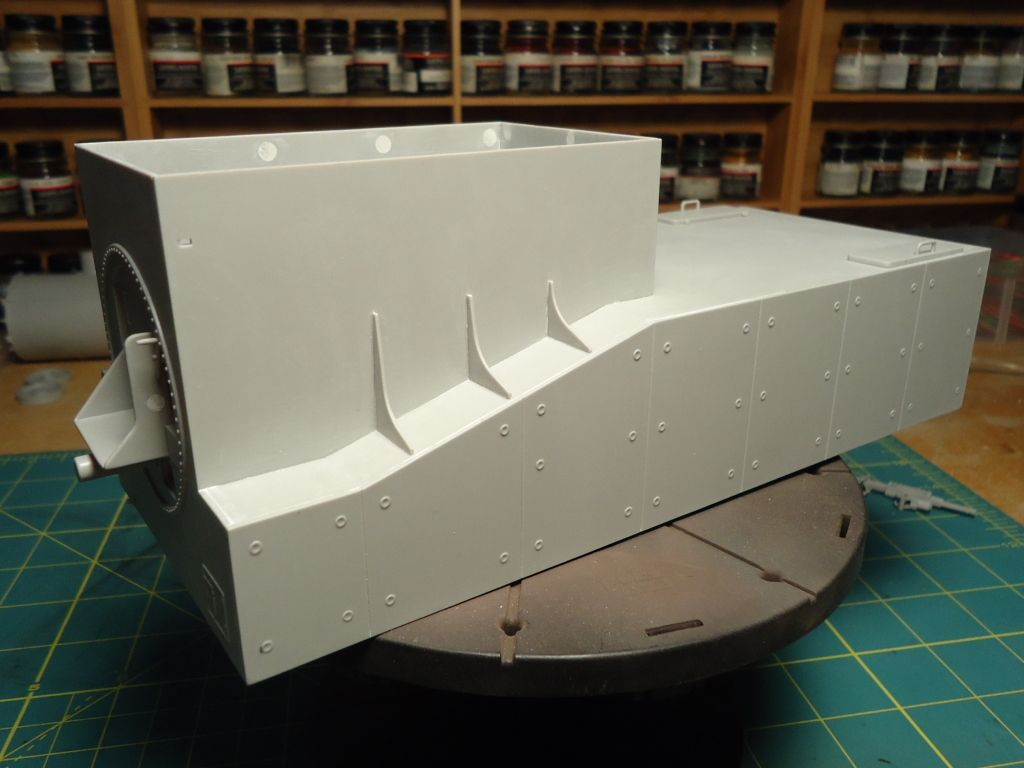

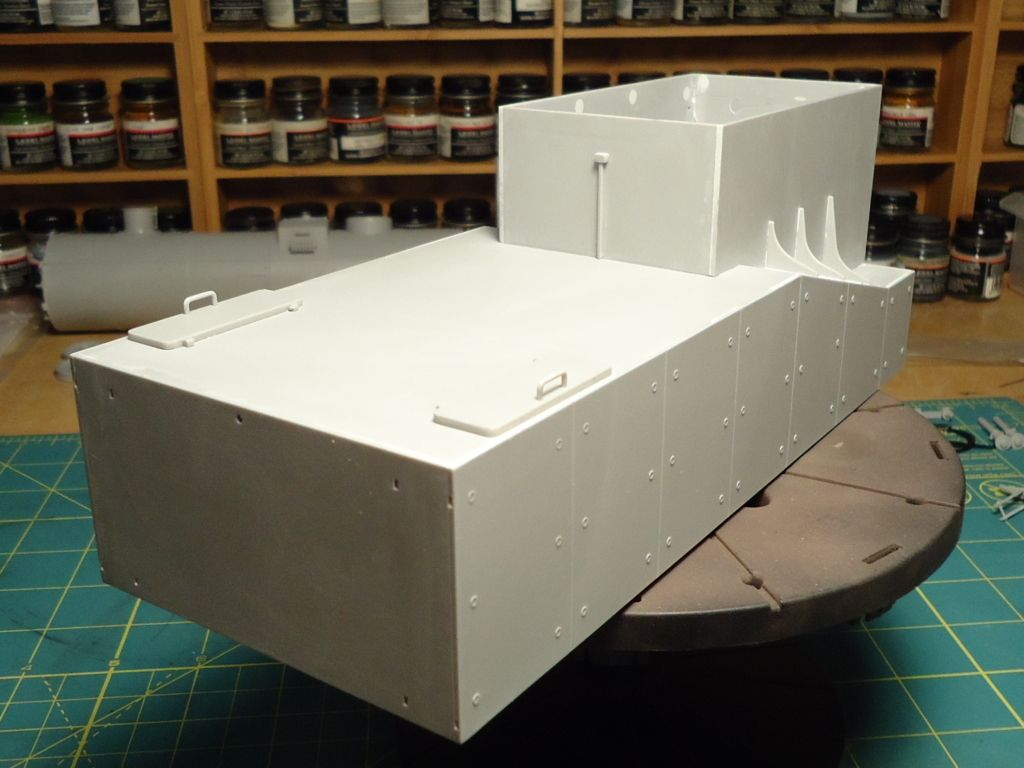
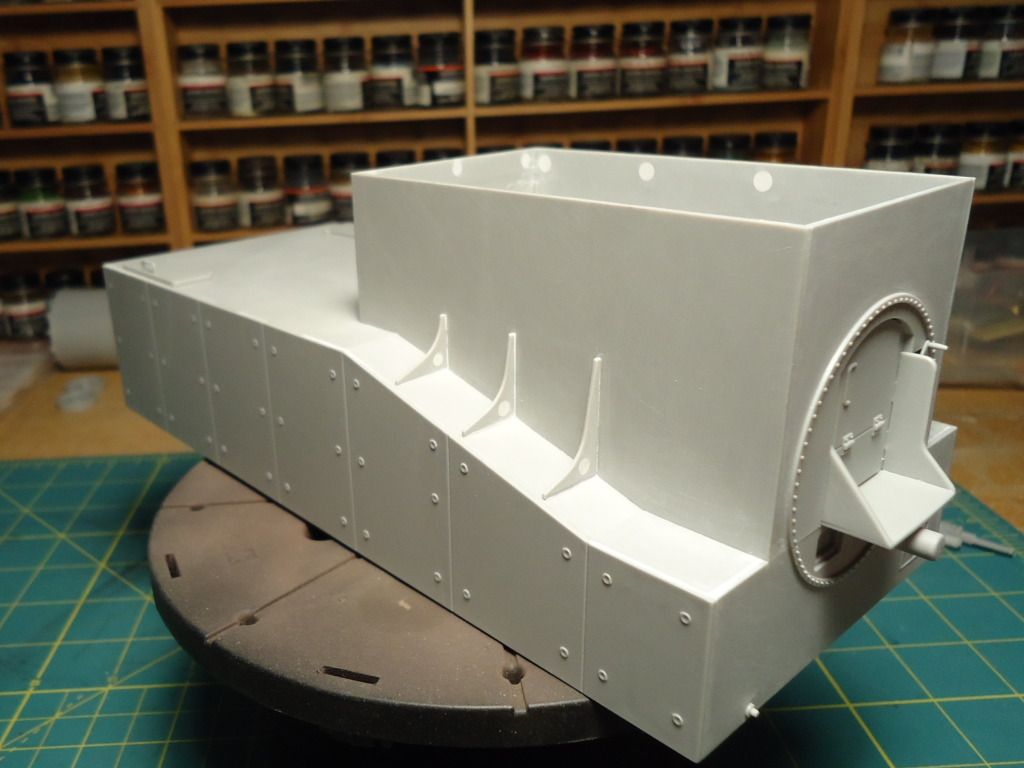
There still maybe some putty touch up areas on here, will get to them. Now back to the frame to add some more scratch work.
Sorry to hear your old paint booth… was it the one you built from scratch? What booth did you buy? [:D]
Still looking great… will follow this til the end!
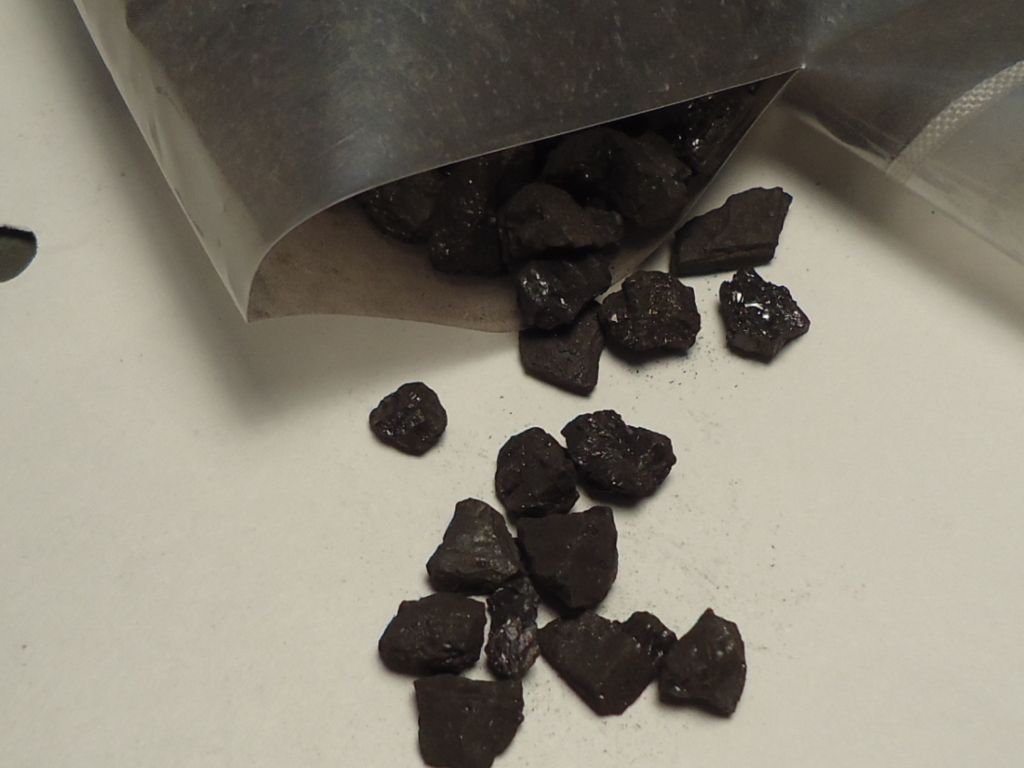
Keep up the good work! When you get around to filling the coal bin, I would suggest getting some charcoal bits from aquarium filters and use that instead of the kit-supplied part. Keeps it in scale but also allows you to control the level of “fill” in the bin. The kit part is ok…but a little too uniform IMHO.
ANDY - Still happy to have you aboard…it’s going to be a long ride. Yes my old booth was the one I had built. It worked really well and was very durable but just not esy to move and it would not fit through the house doors. When taking it apart it just tore it up. Was never intended to come back apart.
The new booth ordered should work just fine and it will be moveable for when that time comes again. Had ordered the PACE “Peace Keeper Deluxe”. It was requminded by a friend [;)] Will post pics of it when it gets here and let you know what I think of it [Y]
BILL - What a great idea for the coal! I would have used it speacialy since the wife has many fish tanks and lots charcoal for them but not thinking of that I had substituted the kit piece with real coal. So I now have two bags of real coal ready to go in when the time comes. Hard to tell in those last photoes posted but if you look closly you can see that had removed the molded in location tab for the kit supplied coal peace. Thanks for the tip now I know for next time [Y]
Hey Rob ! Great looking ipdates …sorry i’ve been missing them [:$]
Really liking the details you are putting into this . [Y]
Thanks Carl and it’s good to be back!
Tonights updates…
Looking at reference pics something was missing above the piston and rail. This is how the kit would have it look.
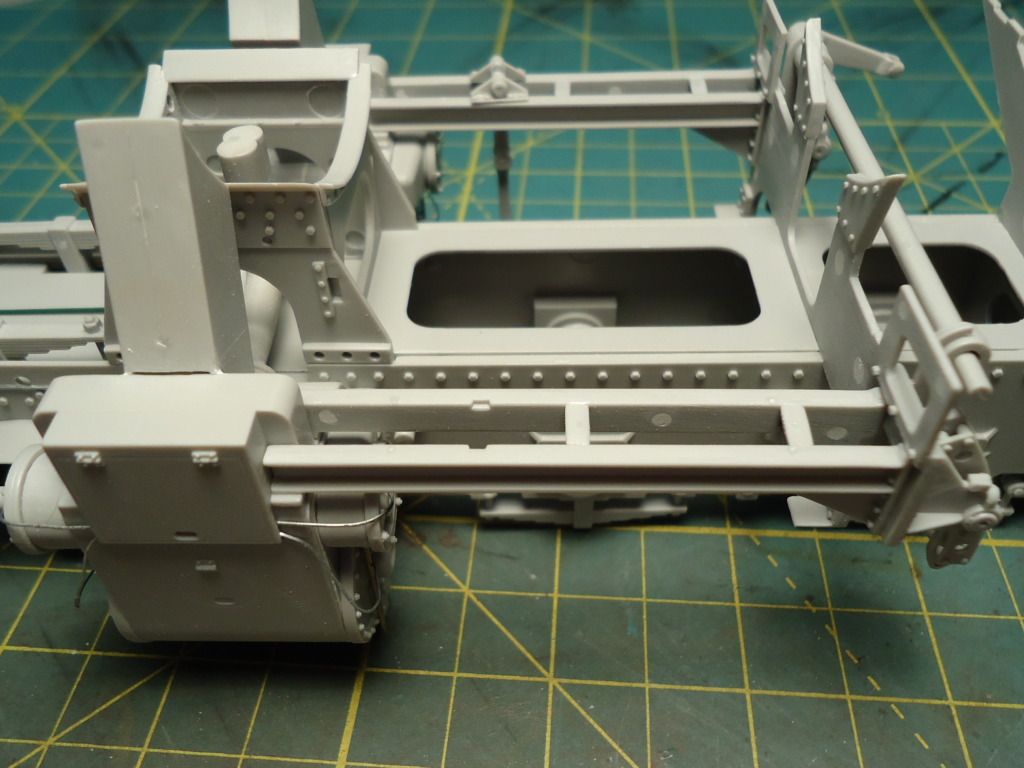
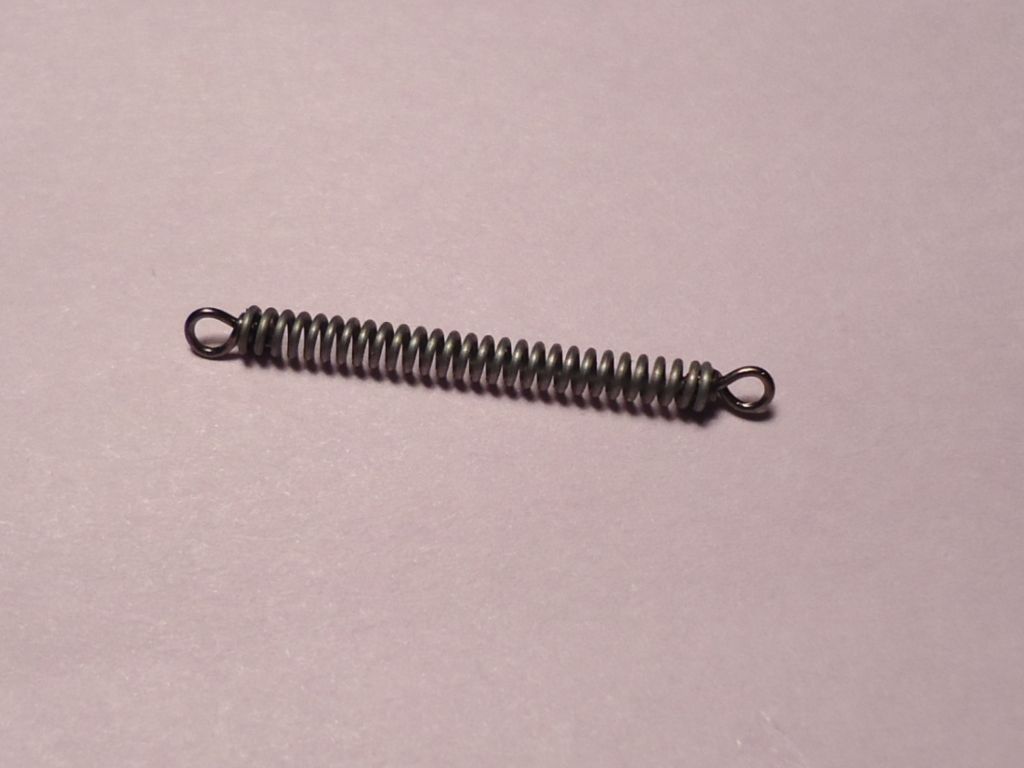
This will not due so off to the spare part box I went. First though I grabbed a spare spring for a pistol to use (I keep a lot of these springs spare for things like this) and visited the tackle box.
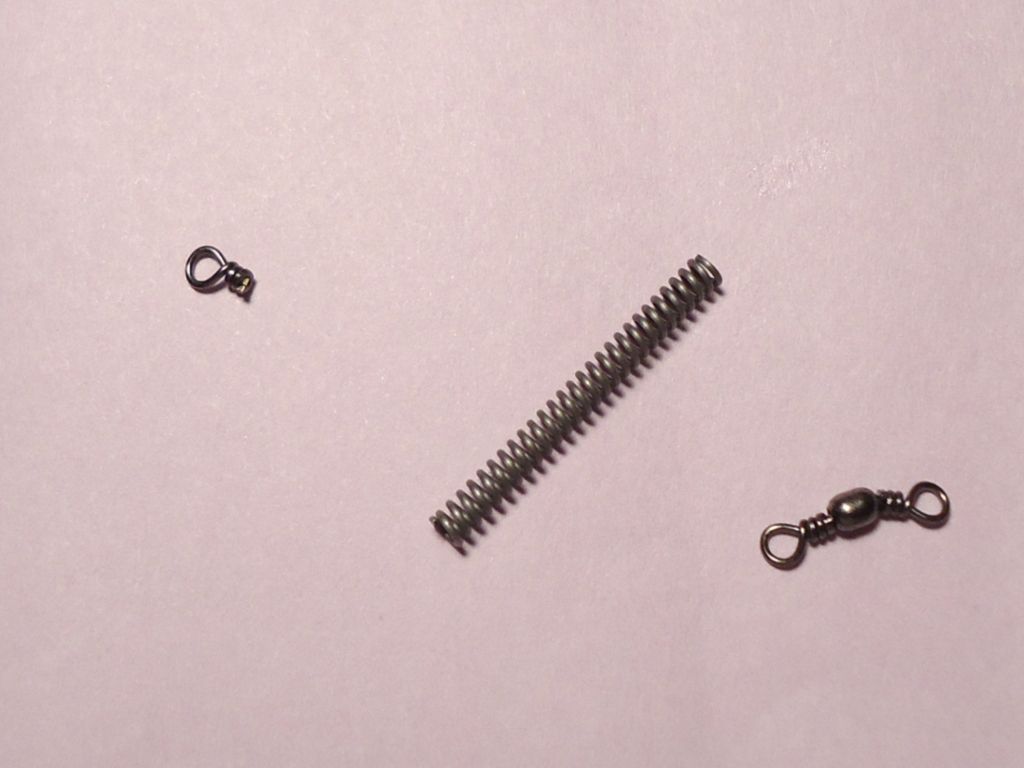
Cut the eyes off the tackle then CA them into the spring to get this effect.
Out of the spare parts box I retrieved half of a gun breach, 2 fender mounts for a PZ III, a brass rod, some tube styrene, and 2 sizes of wire. Then went to work on a few small modifications of the parts. The parts
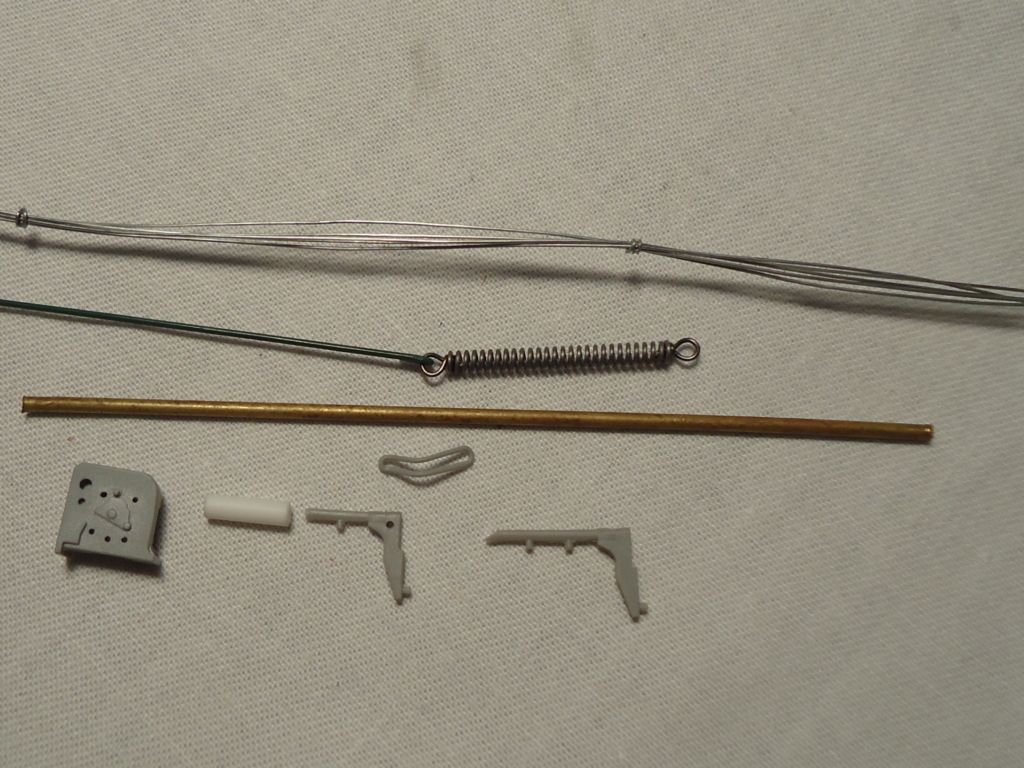
Almost there…
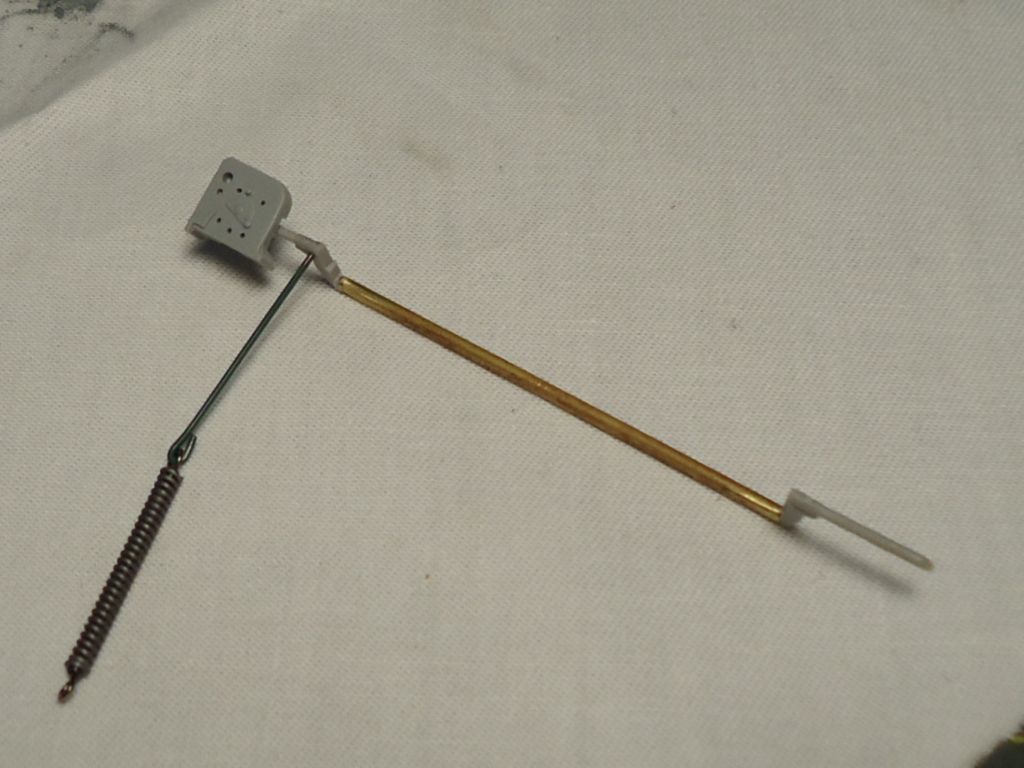
and now installed.
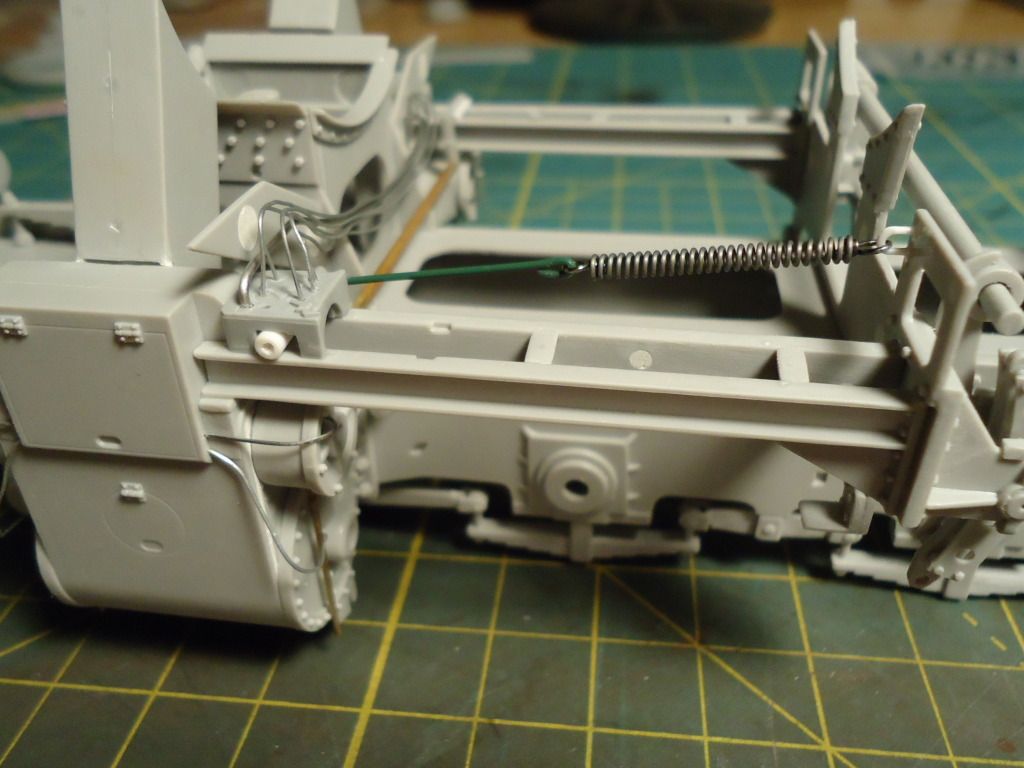
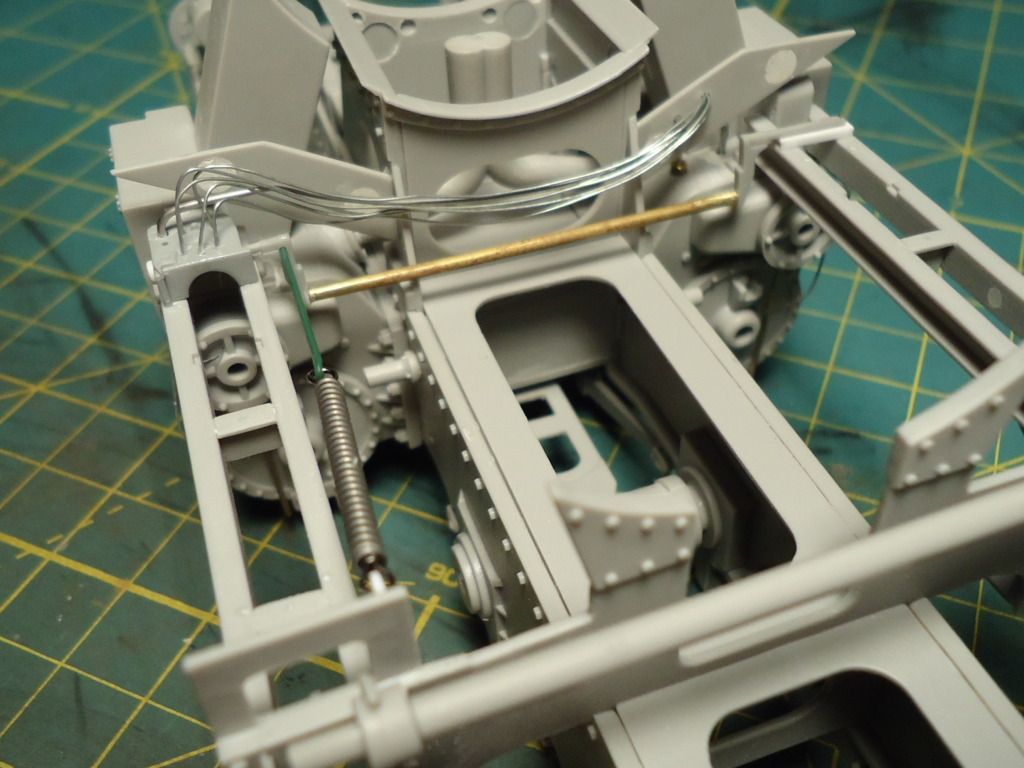
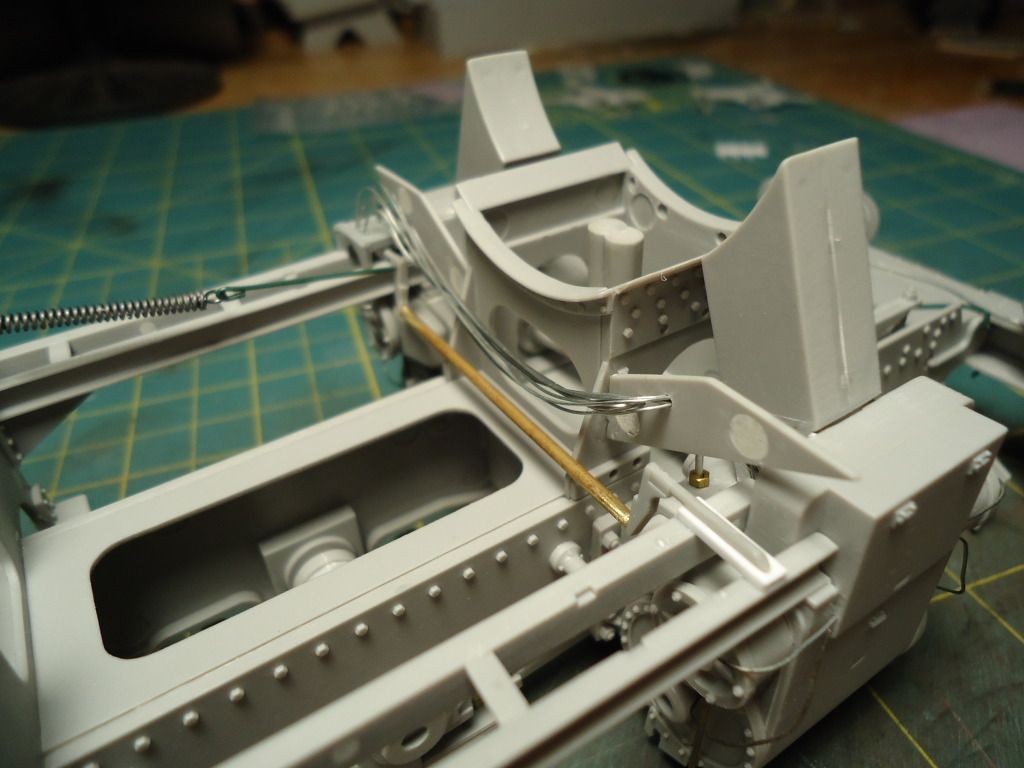
There still more work to be done on these parts but it will come a little later when the wheels and push arm has been put on. On the left side you can see the styrene hole I will use to mount a linkage arm that holds an arm that extends back to the rear of the rail. Not sure what it is for but have clearly found it in my reference material. On the inter right side there will be another linkage arm that runs all the way back to and into the cabin. For now though on to some more work on the frame.
Hi Rob [:D]
Great progress,man[Y][B]…sorry for the delay responding , but every time I sat down to get a post off, something or some body needed my attention this weekend .[:'(] The build looks terrific and very clean even with Trumpy’s famous ejection pin marks and too short on the feed pipes.[00ps]…I also checked out your mention of the Pace ’ peace keeper ’ booth… looks really nice !.. Keep the updates coming when you can, they certainly are worth waiting for ![t$t]
tread[H]
Hey there Tread, you sound like a wanted man. Good to here from you and thanks, glad you like so far. Going to do my best to keep plugging away at this build and hope not to be gone so long from now on. [Y]
I like that scratch building Rob [Y] That must be a huge spring on the actual locomotive !
Now that’s some nice “gizmology” going on there Rob! And of course, nothing looks like coal like the real thing so glad you’re covered in that department! [:D]
Very nice job on the spring assy. This is a fascinating build to watch not only because of you skill but because it’s a train engine too.
The coal you are going to use reminded me of a Christmas not too long a go, when my wife got me a lump of coal and I wasn’t even building a model then!
Sure was a funny present, I guess , everyone laughs when they hear about it.
Ya got me though.
lol It’s a macgyver moment
CARL - Yes, that spring would have to be massive. Imagine the poundage that would be behind it.
BILL - Just call me Gizmo, just don’t feed me after midnight [6]
STEVE - Funny, when I first pulled this kit out to look it over it was right before Christmas so I had asked for a piece of coal…did not receive it though [G]
RAMBO - Not quite Macgyver, ther’s no duct tape…yet [:P]
Glad you guys like it. Have done a little more but not enough to show pictures yet. Taking a little time to figure what and how to make the next pieces for the frame. Should be just a few pipes to add, a wheel valve and the shaft, and some small chains. Not much more before moving on to the next section.