B-36 Peacemaker Group Build

Hi John,

I was like a drooling kid in a candy store looking at your builds. [:)]

As far as being like the other GB`s and making a list of participants with what they are going to build, I decided against that, and to make this GB a come as your are - and when you can - GB due to the model being built.

The B-36 model ( esp the 1/72 ) is kind of like the “Christmas Puppy” everyone gets, and then it ends up unwanted at the pound within 6 months. Yes, the kit looks big and enticing and exciting to buy. The problem is when most people get it home they just cant get around to getting started because its so "big", and it gets put off and off. Other kits one can typically build in a few free days spread over a month, but not this one, and thus it gets put off and eventually forgotten. Im willing to bet that most garages/storage closets of homes in the USA have at least one of the two of the following in them: A tennis racket, and an unstarted B-36 Kit.

Aint that right Kugai? LOL! [:P]

Most people I have communicated with online whom build their 1/72 to completion have given construction times of actual clock hours of between 40-80 hours. I`m willing to guess most people just dont have that much free time to devote in large chuncks. Most people can do an hour here, 30 minutes there, and maybe half a day every couple of months. With that being said, this GB will allow everyone to share their progress and to give/get tips, spare parts, info, stay moticated, etc.

Also, anyone whom doesnt plan to build but wants to talk about the B-36 or even the kit in generaly is allowed to join.

As for myself, here are my projects:

Build #1 – Stock RB-36 Build to become aquainted with the kit- Starting over Christmas Holiday

Build #2 - YB-36 as it appeared in 1947/48 - Sponsored by Click2detail.com. To be dedicated in memory of the late Walter Soplata

Build #3 - restart my B-36 carries B-58 to Wright Patterson in `57. To be donated to a local Museum

Builds 4- 7 - B-36B with Artic red tips, WWII “what if” build, and BM-015 - The City of Ft Worth, The last peacemaker at peacemaker park in 1959.

That should keep me occupied for 2-3 years. LOL

Would enjoy having you join are group and share your modeling insight even if you dont ever plan to build

John
I scanned the instructions and put them on my website. Right click to download.

The link will be:

http://yolo.net/~jeaton/fsmforum/b36monoinst/b36inst.html

Edit:I will get have the pages up later this evening.

Cool! Thanks John.

Next question for you… Have you ever scratch built the enternal bombay componets of your builds?

I built the Revell-ogram kit last year. Bad kit. I did the best I could with it, and hung it over my basement workshop. Don’t try to follow the painting instructions of various metallic shades- mine really looks bad, but probably my own fault. Not recommended for any but the most experienced modelers.

Hello again Chuck,

You do bring up some very good points about the paint schemes- esp concerning the metallic shades.

There are some builds out there on the net that provide pointers on how to accomplish the metallic coloring…

http://modelingmadness.com/reviews/korean/kolb36.htm

http://aircraftresourcecenter.com/Gal7/6701-6800/gal6758-B-35-Irving/00.shtm

http://airfixtributeforum.myfastforum.org/archive/revell-monogram-1-72-rb-36-peacemaker-5712__o_t__t_15705.html

And from our very own Lucien Harpress

/forums/p/67963/677619.aspx

Thanks for the info and offers, guys.

As far as the props are concerned, I’m taking into account that we’re not going to be getting a house anytime soon ( so packing this thing for a move is a consideration ), I’m okay with the “spinning props” idea with clear styrene. The original parts just seem too fragile to survive a move, especially since I think the plastic’s a bit brittle from age.

I took a second look at the kit and spotted another problem: the clear dome for the nose is missing as well. I’m hoping it’ll turn up, but if not I’ll have to come up with a solution. At worst, I can buy another kit if my son’s interested in trying this thing someday ( or, if he’s not interested, it can be something for the spare parts/greeblies box, a big “what if” build at some point, or something I can hand off to another modeler in 20 years ) and cast a clear resin copy of the part.

Not having the nose is a problem. I messed mine up by wiping it briefly with lacquer thinner, and could not find a new one. I ended up painting it green, and it looked pretty good.

It should be clear green like the other glass.

RIP Harry Morgan. What, you haven’t done your homework?

If you don’t have wing walk decals, start by painting the wing black, then lay down tape and do the aluminum.

No. Haven’t done that yet. I generally build because I like the models to display sort of as a technical and operational history of aviation and going too far in detail cuts down my already slow production. But the B-36 is a natural for display with GSE and a few bombs about.

Hi Bondoman,

What specific kit did you have? All the revell/mongrams I have are clear plastic parts. I know there was an older kit made that had the retro coke bottle clear green tint. Was the the kit you built?

Looking a Monogram kit over, all my props are fine.

I’m noodling on fixing the wing/fuselage join by lowering the wing some. I have a number of the kits and one is going to donate wings for the XC-99 so I can afford to goof up. I think I will put the fuselage together with white glue and then cut along the wing to fuselage intersection lines which are very definite. After that I will join the wings to the root segments and jig the wing up true and fit that assembly back to the fuselage, trimming the bottom of the root on the fuselage until the wing is lowered to the proper level. After that I may make a resin mold of the new center where the wing joins so I can use that on other builds. The new part would be an insert for the upper fuselage out of resin that replaces the removed area between some of the panel lines so it is easier to fit.

This sounds like a sensible plan. You will need to replace the upper half of the fuselage on the master, but I think it’s a true cylinder so it should not be too difficult. It really needs the spar too, which would be difficult to cut a slot for in your resin part, so plan on that.

The intakes are wrong, but filing them open makes them look better, a “by eye” project.

There’s an RB-36H at Castle. Let’s make plans to go over there and see her, along with the Vulcan. I thought they had a C-124, but I don’t see it on the website.

Sounds like a fun trip, Bill. I have photos of the inside of the Castle B-36. Panels were pretty bare at that time in the cockpit though.

I don’t remember if there is a C-124 at Castle either, but there is one at Travis.

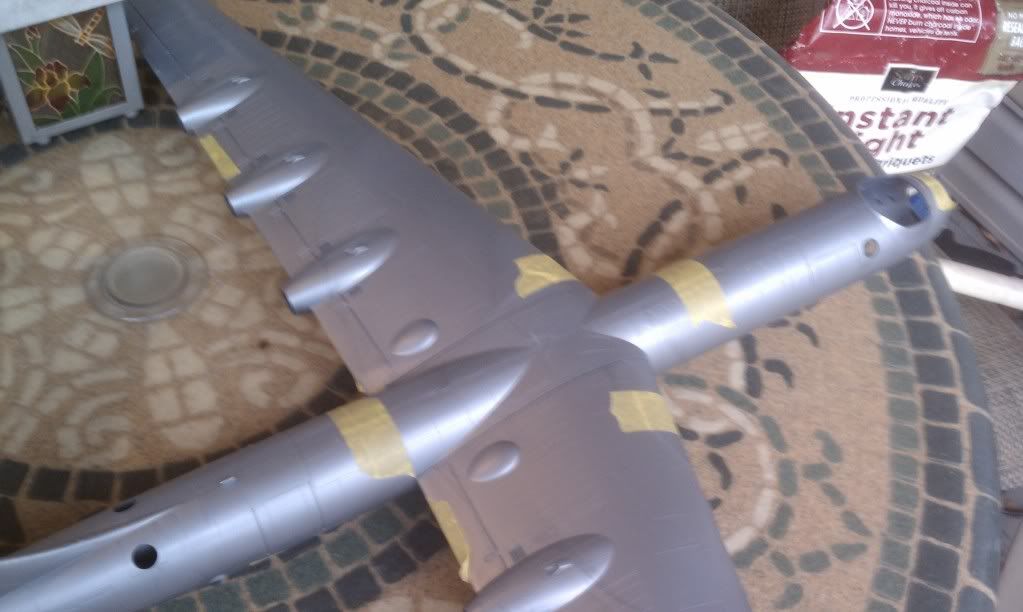
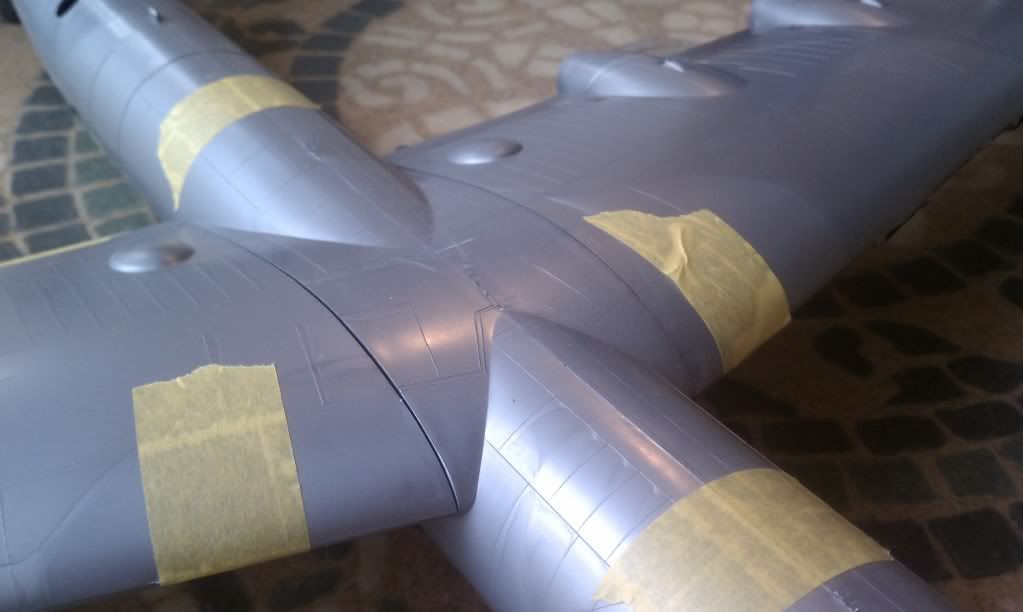
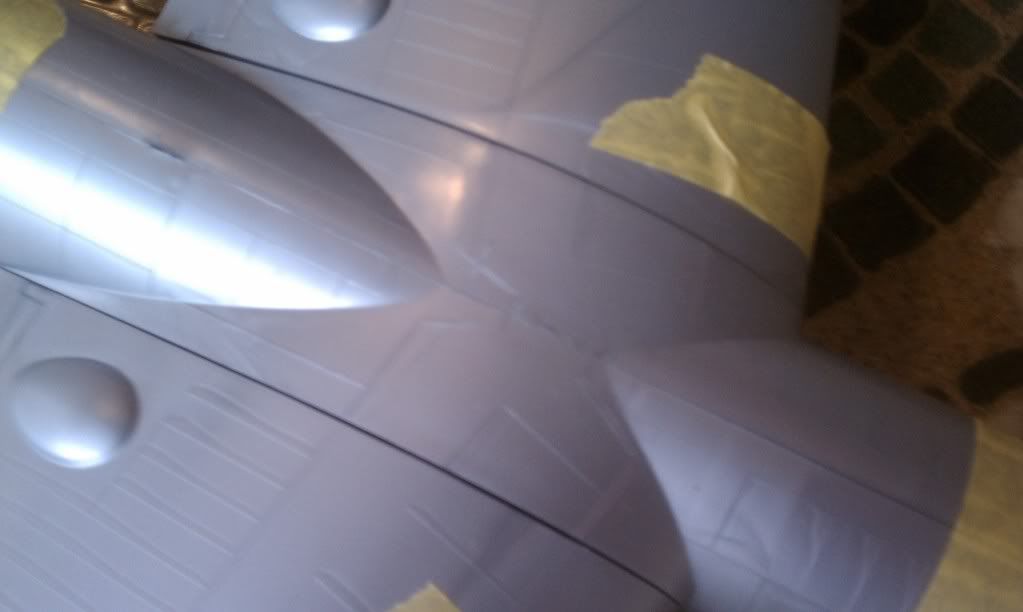
My hat is off to you if you accomplish that. As for me, I`m going to just add the walkway stripes and help create the optical allusion of the the proper wing to fuselage joint…

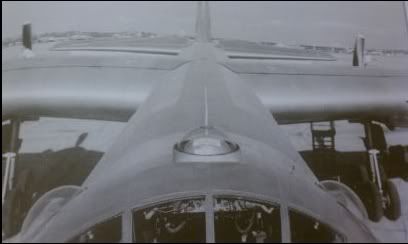
For those unfamilar with the current 1/72 wing issue… here it is in picture form:

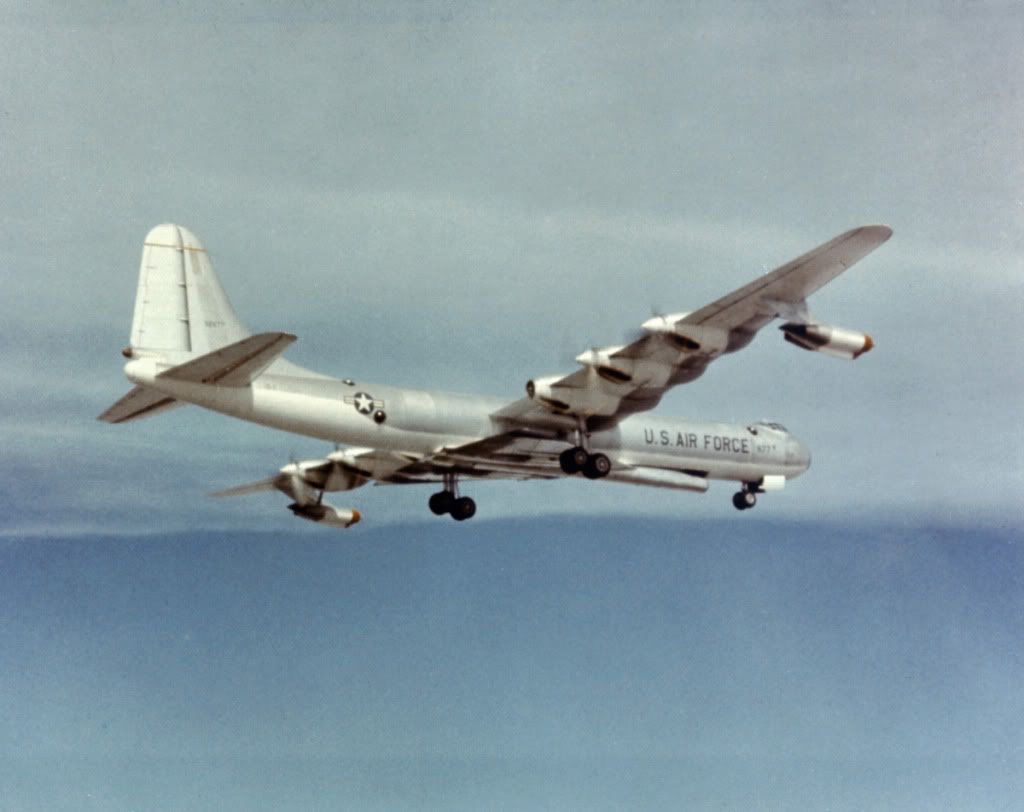
First a real B-36 Wing Joint

Notice how the wings barely touch at the top of the fuseage

Here is the actual model I am using to build SN 49-2677, B36F-1-CF

Hope everyone is having a good holiday break. I thought I would have time to do some work this week, and that has turned into nothing more than wishful thinking.

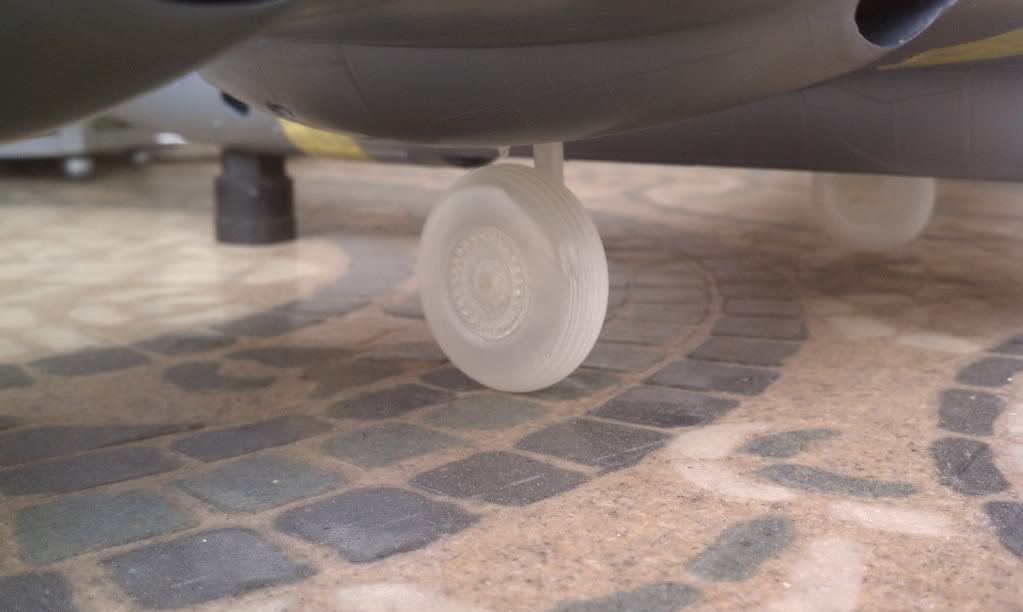
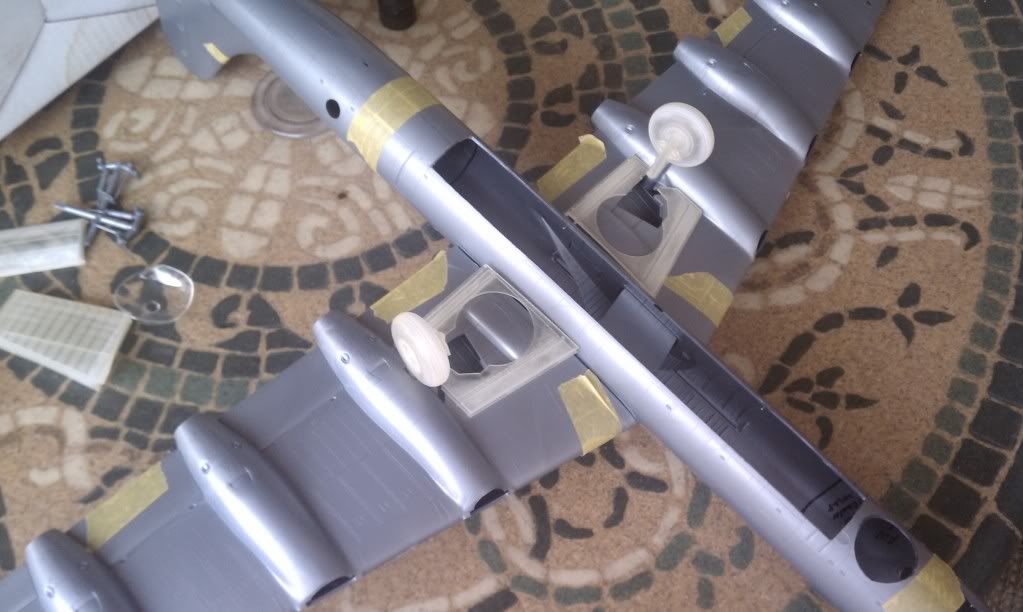
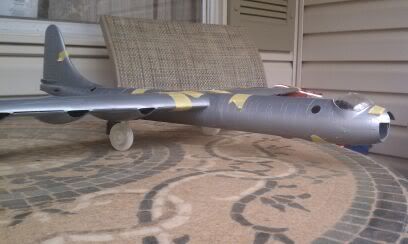
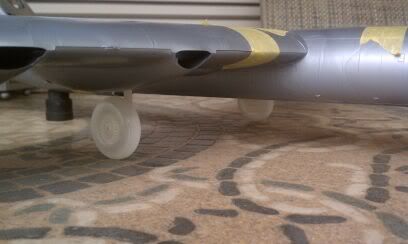
Some of my YB-36 parts from Click2detail.com have arrived, and thought I would share them. Here is the 110" landing gear being modeled by SN 49-2677, B36F-1-CF I will be using later for the B-36/B-58 combo build. With this one you can see the work done to modify the bombay to represent the bomber version.

The 110" wheel:

An underside view which also shows the bombay work for the SN 49-2677, B36F-1-CF build. Notice also the outer cover to the new wheel wells that will be installled on the actual YB-36 build

Some side views:

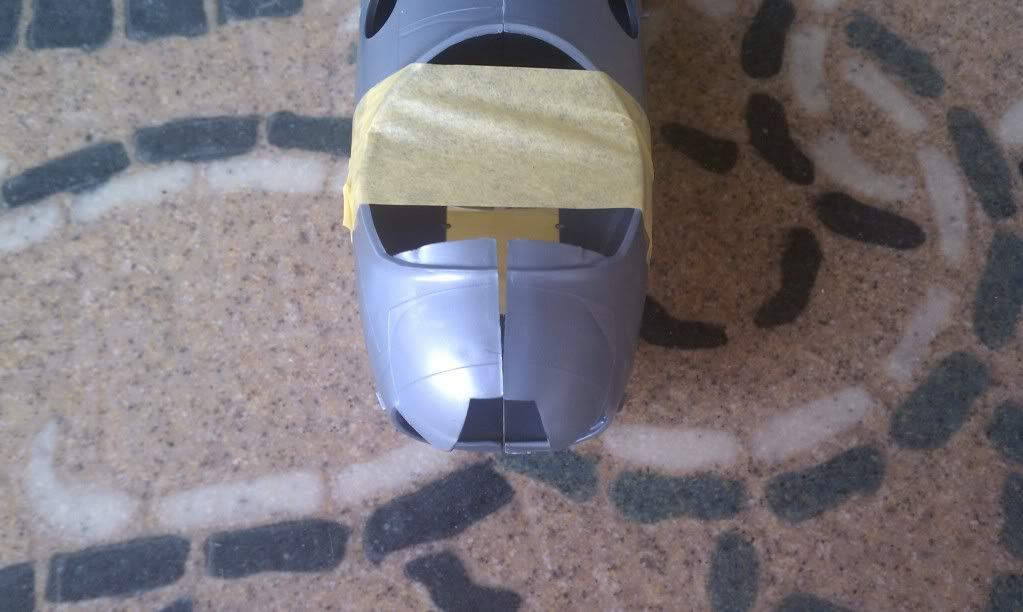
I do have a problem with the kit I will be using for the first build of a stock build RB-36. When putting the fuselage together, the cockpit area seems a little warped from spending 20+ years in tight fitting box at the wrong angle. When you put it together, you get a gap in the forward part which can be seen here:

The model will conform to the propper fitting when enough pressure is applied to the fuselage. My best idea so far is when it comes time to glue the fuselage together is to use a high strength glue such as super glue and instead of tape to hold the fuselage pieces together until they dry is some wire tie cables.

Any ideas on what to do here?

Also, when building the 1/72 put some counter weight/ballast in the forward fuselage such as some metal washers in the lower radome because model or real thing, when this happens it isnt pretty. [;)]

Pardon me for snooping; I built one of these last year, and my curiosity was peaked at how folks were doing. I wanted to comment on the balancing issue; I ended up using a heavy long-shank padlock white glued between the bomb bay and cockpit area. Even with that and a lot of lead shot, the center of gravity is still only just in front of the rear wheels. I tacked on the wings and elevators while putting the weight in because they will move the COG back past the rear wheels if you don’t factor those items in. Fortunately the kit gear handles the weight well, no bow legs as of yet!

Glenn

Hi Glen,

Thank you for you input on the balancing issue. Im hoping when it comes time to get back to work on my B-36/B-58 combo build that simply hanging the B-58 fuselage to the bomb bay of the 36 that the weight of the 58 balances the thing out. With that build as you can see in the photos above of the B-36 I will be using that is demonstrating the 110" main gear that will go on the YB-36 that I have cut out the long bombay true to the bomber and removed the FWD Radome as it was true to the 36 used in this build. Its going to make for an interesting counter weight issue if it doesnt because there wont be very much room in the forward to add any weight

Also, FYI…

For those concerned about a weight issue on a 1/72 build, or for those that would like a more realistic look, Scale Aircraft Conversions of Dallas, TX offers the landing gear in white metal

http://scaleaircraftconversions.com/moreinfo.cfm?KIT=140

They do ask that you first try to purchase through your local hobby shop in order to support you local shops. However, they will sell direct to the public if your local shop wont order it, or you dont have a local hobby shop. Also, Texas residents will pay all applicable sales taxes. For those that travel to the DFW area, they will allow a pick up.

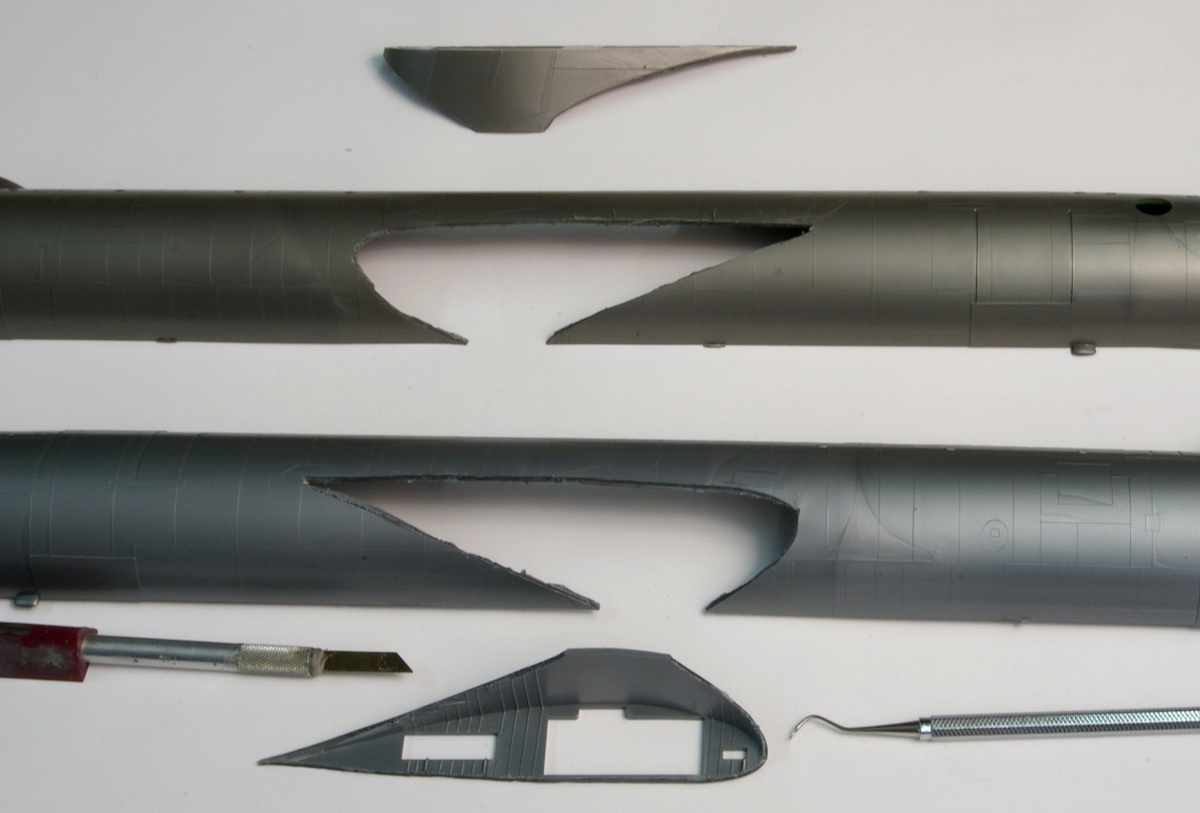
I’ve started on my B-36, and the first step is done, cutting the wing roots loose from the fuselage. I’m going to build up the wings next. Starting on that I can see that as Bill said the engine cooling inlets need some help. Still thinking about how but those center parts are just too blunt and the top part of the scoop could use some milliput to make it look more like a duct. Pictures soon.

Here is a picture of the separated wing roots and fuselage. I used a dental tool to scribe along the wing/fuselage intersection, then after the scribe line was almost all the way through I sawed through the remainder with a small saw made by Exacto that fits in a #11 holder. It took about a half hour to do it.