Cowling Question: What color is the inside of the cowling? I’m building the mid war Trainer version. Should it be interior green, bare aluminum, grey primer, or something else? Bob
You would generally find interior parts of the WWII vintage aircraft painted with zinc-chromate primer. It is a yellowish color. The cockpit interiors were generally interior green (FS color? anyone). A few years back I was at “Thunder Over Michigan” and there were about 10 AT6, SNJ, Harvard (Canadian built AT6s). There was a discussion about the “differences” in these variations of the aircraft. Would anyone like to point out some of those differences? Are the differences mostly in the interior or under the cowling. I was not looking for anything at the time, but they all looked the same to me (other than paint schemes).
10 - 4 rangerj. Now you know the problem that I’m running into. The Interior isn’t an issue for most of the T-6’s. It’s Interior Green, FS 34151, with some variations in the rear instrument panel protective hood. I’m puzzled as to why good solid info on these things is not as readily available as info for most of the other warbirds. There are many restored T-6’s floating around and that’s why I’ve seen different colors for the inside of the cowling. I’m hoping that someone out there knows how they left the factory as far as the color of the interior of the cowling.
I might have a Game Plan change. I just noticed that this kit has the long exhaust tube for cold weather use: Canada eh? So, if anyone out there knows if a set of decals is available for a WWII Canadian Harvard/ AT-6 Trainer I would sure appreciate it. Also I think that they were Yellow, so hopefully someone knows the correct shade of Yellow. Did they use the RAF Trainer Yellow, or one of our colors? By the way, I’m still wonderin’ about my last question which is what color to paint the inside of the cowling: Interior Green, Yellow or Green Zinc Chromate, Natural Metal, or some other color? I do not want to go any newer than WWII so hopefully I can come up with something. Thanks for any help. Bob
UPDATE… I now understand what was previously mentioned about the front end fit issue. In case some of you are following along and are going to build this kit, just try to use a good eye and be prepared to do a lot of sanding. That will help with the fit issue. Recently I have been chewing up a lot of time getting the landing light lenses to fit. The one thing that you can do to help out will be to sand the petruding landing lights down a lot. Also I had to do some sanding on the clear light lenses. I now have to figure out how to restore the clarity. I do have some 3M Lens Polishing compound that is left over from when I did the Headlight Lenses on my Wife’s car. I will try it on these small lenses and maybe it will work… hopefully? ? My ease recovery build is slowing down a little bit. Later… Bob
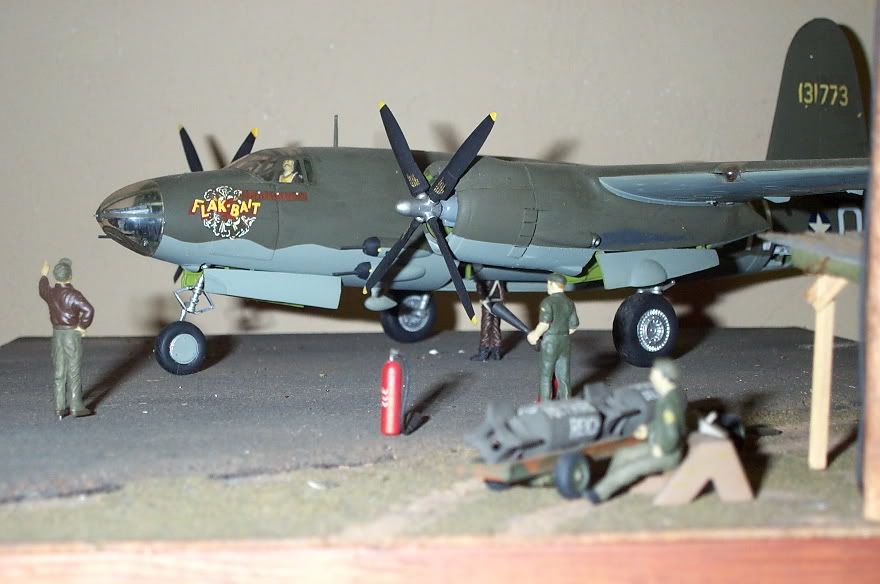
I have just used Scotch Tape, glossy type over the lens area. Trim it along the panel line and it is perfectly clear and “to scale” thickness! I’ve had one on my B-26 Marauder since the early 1980’s and it still looks new.
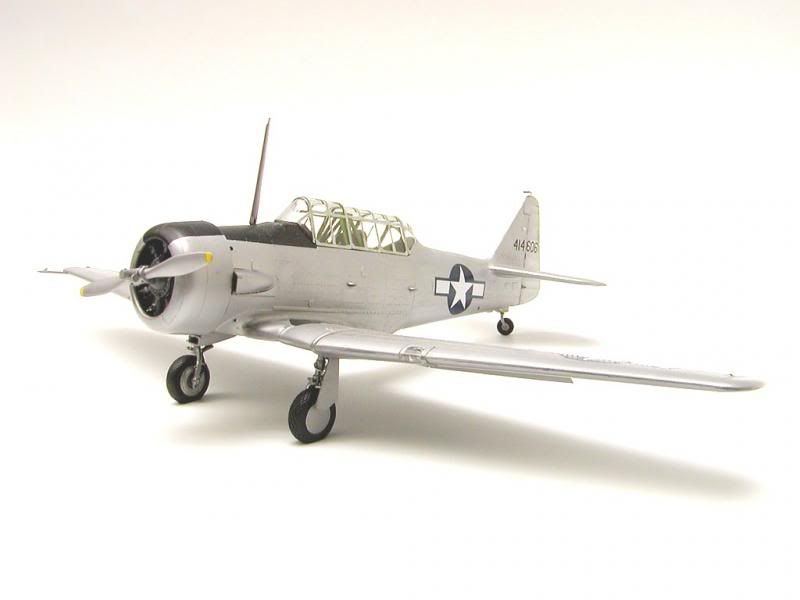
Mel, both planes look GREAT !!! I saw your simple scheme on the Texan. I guess that since I have the basic decals I might be able to choose a variety of paint schemes and leave off the specific markings. Is that the same basic amonogram kit that I’m workin’ on? Bob
Right Bob, the only thing I did was fill in the trough for the machinge gun in the cowling and add a P-51 tail wheel. I just wanted a generic T-6 factory fresh. The B-26 has electric motors for the props and working landing lights in the wings. Power fed through bodies of two ground crew via sub minature jacks at their shoulders in bomb bay.

