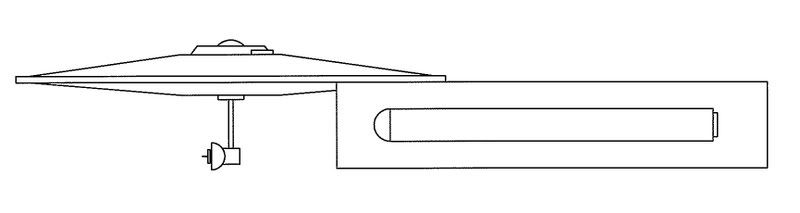
!!! From the first angle, I thought the saucer-mounted phasers were on top of the nacelle! [:D] Pretty cool idea to have them mounted on the saucer! And that they’re mounted forward of the outermost circumference is just that much more interesting.
I agree, let the old builds stand as they are. It shows how much your skills have grown. The putty work I was refering to is on the saucer rim window inserts. You can see the edges, but then again that old kit was pretty bad in some areas. When I built mine years ago, it didn’t look any better. Those inserts have about a 2mm gap on either side! [:O]
The phasers were shown there in the Jackill’s drawing. I opened the “reliant” kit, and used the part there, as a reference for scratching the ones on “Firestone”. I also quoted your info about the rim window inserts, in Skullgundam’s thread on the Star Trek VI Enterprise build…same Enterprise kit.
Some updates! Here’s some of the putty work. I wanted some panel lines, so I puttied over only what seemed to be out of scale & also added some Aves to the aft between the engine housings. You can also see a bit of the neck, supplied from an old Transformers toy.
Since the Taegu will have double deflectors, I wanted to keep the theme. I came up with this design. We’ll see how it works out after I make the main aft strut.
It is not the most elegant of sketches. Here is the trouble I am having.
I need to get some styrene and try again. I have head of another way to do a scratchbuilt saucer with Bondo resin. I have not tried that one yet. Of course now looking at my sketch I am not sure is to go with a tapered down saucer or have look different with a more rounded up top part.
The bottom sketch is just the bottom angle of the same idea. The era I’m designing in is the post-Nemesis time period.
Looks like a new version of the Ptolemy Class. Very nice. I like the top contour. Similar, but different than the usual Starfleet type. A little bit of the classic UFO feeling to it.
I have a kitbash of a Klingon ship that would fit right in here. I built two years ago for Wonderfest 2006. It didn’t win anything but I did get a few compliments on it. I also have the in progress shots still from when I posted it on www.Starshipmodeler.com while building it. If it fits the rules here I’d like to enter it in the group build.
Hey Snoopy, I use that method of turning parts in styrene all the time. I think I see your problem. You are building up too much heat in the part and it’s not stablised enough. I use a cordless drill to turn the part and a Dremel with a coarse tooth to sculpt the part. Turn the part your cutting slowly and use the dremel on as high as speed as you can that doesn’t cause melting. Heat is your enemy! I would also support the underside of the part, directly under where you are cutting with the Dremel. If the part isn’t solidly supported you will get a wavy. uneven surface. I clamp the drill to the workbench, support the back side of the piece with my finger tips(put talc powder on your finger tips), and hold the dremel with my right hand. If the friction on your finger tips produces uncomfortable amounts of heat, the drill is turning too fast. I hope this is helpful.
I got this idea from you a few group builds ago. I am using a bench top drell press that does not turn all that fast but I can still slow it down a lot. The cutting tool was a combination of a sanding block with 150 grit sandpaper, a small coarse file, and at times a 3M sanding sponge. I really do not see a lathe in the near future so if I can perfect this I think I will be okay. I still have a Dadealus Class in storage waiting to be unmothballed and finished. This week I will try again and let you know how it goes.
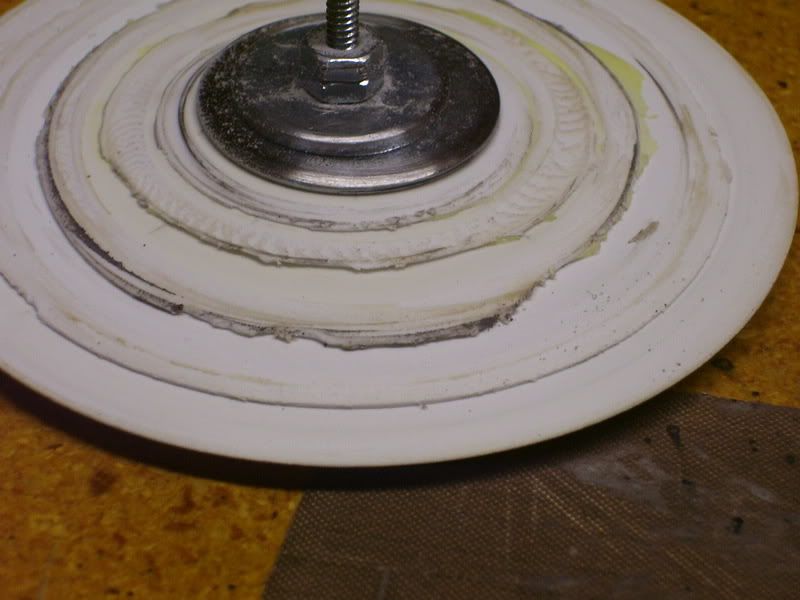
Woody, I am also having the problem of unlamination. I tried two things. two layers I tried Testors Liquid Cement and for the others I tried epoxy. Both layer are starting to delaminate. Any suggestions on adhesive for laminating sizes of the circles from 3-3/4" to 1-5/16" in diameter? I was thinking of trying Weld -On #3.
I mostly use CA but I have used epoxy as well. I didn’t like the epoxy as much because the texture of the cured glue isn’t the same as the styrene. I also don’t like to use regular model cement because it takes a long time for the parts to set when you are dealing with surfaces as big a saucer sections. They seem dry but the liquid cement can “gas” out through the surface and mess up the plastic and paint.
I read it as if Archangel had another klingon ship he had started. If it is not complete i do not mind him jumping in as long as other agree. As far as an already done one well that does not fit our category.
Archangel can you be a little more specific on your build?
I would try CA but the strength properties for CA are not very good in the shearing direction. If you have not had any problems with it I will give it a shot. What do you think about taking either balsa or basswood sheets, cutting out the circle sizes, laminate, sand and then make resin parts? There was also a system someone showed on the scratchbuild forum where he used Bondo resin with stacked styrene discs and make a tool to smooth out the resin. It seems a little too messy to me but it might be something I need to think about trying. I would like to get the saucer done before school starts in two weeks. It is going rather slowly.
I haven’t had a problem using CA laminated styrene but regardless of which glue you use I’d use plenty of clamps. Air spaces will cause de-lamination. My goal in making the blank is no air and fully cured cement/glue.
Just a thought, how about “rings” instead of circles. It might be touchy aligning the rings, but the bonded surface area would be smaller, and the liquid styrene cement could set more quickly, with less “gas out” problems.
It probably be a quicker cure time for the adhesives but like you said I think alignment would be rough.
Woody, When you used CA, what did you use to spread the CA? Did you just clob it on and spread with a putty knife or did you put dabs of CA every 1/2" or so then let the pressure squeeze it out from there? I was just thinking what about 3M 77 spray? I am not sure if it has the holding strength when being sanded. Time to experiment? I wish I still worked at this filter making laboratory. To bond plastics together we would put them in special made jig that would heat both surfaces to be bonded but the opposite sides were cooled with CO2 or nitrogen and then each piece pressed together until cooled. Presto one solid plastic piece. Well, that was the past.
I use the thin CA and makes concentric rings about 1/4-1/2 inch apart. I don’t place the first ring right on the edge but about 1/2 inch back. You just have to eyeball it. After the parts are placed together the glue should go all the way to the visable seam. Too much and you have a mess.