Looking good, I have this kit along with the PE in my stash too. Will be the largest airplane with rigging that I have ever build, so looking forward to your next update.
waikong,
Thanks for the generous comment. I’ve got a few mistakes already that I’ll not be able to correct with the PE. C’est la vie.
I noticed you’ve built the Accurate Miniatures Grumman F3F-2. I’ve got that in my stash and need to get to it before my sell date expires. I built the F3F-1 but screwed up the wire braces in the rigging - I couldn’t get them to fit properly and they were bending. I’ll be more careful next time. Yours is nice.
Thanks Mike, your guess was right I built a PBY Catalina a few years back also 1/72 and my eye is always turned by Walrus advertisements.
Hope you have some Beatles playing while you work on this!
Jeaton01,
Since you mentioned it, I should play that song as I build the Walrus. It’s going to be a magical mystery tour for me anyway.
Mike, thanks for your comments about my f3f-2. That was a fun kit, too bad AC went bust. I do remember that PE, it doesn’t look it will fit, but if you pray and carefully fit it, it ‘snaps’ into place. Having built a few AC kits, they could get quite fiddly at certain spots but does have a great details.
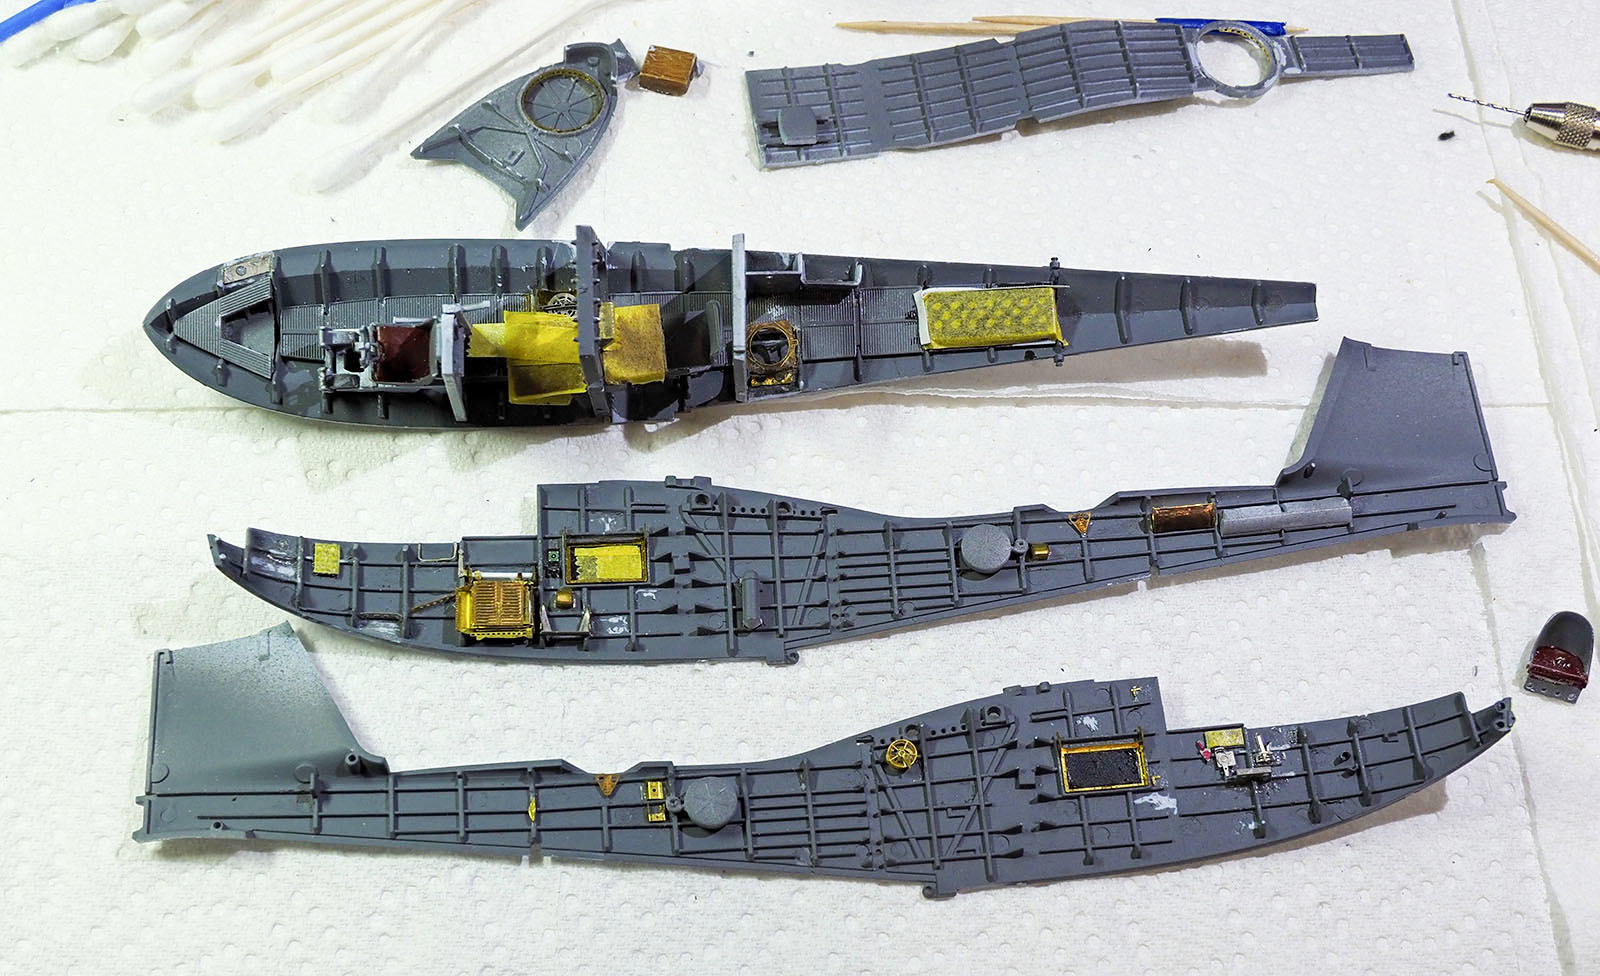
OK, I’m halfway through the PE on the interior and have lost or mangled several of the little brass nightmares. There’s nothing wrong with the PE, just its builder … your truly.
Before I continue with the PE I’ll paint (A/B) the interior green and then see if I can lift the masking from the interior windows with the frame glued on as I have it. If not I’ll have to rip off the frames and, if salvagable, refit them before masking for a second try at airbrushing the interior. If I can lift the masking I’ll probably reuse it (loosely fitted) for a second round of painting the interior after having fitted the last of the PE inside. I’ve some more masking to do before spraying interior green … mostly liquid masking. It’s going to be interesting to see whether or not I’m successful in removing the liquid masking from some tiny pieces of PE after having airbrushed the interior green.
And so it goes.
good luck, PE is both a blessing and a curse! I usually attach any PE that I can, spray, and then paint them. Anything I have to paint ahead of time, I try only to attach at the very end before closing up. That’s the theory anyway.
Another update.
Fought with closing up the fuselage sides … many, many rubber bands (no purchase points for my clamps due to shape of the hull) and still needs some PPP. I can see a very tricky closing up of the top … just hoping I can get it done.
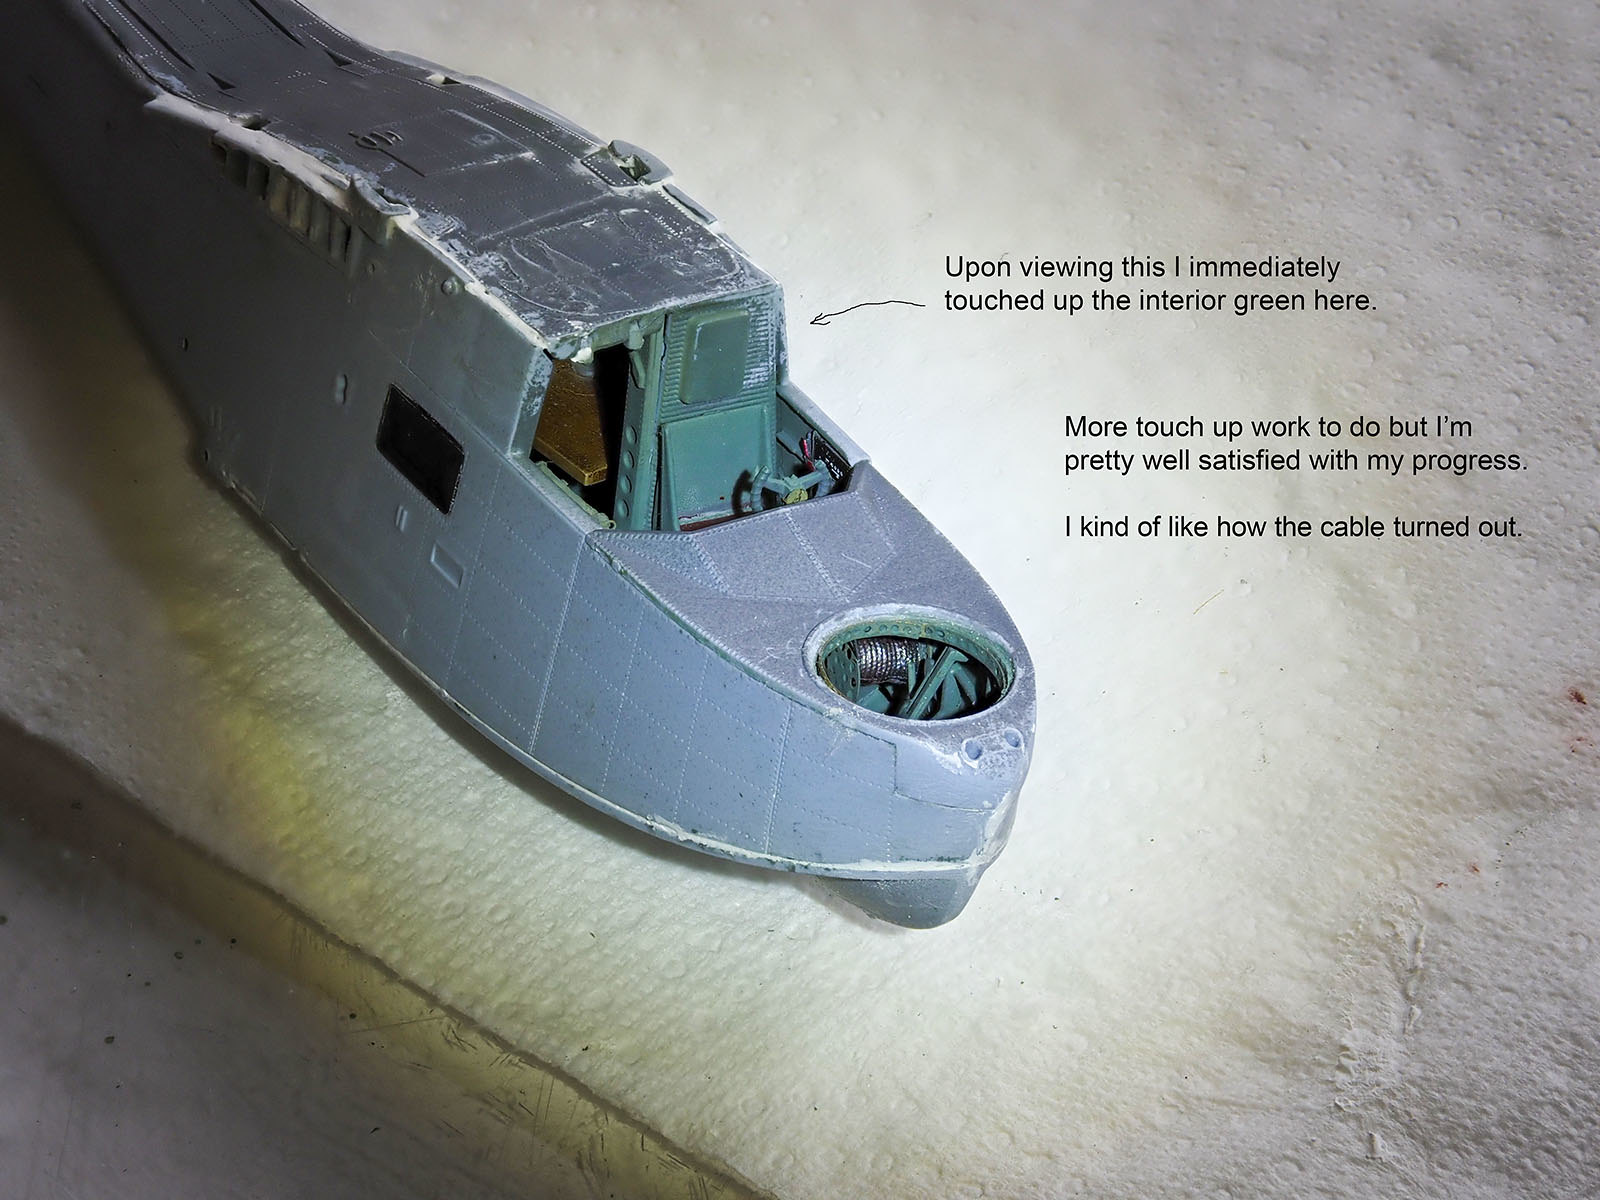
These images show that I need some touch up work … not sure how much I’ll do since no one but me will know what’s on the inside … of course that means I’m committed to at least some touch up work [:D].
Onward and upward.


Mike,
I think it looks great bud. Keep at it as I know you will. Are you going to try rigging this puppy? I hope so because I would like to see it come together. I also love your wood graining, it really looks awesome!
I too have the Walrus but the first release. I’ve been collecting PE for it slowly but surely. Although, I have a large back up on models in the queue already… Thanks for posting this, I think this might be the first 1/48 Walrus WIP here!
Steve
Thanks Steve.
Here’s the bad news:
-
As you may be able to discern from the photos above, the port side was not fitting up against the main bulkhead behind the pilot’s seat.
-
When I attached the top of the fuselage (I’ve not posted those pix yet) I thought I’d be able to get the sides to fit with a liberal amount of glue, clamps, and rubber bands.
-
After overnight drying, no such luck. Popped back open after a short amount of gingerly handling the model.
So, last night I went overboard and practically poured in “Professional Plastic Welder” (from Micro-Mark) and this morning it looks like it might hold but I’m not very confident that it will.
If it doesn’t hold I’m trashing it. For one thing I now have really obvious marks on the fuselage sides, top and bottom where my clamps were and, if I’m going to spend time trying to fix the worst of the “gouges”, I want to be absolutely certain that it won’t pop open at the seam again. I’ll give it a day before I work on it again … I’m hiking Triangulation Peak in the Cascades today so I’ll not be stewing about it.
My theory as to why I couldn’t get it to close properly has to do with my perhaps not having seated the parts to which the pilot seat is glued (on my kit they are parts D28 and D36) deeply enough in the hull. I’m not really sure. It’s difficult to dry fit ahead of time with this kit - at least for me it was - since one would need several more hands to hold everything in place as you’re checking for proper placement of the afforementioned parts.
Enough whining. I’ll carry on tomorrow and see if it holds.
Just a heads up for when you get to your kit.
P.S. Yes, if I get that far I’ll be rigging it.
So far, so good as far as the pieces holding together goes.
I’ve progressed in my puttying and sanding to where I’m satisfied for the moment. I still have some more to do around the bow area and the seam on the vertical stabilizer but I’ll get there.
I am still really concerned that it’ll all pop open down the road … but after about a year’s hiatus from the bench, I’m finding the process satisfying. That’s what counts for me.
Mike,
You shall persevere, I just know it. It’s looking good and you’re getting me thinking I need to build this sucker! Thanks a bunch bud!
Steve
Congrats on overcoming the issue. You can’t give up on this one, I’m counting on you to finish to inspire me to build mine!
Steve and Waikong,
Thanks for the kind words.
I’m not sure how inspiring my build will be but I’m going to continue unless it pops apart at some point - however unlikely that may be as of now.
I’m also debating how to configure he completed model for display. I’ll not say much now since I need to do more thinking on that subject.
An unbuilt kit is just some plastic pieces and potential, a built kid is an effort and accomplishment. So yeah, it’s gonna be an inspiration to me as long as you finish it.
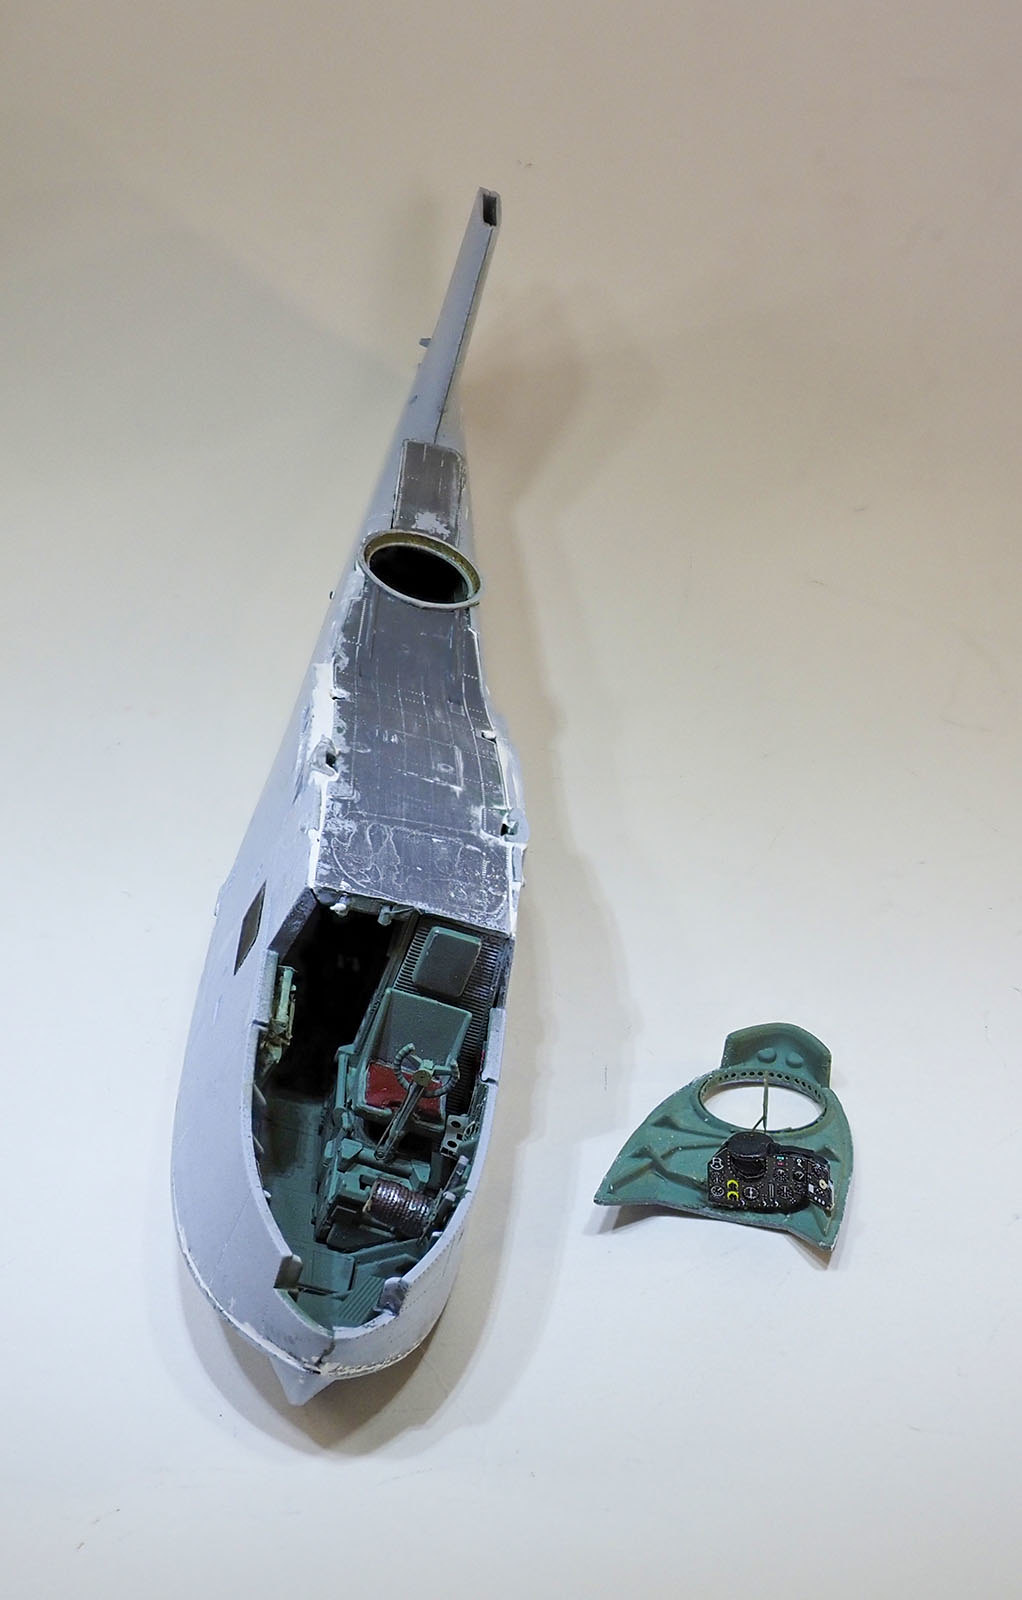
Very small update. I’ve put the top forward section of the fuselage/bow on. I used one of my little LED flashlights to try to light a bit of the forward interior when taking the photo.
Here’s another update.
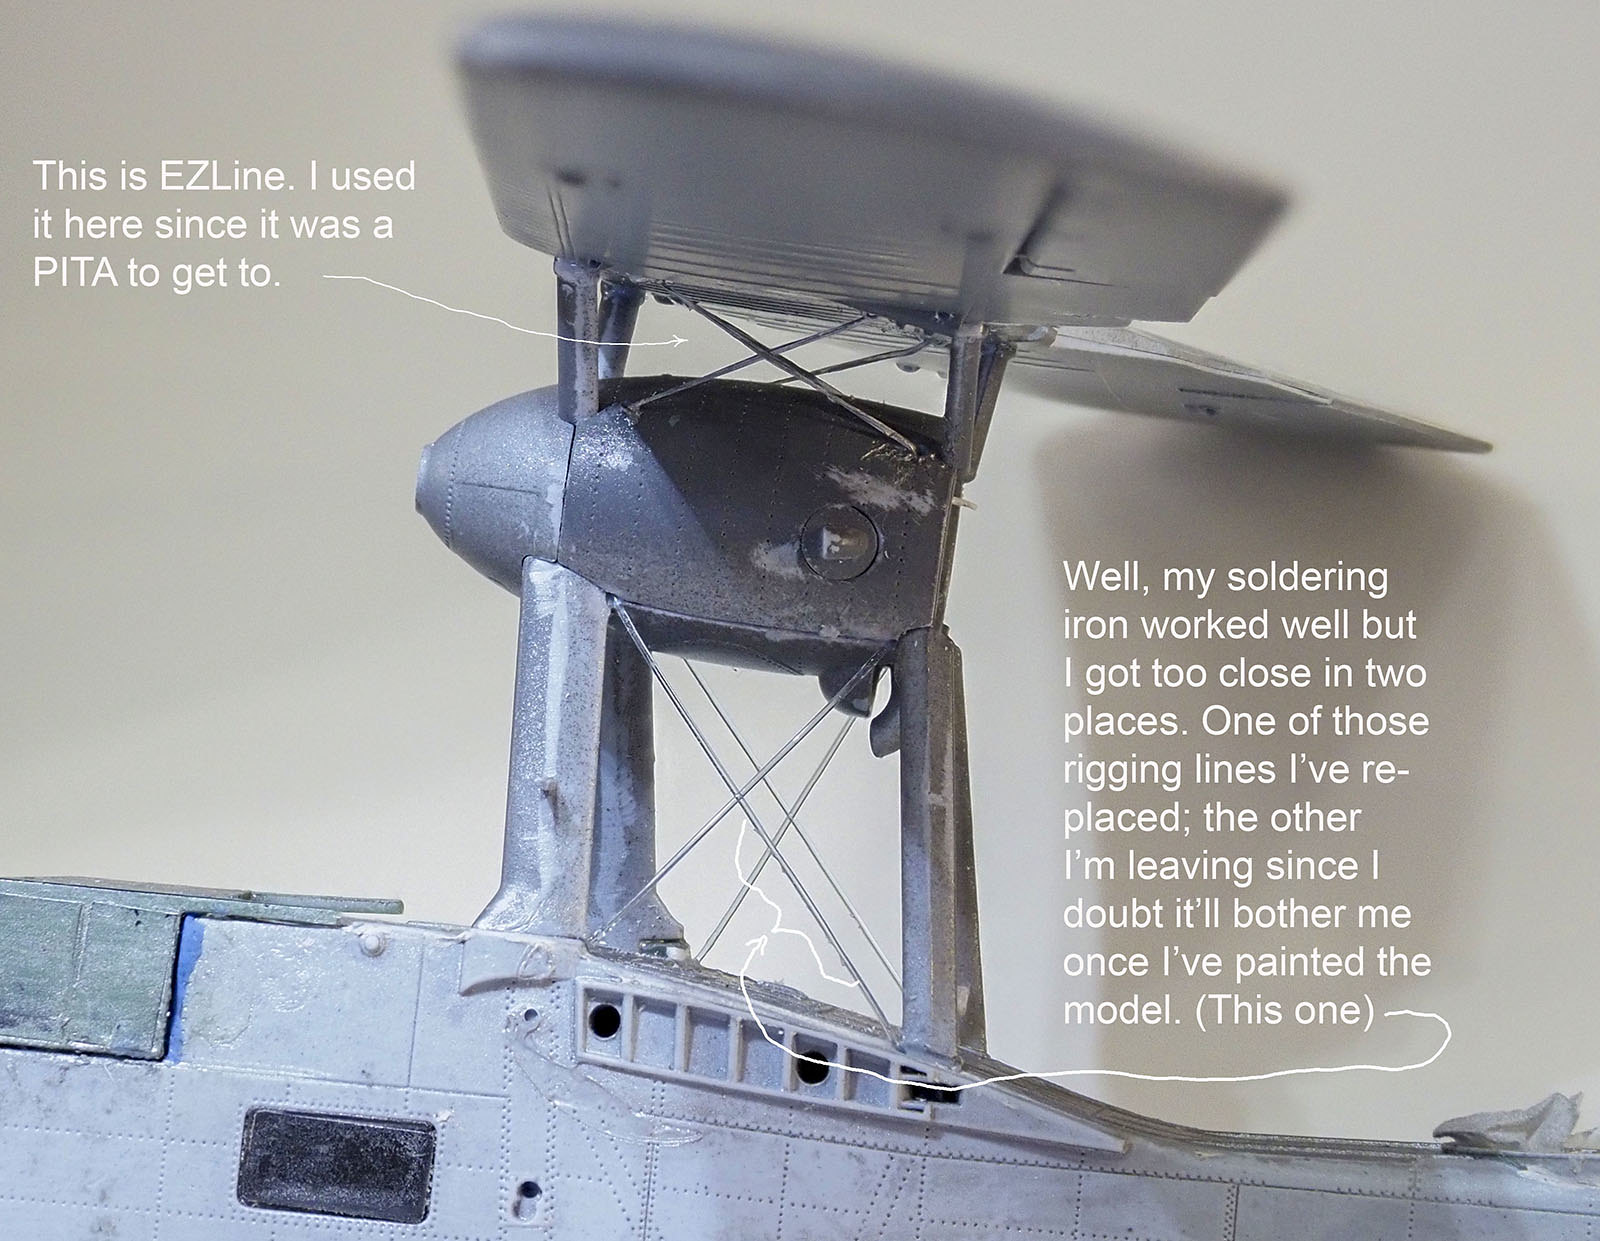
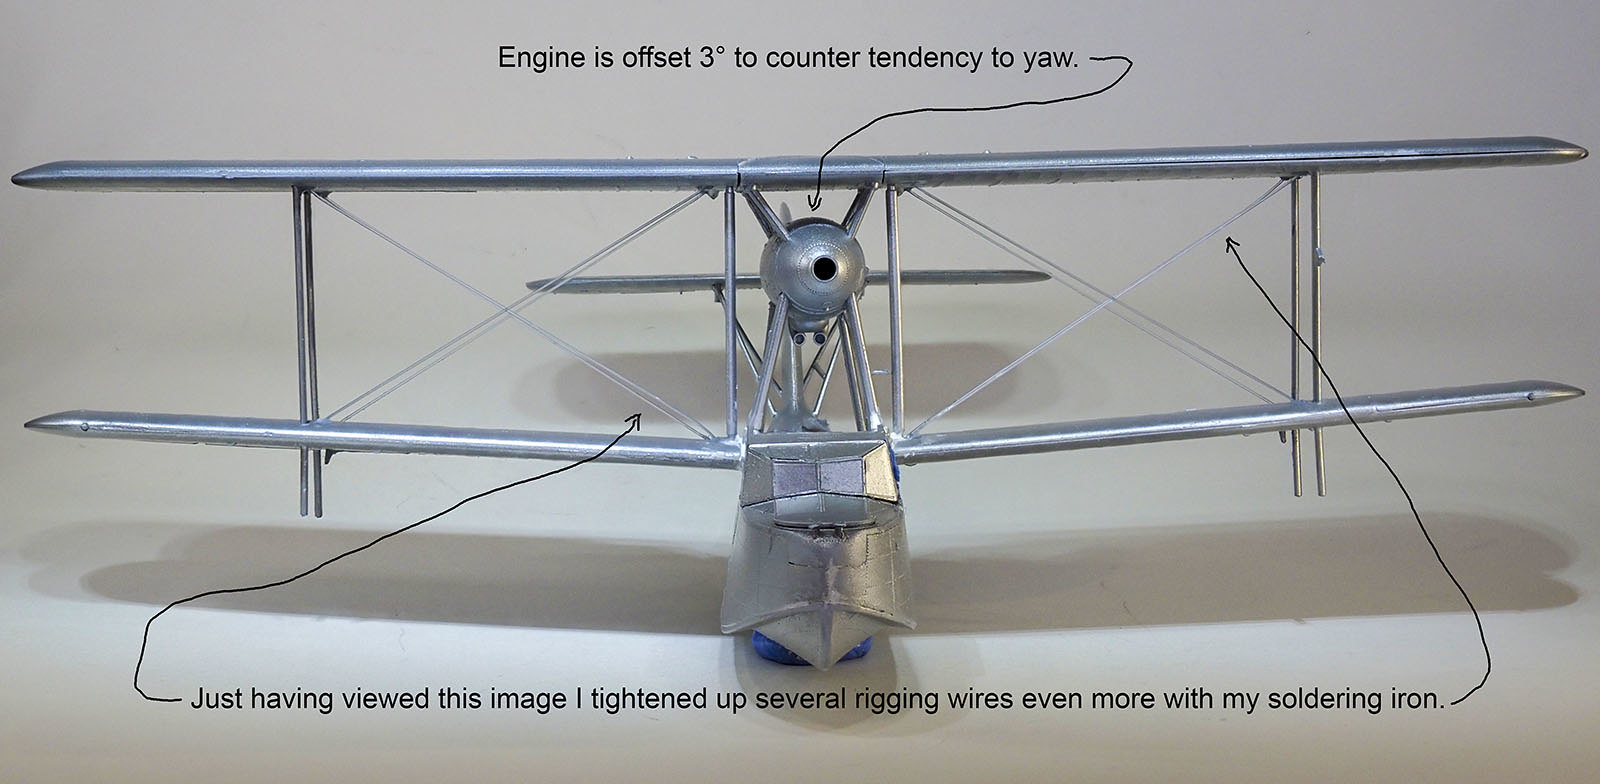
Thanks to you guys who responded to my query (in a recent thread about monofiliment) I’ve been able to do the rigging between the upper and lower wings that attach to the engine.
I did use my soldering iron and, unfortunately, got too close to two of the wires … one of which I’ve replaced, the other of which I’m leaving as is since it doesn’t bother me much.
I’ve still got lots of touch up work to do (puttying, sanding, etc.) but I’m about ready to spray this part of the aircraft before I move on to painting, gluing on the struts, attaching the bottom wings and rigging them.
Looks sloppy I know but, as I said, some touchup work to follow.
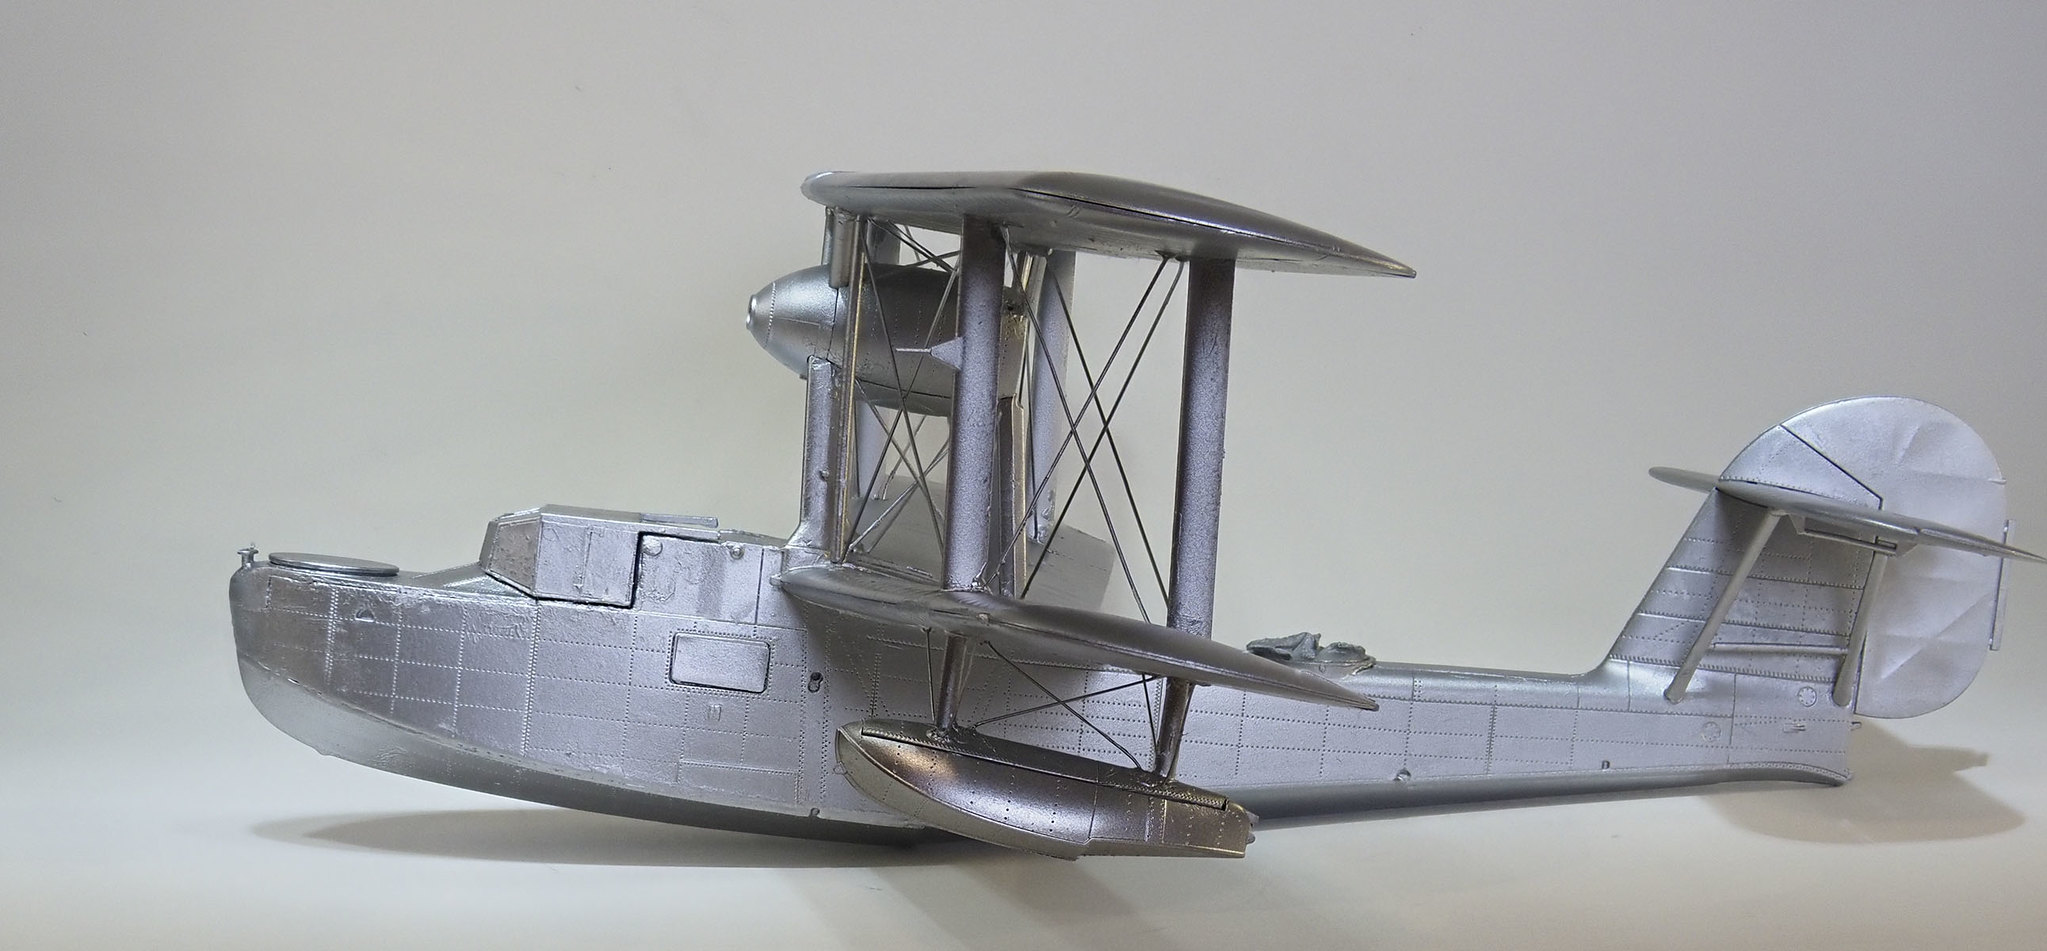
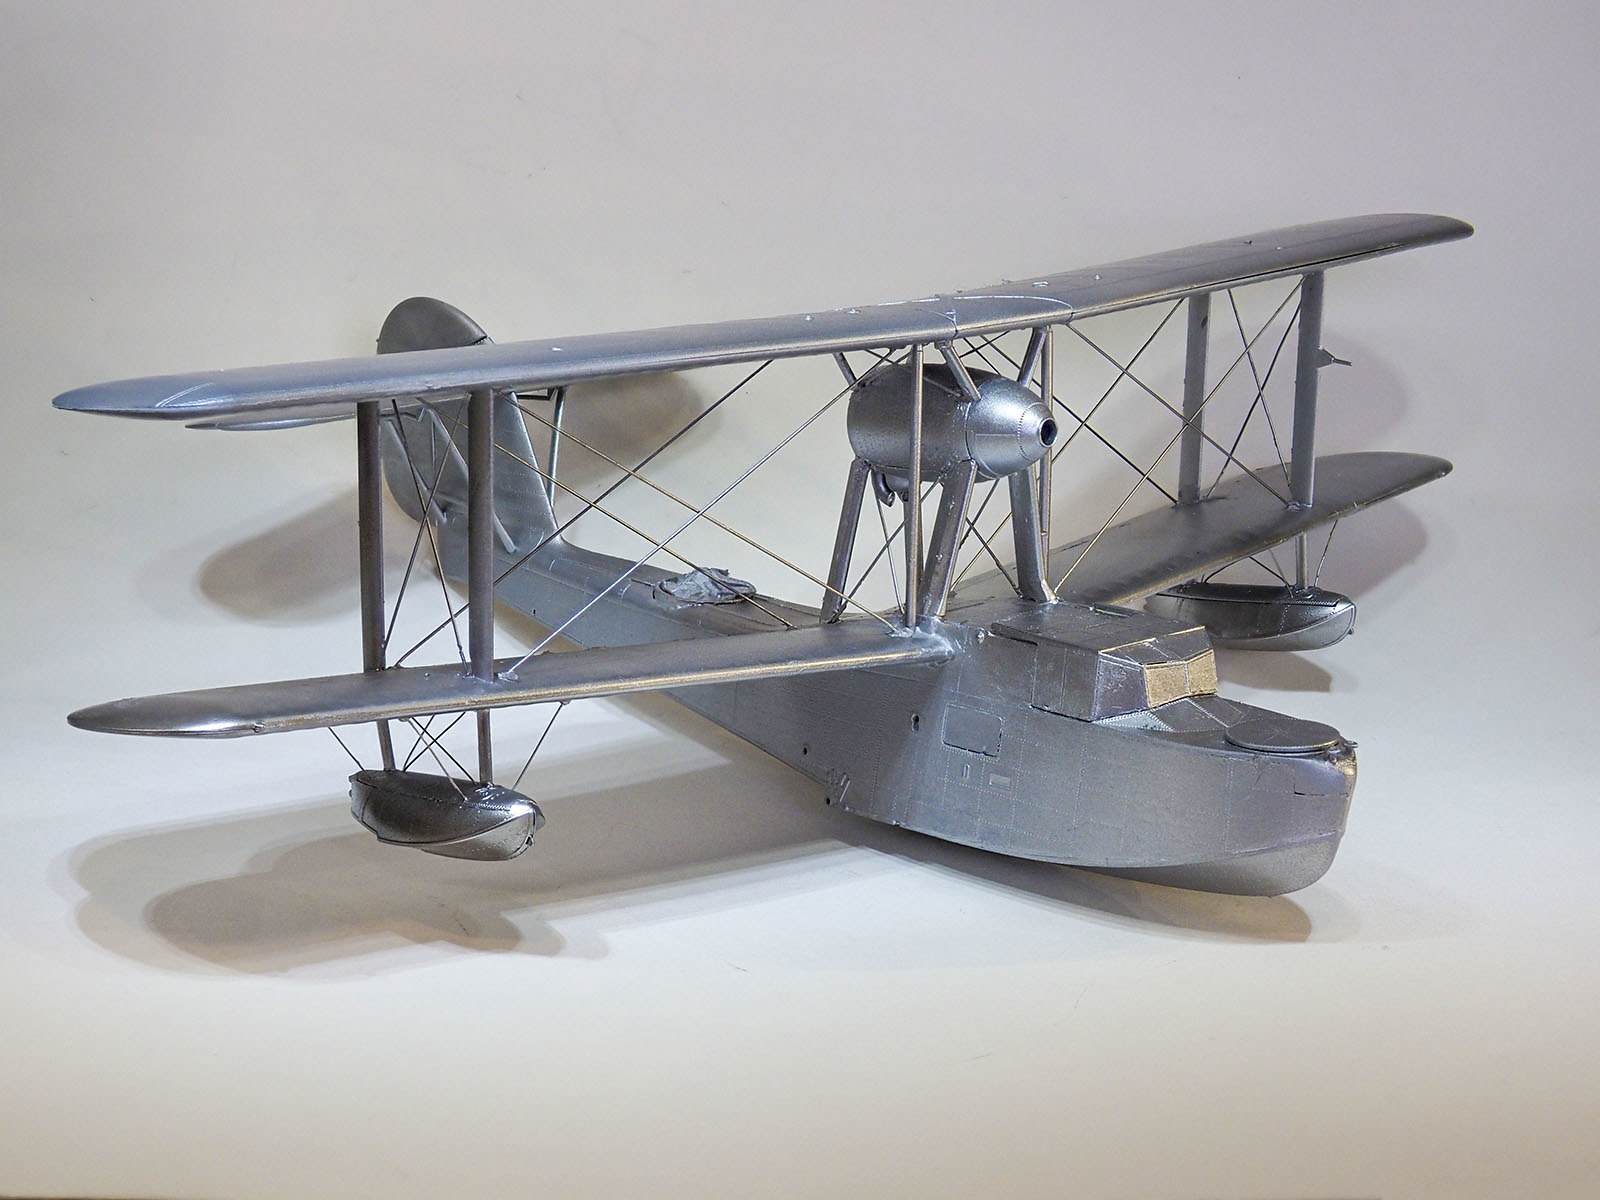
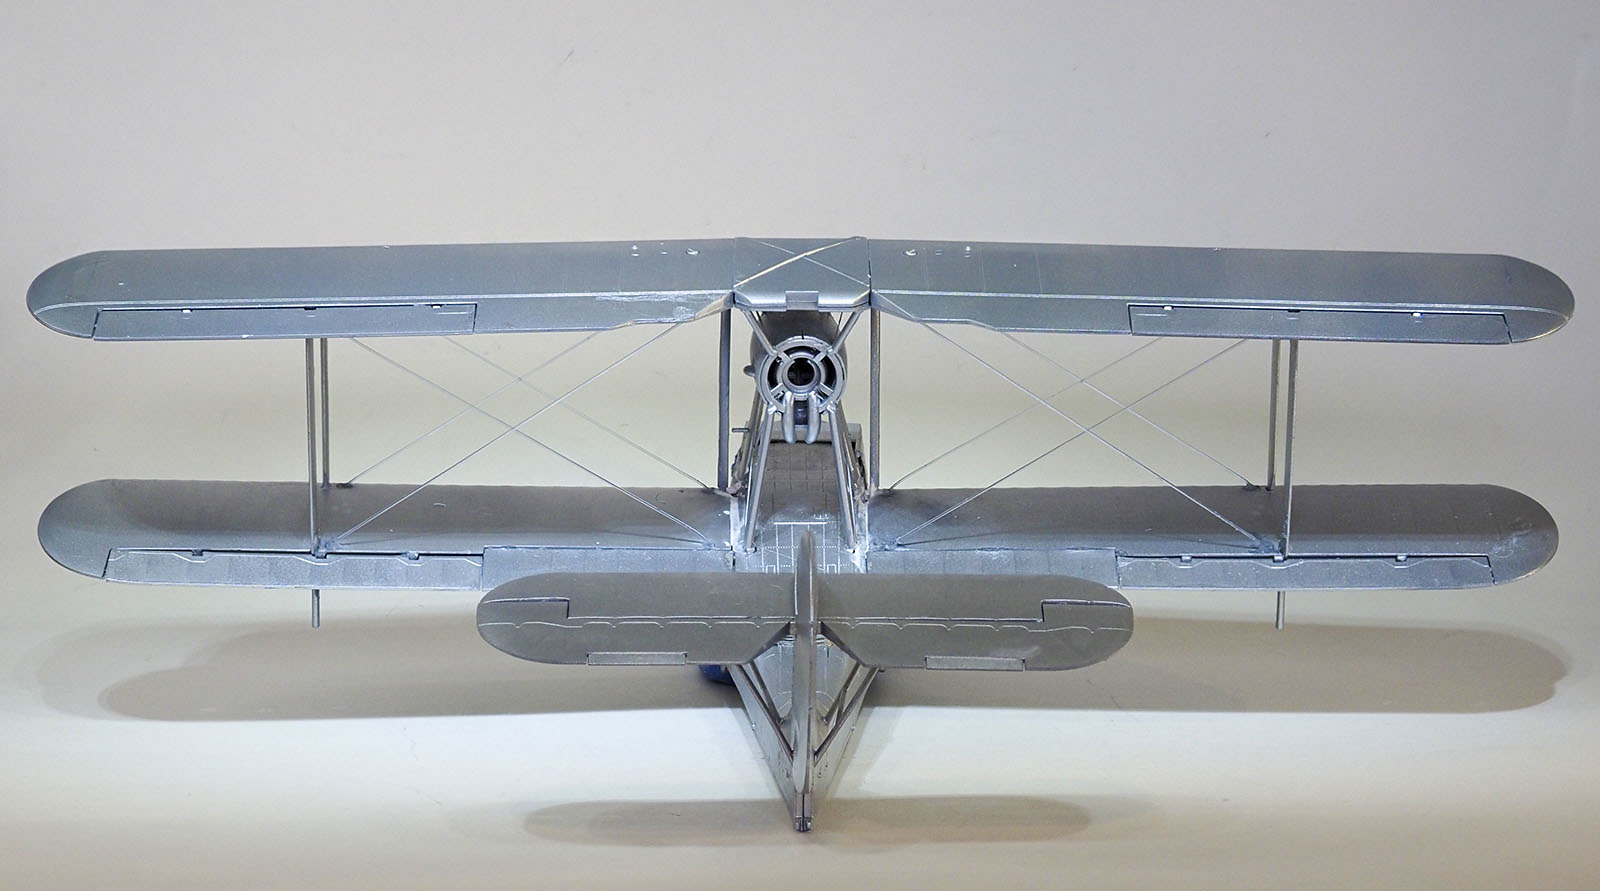
Here’s one more update.
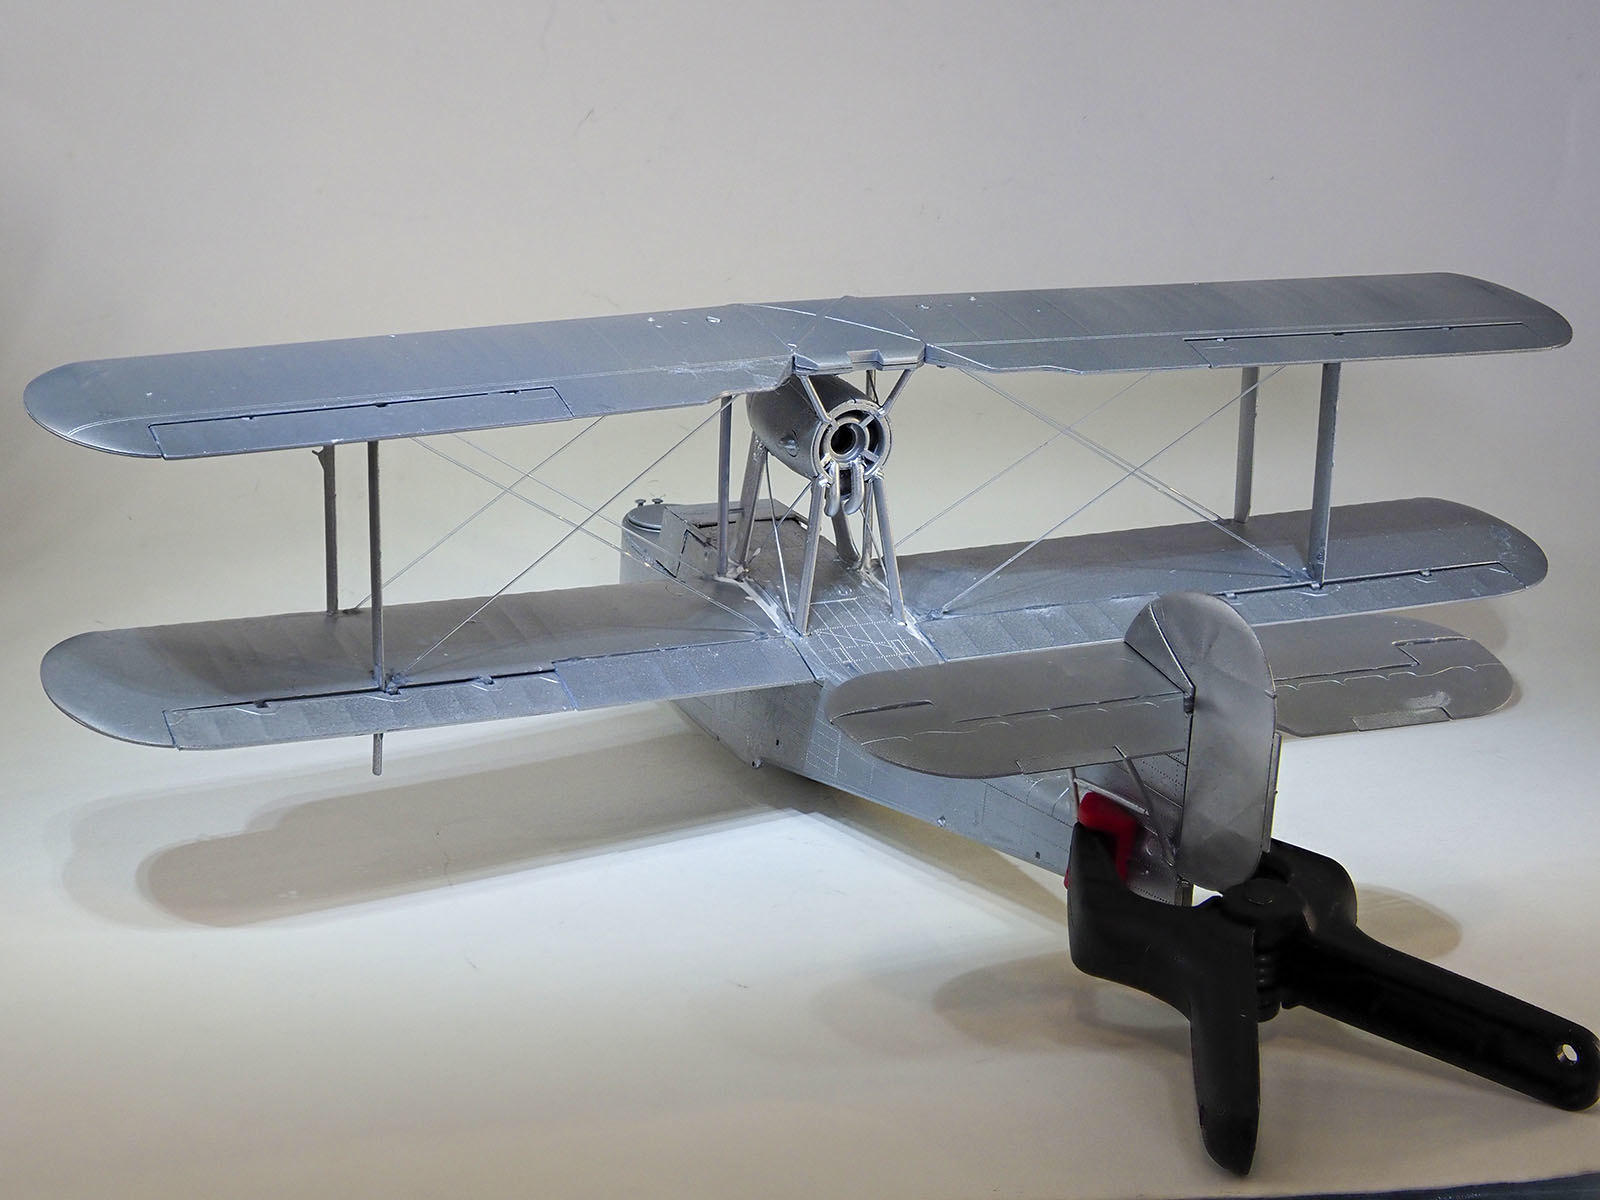
I’ve airbrushed Vallejo Metal Color (aluminum) as a base but will have to respray once I’ve finished all the rigging and attempted to remove the glue gobs near the attachment points.
I’m about 1/2 to 2/3 finished with the rigging which I thought was important to do at this stage since I tend to mess final paint coats up when I have gluing left to do. I need to attach and rig the wing floats as well as finishing rigging the forward/aft rigging on the outside most struts of each wing. I will also have to rig the radio antenna at some point.
I need to be very, very careful when I build and attach the engine! I’ve alread had to rerig several wires on the wings … I’m such a klutz!
I’m finding my soldering iron to be quite effective in tightening the monofilament with the caveat that I’ve already gotten a bit too close on one of the lines but I’m finding my technique is improving … I’m now holding the iron with both hands, etc. [:D]
Here are some of the pictures from today.
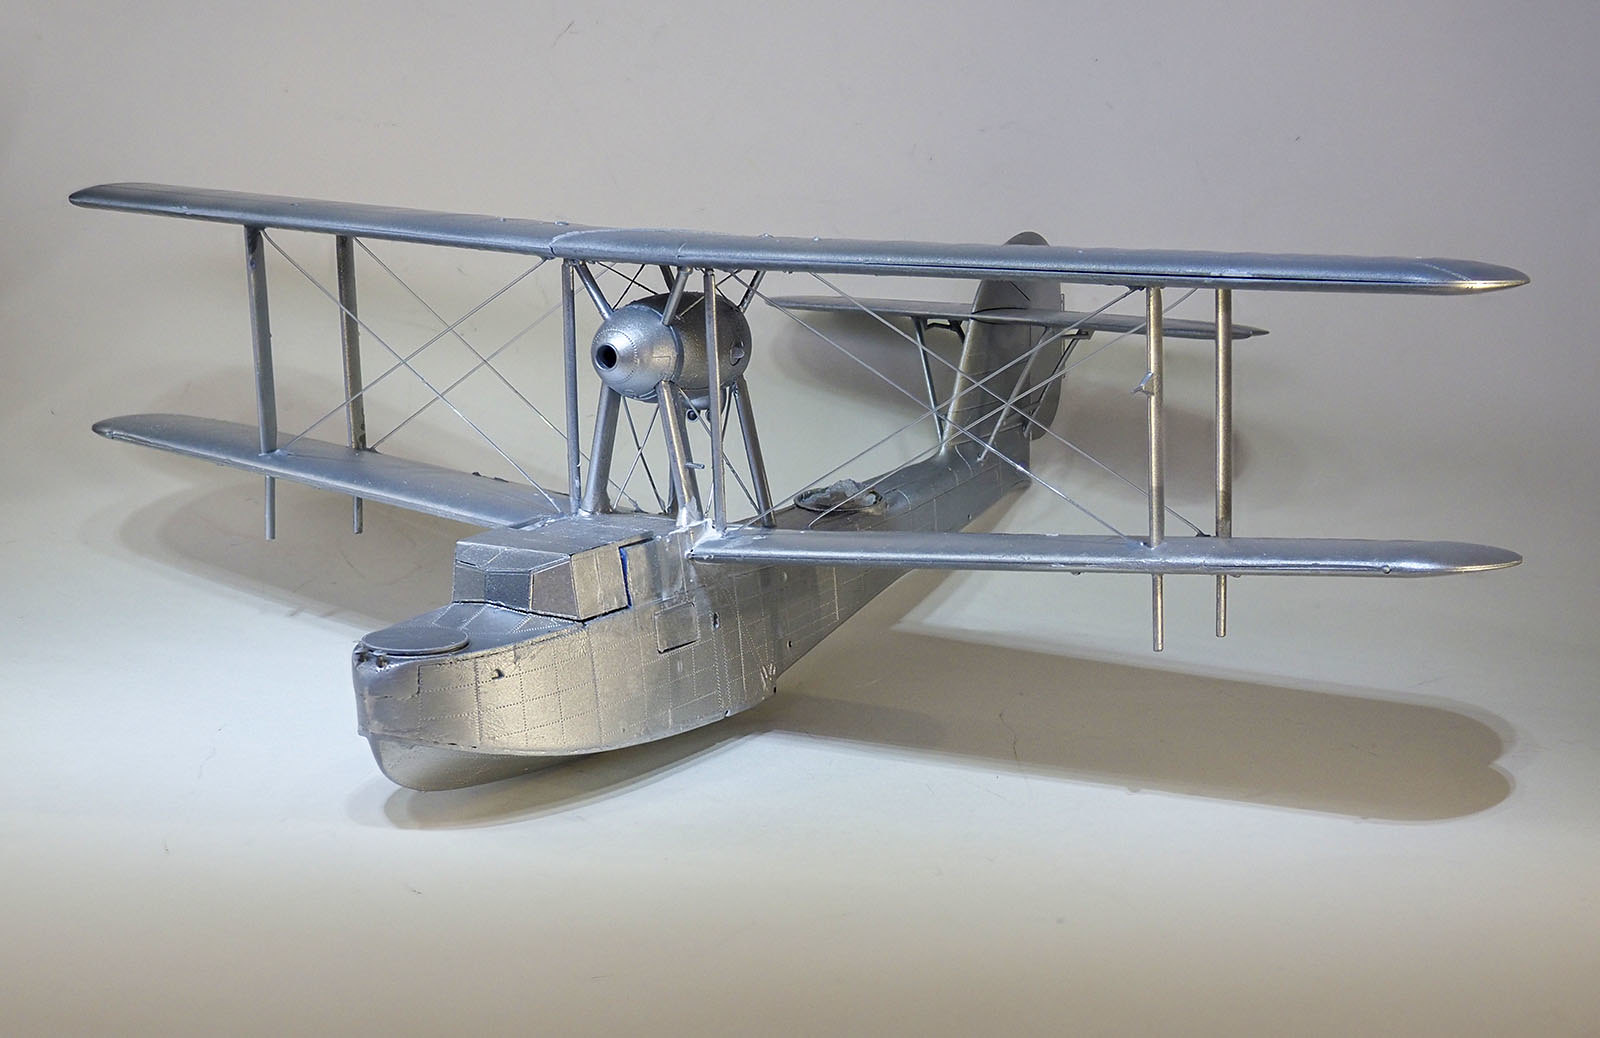
OK, done (for now) with all the rigging. It’s turned out to be both an interesting, enjoyable learning process (never tried monofilament before) as well as very frustrating and, almost, depressing. At each step of my rigging when I think I have it finished, I find one more piece that needs tightening. Then I proceed to attempt what has been fairly successful for me using my soldering iron to heat and stretch the line … at which point I’ve experienced a few snapped lines [:@] and have had to rerig while the floats are attached. It’s the old 2 steps forward, one step back routine. Kind of demoralizing … but onward and upward.
Those lines that are not looking very taught as of this point will stay that way. Just too much time invested already for me to possibly screw up so much that I have to trash it.
So, next up the engine, landing gear (folded up to the wing), deciding which canopy to use, decaling, painting touchups, etc. The “etc.” includes whether or not I’m going to do what I’d thought about for this kit … show the aircraft in the water - maybe even with a raft of downed RAF personnel which I’ve seen done somewhere on the 'net.