Very nice looking.
I also took a look at your album, they all look great. How many of the builds are of vehicles that you have personal experience with?
Paul
Very nice looking.
I also took a look at your album, they all look great. How many of the builds are of vehicles that you have personal experience with?
Paul
Padakr - Thanks for looking…at everything.
I commanded a battery of M102 howitzers…with M35A2 prime movers.
The Hummer was my command vehicle…B6. When we first recieved them we were short rear covers so thats why the strange rear cover.
The M107 was where I started and served on.
Thanks for asking.
Rounds Complete!!
well done thier redleg. thats why i asked about the slat armor i seen that on the other site. and as for those grab handels thier a royal pain in the !!!
GA - Yep, I’m in the middle of handle hell. Already have to replace 2 which were broken on the sprue. 24 gauge wire is the right size
As for the slat armor, the M1128 uses a different slat armor than the M1126 AFV or M1130 Command AFV. The slat armor kits out there are not correct and will not work with the M1128…so I am save from slat armor hell. In the future when I do a M1126, I will do it with slat armor. This kit will look cool without it.
Thanks
Rounds Complete!!
all right here is a little tip for everyone that is working on a stryker or a mgs. for the grab handles DO NOT USE YOUR KNIFE OR SCRIOSS. ues a razor blade. thats how i got all mine off the spru with out them braking. i am all most thru with mine. yahoo.
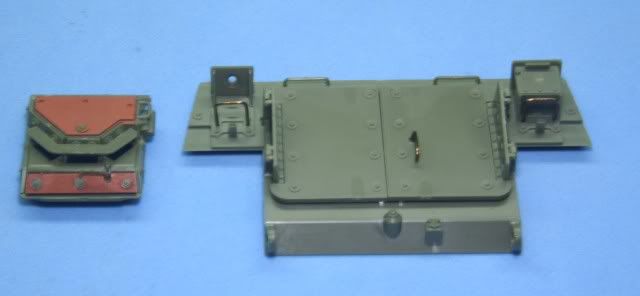
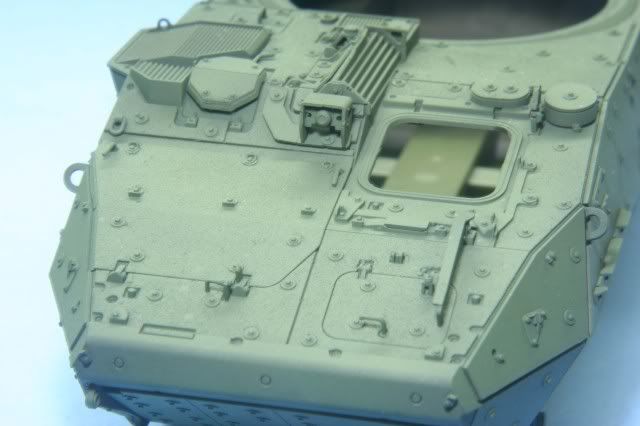
I mounted all the detail parts (another 3 assembly steps) which will be painted green and not to delicate to be broken off during handling. The remaining steps on the upper hull are for mainly the lights, tools mirrors, tow bar mount and screens
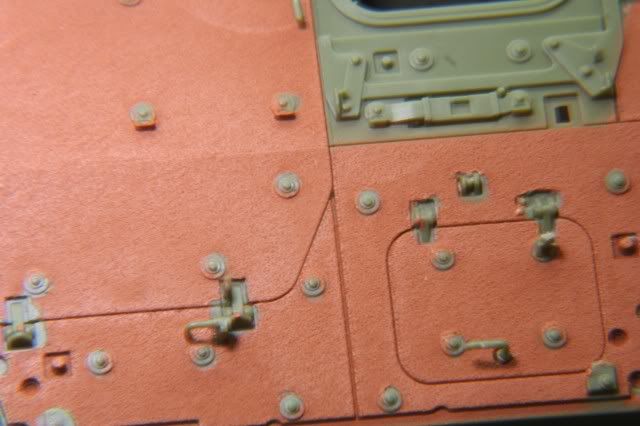
For those of you who wanted to see the anti-slip coating up close, here is a detail shot.
While I waited for glue to dry I finished the drives hatch except for the armor glass, a whole step in itself with all the small parts and also finished the rear section except the antennas which was another two steps. The grab handles over the lights and for the rear door handle were broken on the sprue so I replaced them with 22 gauge wire.
The kit is well built but has a number of very small and delicate parts which make this kit not for the faint of heart.
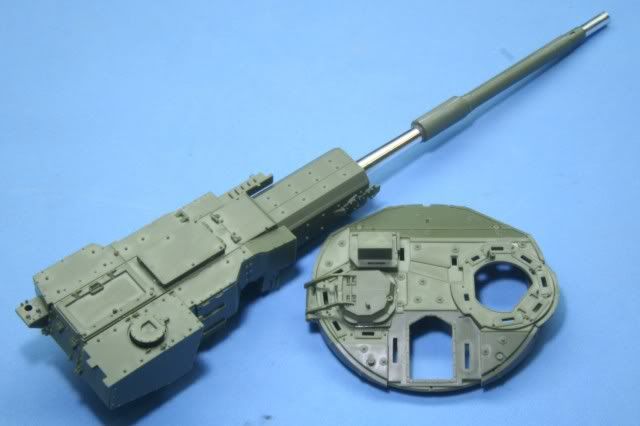
Before we start up the spray booth I completed the first 3 steps for the main gun. Again the fit of the parts are good but AFV defeated the purpose of a metal barrel by having two wrap around halves for the bore evacuator and details. The seam is minimal but will have to be dealt with.
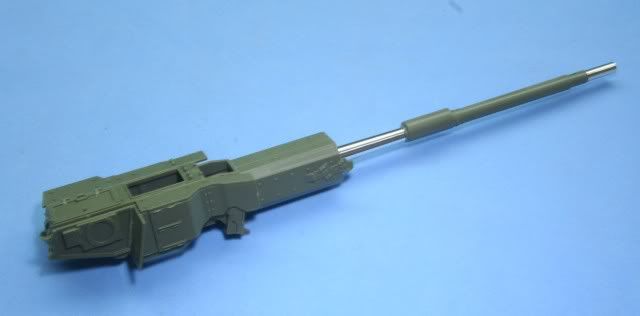
I continued on the gun through another 3 steps and what remains is the last two steps which are mostly grab handles, straps and smoke launchers. Also missing is the gun sight system which has armor glass front.
I also moved through the first 3 steps of the turret assembly, again except for armor glass.
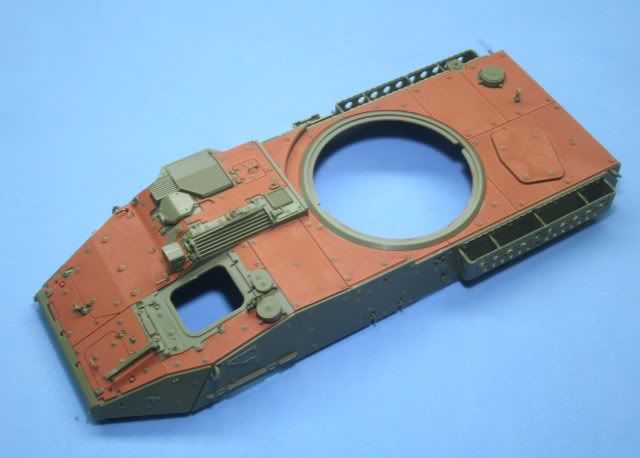
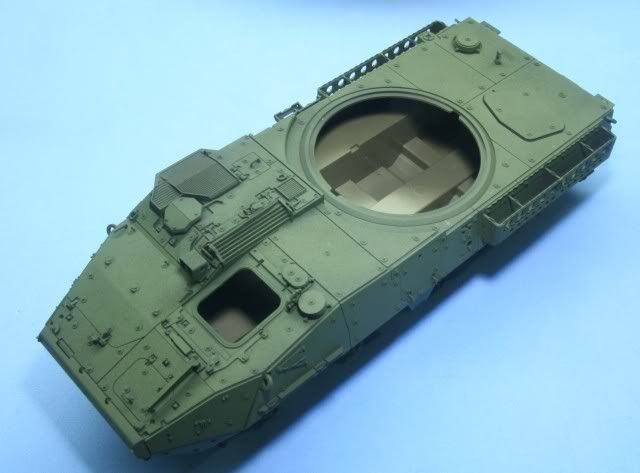
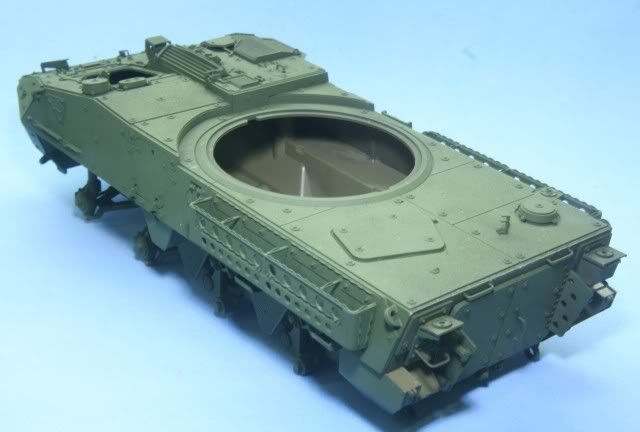
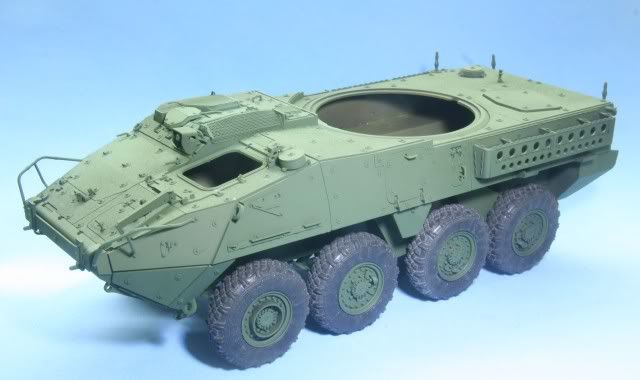
I moved to the spray booth and base coated the upper hull and rear section with Tamiya Flat Black and then put on a coat of Tamiya NATO Green.
Once the paint was dry I assembled the upper, lower and rear sections. First I glued the rear section to the lower hull. Once that set up I assembled the upper and lower hull. The assembly takes time to line up but once in the proper position, the sections snap together nicely. The fit is almost perfect except a slight gap between the upper hull and rear section. I closed this up with a little MR Surfacer and touched up.
Here is the view from the rear
For those wondering what the anti-slip looks like painted, here is a close shot to give you a better view.
In between these major items, I painted the wheel hubs, removing the right side front wheel cage as it was pointed out to me that the actual M1128 only has one cage (as opposed to what the directions tell you) on the left side.
Also painted the light assemblies and chromed the inside part of the lights along with a few other minor tasks.
That’s it for now. Lots of little details still left, the biggest of which is painting all the armor glass. Even with my jumping around, this represents about 75% complete, based on instruction steps.
So far the kit is outstanding. The only drawbacks so far is the split barrel cover, a few broken small parts (mostly hand holds), and a few mistakes on part numbers in the directions. All of this is minor thus far compared to the overall kit quality.
All comments are welcome, thanks for looking.
Rounds Complete!!
Amen to that. I have been very fortunate that none of the pieces have been broken on mine (well, except for the ones I have broken myself).
I have to say, it is looking very nice. I am looking forward to seeing the completed build. Are you going to build a diorama for it?
Now I’ll have to go take some more pictures of my progress (not as far).
Padakr - Thanks, as far as a dio…see some of the other threads on what is considered a dio [;)]
I’m not a dio builder but it will have a base with terrian. I have the Real Models Molle kit for packs. Also add some more water cans, and some MREs. Will also try to add a driver and TC. I have the Verlinden kit for those.
Thanks again
Rounds Complete!!
To finish up the turret assembly (6 total steps in the directions) I needed to complete the armor glass. Since AFV give you a nice set of clear armor glass, I tried an experiment to add depth when looking at the armor glass. First I masked all the glass areas. (I know the blue tape and blue background are not the best contrast)
Then I painted with successive coats of Alclad Gold, then Tamiya Flat Black and then Tamiya NATO Green. After removing the masking, here was what it looked like
Next I painted some clear decal paper with Tamiya Clear Green and also a mix of Tamiya Clear Blue and Red to make the Clear Magenta. Then I spent time with the digital caliper measuring and cutting and then mounting. To finish the turret I mounted the TC hatch, gunners hatch and sight, miscellaneous handles and the gun travel lock…which was a true PIA.
Without going on a rant, there are some parts which are so small on this kit, and there is no reason not to have molded them on the main assembly. Some of these appear to be parts for parts count sake. The side pars on the TC armor glass is an example. Others could make life better if done different. The travel lock is one of them. It is the one major drawback of the kit and does use up a lot of time to work with them correctly.
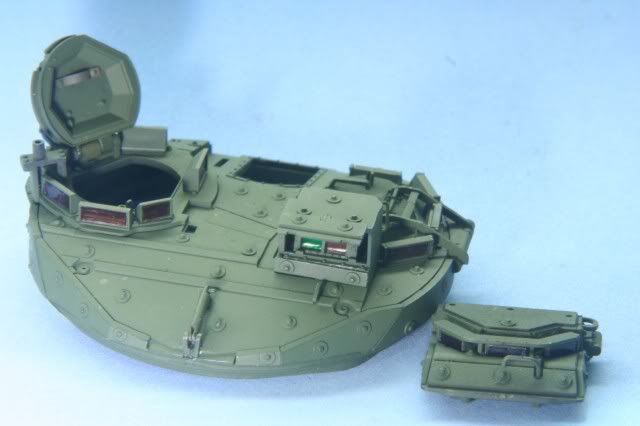
Back on the build, you see the assembled and base coated turret and drivers hatch.
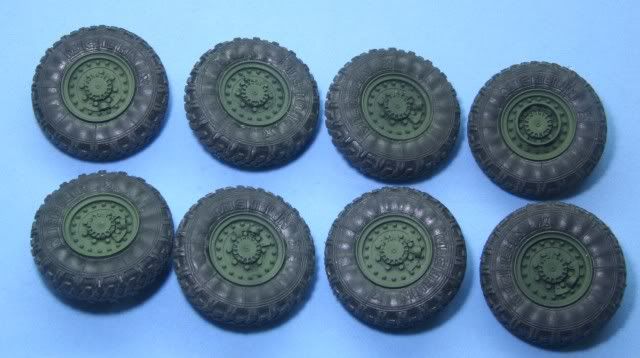
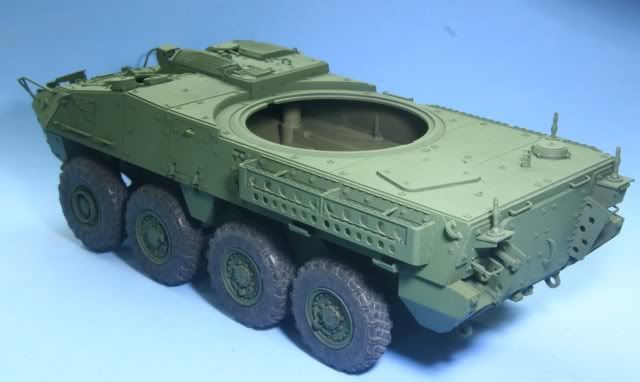
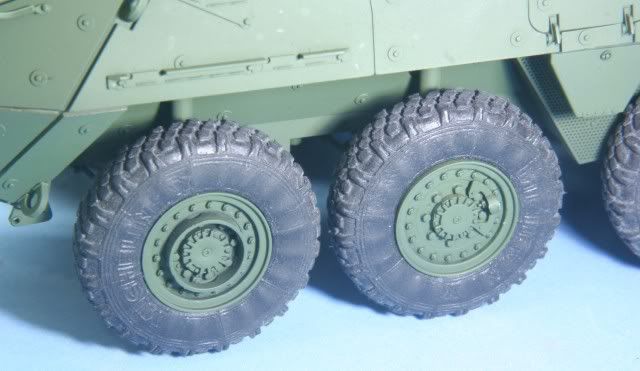
Moving back to the main vehicle, the tires were nice and shiny rubber. To get them more the “used” look, I rubbed them down with a Scotch-Brite pad and then assembled them onto the rims.
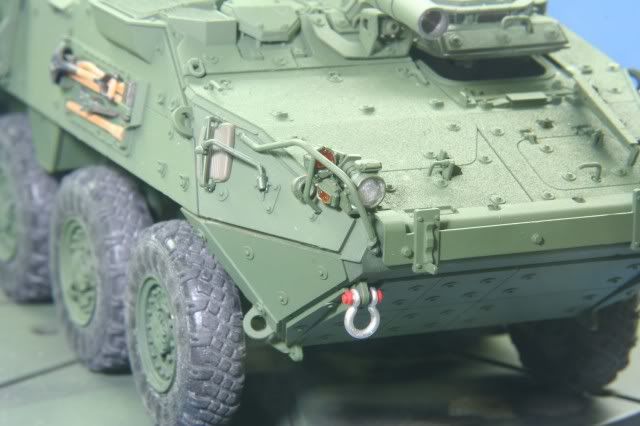
With the tires assembled, I glued them in place on the chassis. Also I assembled the PE screens onto the vents, mounted the front guards, drilled the antenna mounts for an antenna, mounted the antenna mounts and the last few grab handles. After a final basecoat of Tamiya NATO green here is where I am.
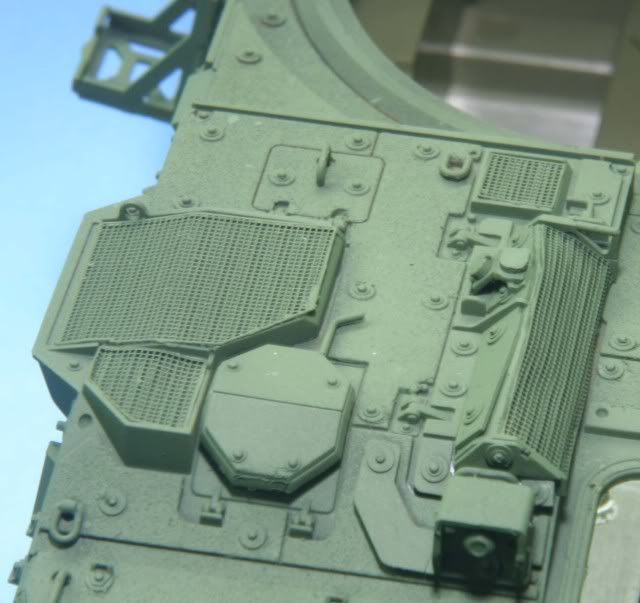
Close up view of the PE screens. These went on pretty easy but do require care.
Close up of the tire assembly. The drive side front is the only tire with the ring. The directions incorrectly tell you to put it on both sides.
That’s it for now. I am working on the front and rear lights, mounting the drivers hatch, tow hooks, pioneer tools, some detail painting on the chassis and remaining PE straps for the chassis. Hopefully I will finish up the chassis this week leaving just the gun section to finish.
All comments are welcome, thanks for looking.
Rounds Complete!!
Looking good, redleg! [tup]
This also answers a question I had about the color of the periscopes…I wasnt sure if they were to be white, black, or some other color. I need to check my wheels, too, as I’m sure I glued those rings onto every wheel.
I find it amusing that we both posted our Stryker construction updates within about ten minutes of each other.
Ranger Joe, Defender of Bunnies
Cameraflage - Thanks for looking…yep I was commenting on yours while you on mine. Be careful, there is only one ring on the M1128. Some of the other models differ. Look at some pics to make sure.
As for the glass, I found it easy to leave the glass color for last. Hope it helps.
Thanks for looking and for your comments.
Rounds Complete!!
Cool beans, Mike!
For some reason, this model just makes me want to “brap!”–it looks fffast!
Looking good–can’t wait to see that big gun topping it off!
Karl - Thanks for looking and your comments. Yep…looks fast and I can’t wait for the gun myself
PS…You always ask so this time I have some Verlinden figs for the driver and TC. I’m going to give them a go. But first have to finish the vehicle.
Thanks again
Rounds Complete!!
My kit, the M1130, calls for the rings on all wheels. What are they for?
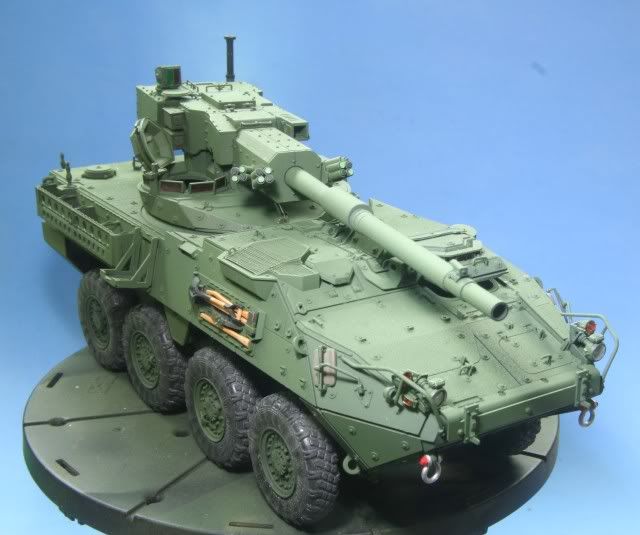
Well not to be outdone by all the holiday building, here is what I have completed.
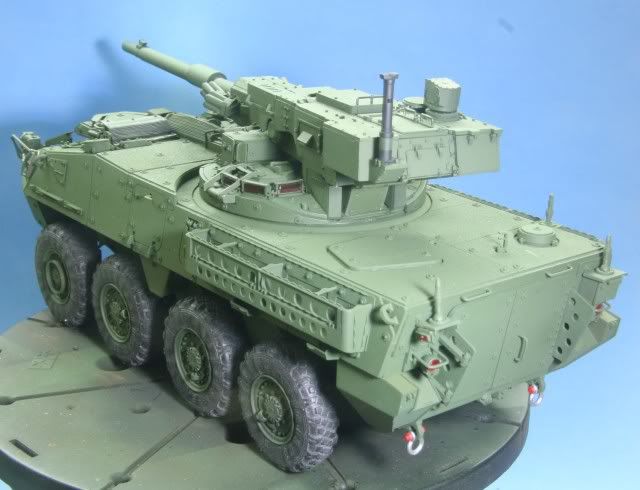
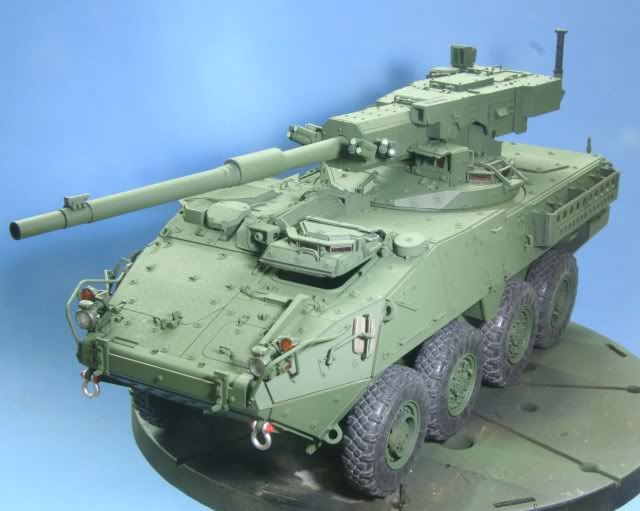
First was the complete assembly of the major components. After assembly I finished up all the minor grab handles everywhere. For the most part the assembly was smooth except the fit of the gun to the turret. The mounting was tight and some work with the sanding stick and #11 blade was required to get everything to fit Here is the overall views of the current state of the build
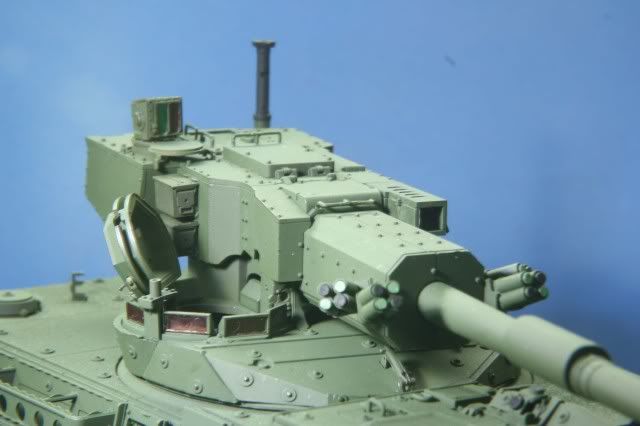
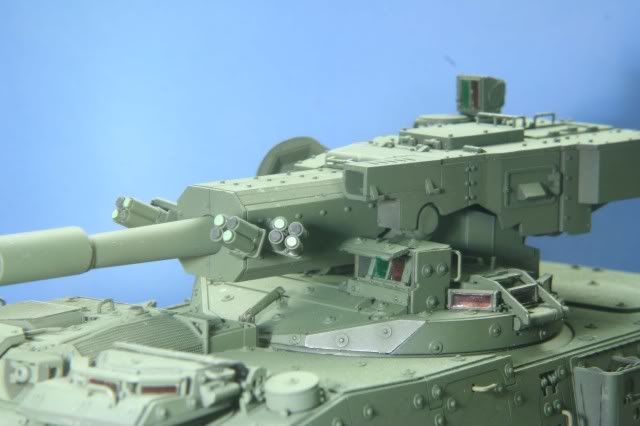
After assembly I began assembly and mounting of details. Here you can see the smoke launches painted for smoke (Tamiya NATO Black) and WP (Model Master Pale Green FS34227) mix. Ammo cans mounted on the gun side for the M2 50cal (Model Master Dark Green FS34049). Also shown is the gun revolving sight in the rear, with the optics glass done using the same decal method as the armor glass.
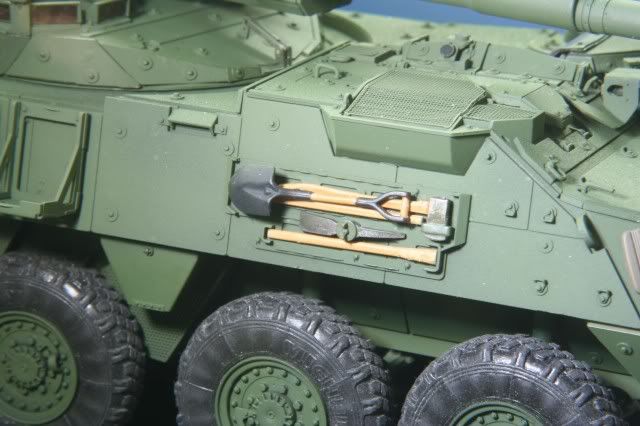
Here is the tool rack (I know the picture stinks). These tools are done similar to what Bill described in his WIP. The steel heads are painted with Alclad Steel then are dry brushed weathered with Humbrol Gunmetal, the shovel is Tamiya Flat Black with graphite for scratches. The wood is painted with Model Master Wood then washed with Burnt Sienna oil to give the reddish wood grain.
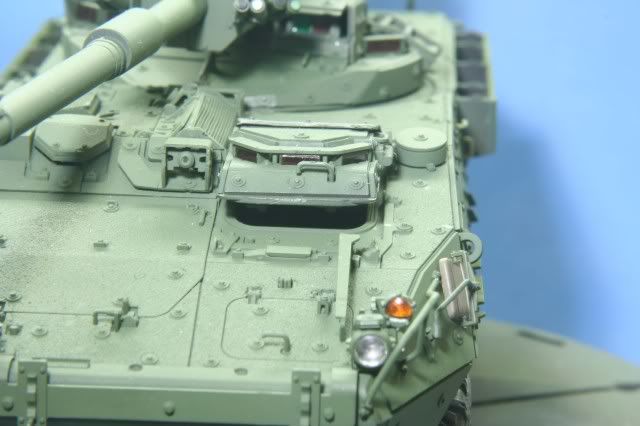
Here is a view of the drivers hatch. You can see the armor glass under the top cover.
Here is a view of the gunner’s sight again done with the same decal method for the glass. Also you can see the gunner’s armor glass and another view of the smoke launchers.
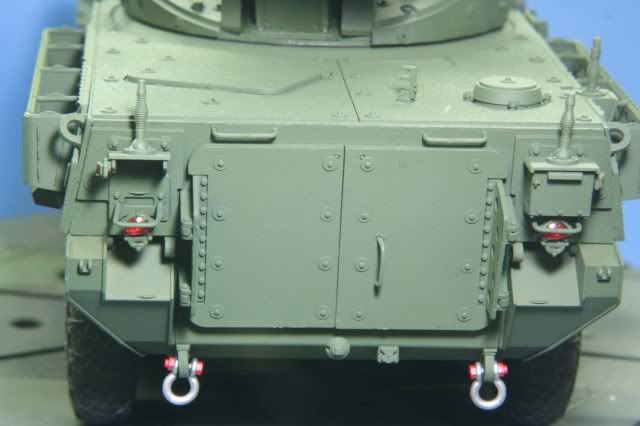
This is a view of the rear. The tail lights were painted inside the lens with Alclad Chrome and the lens with Tamiya Clear Red. The BO markers are Alclad Jet Exhaust. The tow hooks are Alclad Aluminum and the bolts Tamiya Flat Red.
This front view shows the front light with Alclad Chrome inside, turn and side signal Tamiya Clear Orange. The folded in mirror was painted with Poly Scale OD Green 505370
Well that is the current state. The remaining kit items are the M2 50 cal and about 12 PE straps. I will also have to add some other straps such as the tools and some for the rear. I’ll give you a quick update then and prior to decals and weathering. With the long holiday and time off, I looking to finish this up before the new year.
All comments are welcome, thanks for looking.
Rounds Complete!!
Redleg, Your MGS is looking great. It is really coming together. Makes me want to buy one even more. I will book mark this just for the nonskid info alone. I have a build in the future that will require it.
Keep up the awsome work.
Everytime I see this beast it looks mean! You’re doing a great job with it Mike, glad to see the holidays are allowing for lots of bench time. [;)]
Mike, this is an outstanding looking build! What a cool vehicle!
Nice detail work, and the way you did that anti-slip coating is clever–and it looks great!
Hmm…when I get around to building an Abrams for my collection, I might need one of these to keep it company! Very cool, Mike!
Redleg, when you used the terracotta paint, did you first spray it in a airbrush bottle or straight from the can?
I have a MGS ordered for Christmas and am following your build.
Moose - Thanks for looking and for your comments. Glad you like the anti-slip. Good luck with yours.
Bill - It has that look [oX)] Thanks for the peek.
Karl - You could get rid of the bike and strap on of these on.[;)] Thanks for looking and your comments.
Mechtech - Sprayed straight from the can. I suggest if you have a spray cow, try it on that first. Nice even stroke. If you are normally using a AB you have to readjust your stroke and speed when you use a rattle can.
The paint take seconds…the masking is hours. Ventalate well as it is kind of stinky.
Thanks for looking and your comments
Rounds Complete!!