After looking over the stash and what marking options I had I’ve picked Eduards BF 110 E as flown by 14 kill ace Lt. Felix-Maria Brandis he was killed in 1942 when he crashed on the return leg of a combat sortie during bad weather.
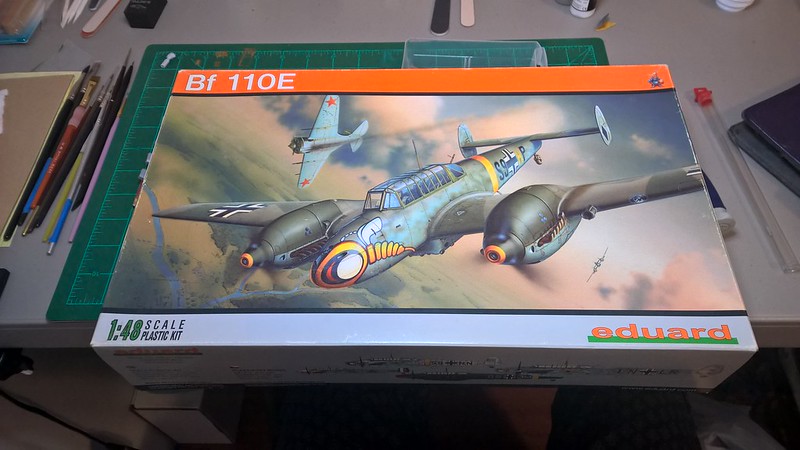
After looking over the stash and what marking options I had I’ve picked Eduards BF 110 E as flown by 14 kill ace Lt. Felix-Maria Brandis he was killed in 1942 when he crashed on the return leg of a combat sortie during bad weather.
Waggish, thanks - for now just put me down as TBA. I’ve an idea what I’d go with if I started right now, but that could change altogether by the time the bench clears up.
regards,
Jack
Rambo, you’re updated. jgeratic, I’ve added you.
Also, I’ve started on my builds! Pics to come tomorrow.
If you will have me, I would like to take part in this group build. I would like to enter with a 1/48 Eduard FW-190A-4 in the markings of Major Hans “Assi” Hahn with 108 victories.
Hi Wags,
I won’t be joining because I’ve got too many irons in the fire.
But, I wanted to say that I’m impressed by your hosting. You’re doing it the way it should be done.
Bill
ExtremeTeam, welcome! I’ve added you to the roster. We’re doing the same ace ![]() I’m doing his 109, though.
I’m doing his 109, though.
It’s too bad that you couldn’t join in this time. If you don’t mind me asking, which parts of my hosting am I doing well? I want to be sure to continue doing those things.
-TheWaggishAmerican
Over the last two days, I got a fair bit done on my Airfix 109 submission- I went from virtually untouched kit to fully assembled airframe, ready for primer and painting. The build starts with the cockpit, and it fits with typical airfix new-tool ease. There’s a fair bit of detail as well, and I haven’t installed the IP yet.

I assembled the cockpit as one sub assembly, and began painting. I pre-shaded the interior frames with NATO Black, and sprayed the cockpit with Vallejo RLM 02. Once that dried, I used oils to build up a bit of grime in the framework, and picked out details. Here is the only picture I apparently took of some cockpit detail pre-installation.

As I prepared to join the fuselage halves, tradgedy struck! Due to my own benchtop negligence, I unwittingly dropped the left side- (in my shelf, the DISPLAY side) into a pool of polycement. This was the damage.

A gob of putty and some sanding later, however, and the disaster was averted. With the hole filled, I assembled the rest of the airframe.

I then came to my first bit of indecision- whether or not to detail and display the engine. On the one hand, the engine provided is pretty nice. On the other hand, however, it is pretty simple. In the end, I decided to go ahead and do it. I just wanted to add a couple of distinguishing details of the E-4’s engine. Looking at pictures, I tried to find prominent features I could add at the scale. On the right side, a very noticable (presumably coolant0 line was visible. So, using stretched sprue, I added this to kit engine and painted it blue. I also added a little joining cap to the point where the pipe enter the engine block proper. On the same side, I cut a little bit of stretched sprue, and added the electric starter onto the gearbox.

On the left, I simply painted the engine block. This section was painted black first, with the grey mount handbrushed with RLM Grey and ‘grimed up’ with burnt umber artists oils.

The engine done, I sanded down my seams and sprayed primer. Tomorrow, I should be able to get a fair bit of painting done.
Waggish: We’ve all had a glue mishap like that before I’m sure you can sand it right out. You are doing a good job of staying on top of things hosting. I’ve got a armor build going on right now hope to be done with it by the end of the month then I should be starting on this build.
WA, despite the glue accident, and i concur with Clint, we have all had that happen, that Emil looks great. I built the Airfix one a few months back and it was joy to build, looking forward to seeing it with the paint on.
Can’t wait!
Thanks! I’ve had the day to do nothing but paint- Just have to take off some tape in an hour or two and I can show the result of that process.
Spent all day and some of last night painting some other projects and this- there was a single hiccup in my painting on this model, which is a lot fewer than usual. Anyway, I’ve got her to gloss, which is now drying.
I preshaded with NATO Black

And the painting commenced. I used Vallejo Model Air RLM 1939-1941 colors. A lot of people don’t seem to like these paints- I think the colors are pretty good. You’ve just got to thin them a little bit (they are in no way airbrush ready) and spray at a bit higher pressure.
I did have a problem with my mottling- on the left side, it turned out exactly how I wanted.

However, I had to reload my cup before the right side. I’m pretty sure I didn’t thin it enough, and I had a huge problem with the paint refusing to spray.

Instead of being lazy, I let it sit for a few hours, masked off the camo on the wing and fuselage top, resprayed the blue, and gave it another go. It’s still not as good as the left side, but it at least looks less strange.

That taken care of, I used tamiya tape and silly putty to mask the front portion of the fuselafe to take the RLM yellow. I sprayed it on, let the model sit for several hours, and sprayed a coat of Tamiya X-22. Immediatly after spraying the X-22, I tried a trick I read somewhere online- I loaded the airbrush with Tamiya thinner, dropped by pressuer by a lot, and misted it over the finish. It definently helped smooth it out- Next time, though, I’m going to get a bottle of Tamiya laqcer thinner and see if that does the job any better.


Decals will probably be done Tuesday afternoon- I want to do them tomorrow, but I’ve got SAT’s to take and I should probably be studying for those instead.
-TheWaggishAmerican
That looks great on a 1/72 109!
WA, that Emil is looking real fine, excellent save on the mottling and the splinter has turned out real nice. It is a great kit isnt it?
WA: Looking really good I’m one of the ones who don’t like the model air paints I always go back to tamiya. My build for this gb I’m going to try lifecolor paints I’ve read they spray just like tamiya but are color matched to rml colors so no mixing. Hey you can’t even tell where the glue mishap was knew you could do it. I agree its great to see teens getting into the hobby at 30 I’m usually one of the youngest at shows.
Waggish, the 109 build is right on.
Are those Vallejo colours from their ‘AIR WAR’ sets? That is their second boxing for aircraft colours, as they had changed most of the formulas from what they had released on their first go-around. From here, your sample looks good.
regards,
Jack
That 109 is looking really good WA. The colours look right on to me.
I’ve finally decided what to contribute to this GB.

The ace I’ll choose to depict is Erich Hartmann.
Cheers
Tony
Great work on that Waggish, colours are really nice.
Nice mottling for such a small scale. I think both side look equally great!
-deleted-
Waggish,
If you don’t already know, Vallejo has a Flow Improver Here which makes a world of difference with both their regular paint and Air paint. Thin the paint as you normally would, then add a couple drops of the flow improver. Hope this helps.
And the mottling on your 109 looks great, especially for 1/72.