Go get 'er Toshi! Have some fun! ![]()
Thats a nice looking first armour build Toshi, and I am sure you have learnt plenty of lessons for the next one. [;)]
Thank you sir, I definately have and will do so as well! Thank you very much Bish!
Toshi
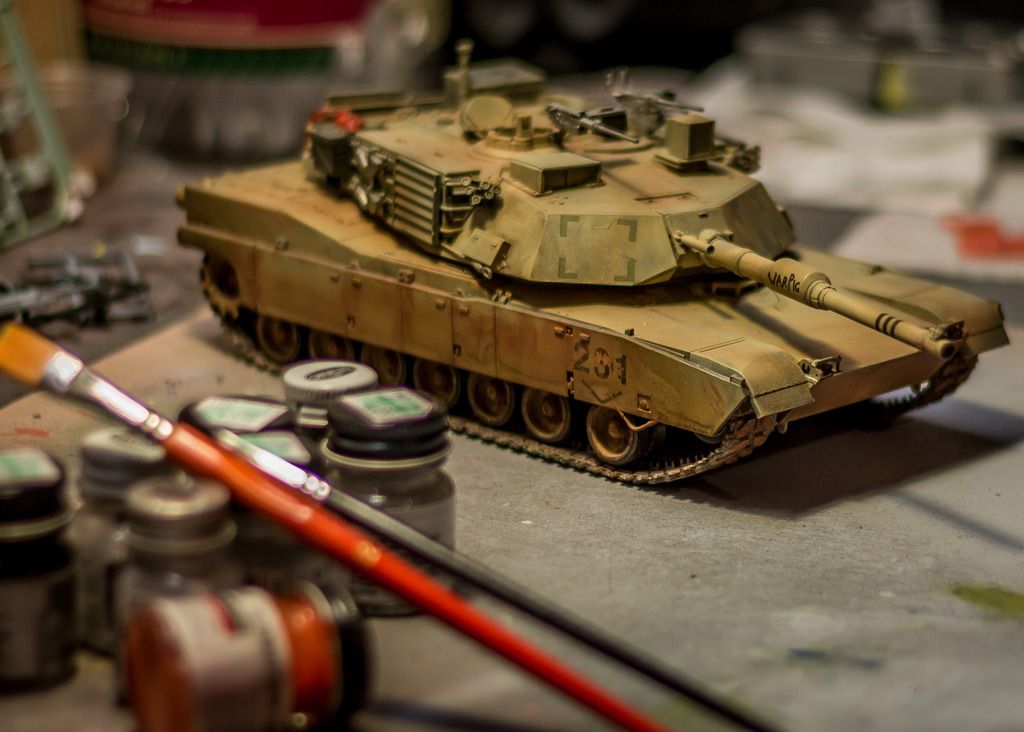
Since everyone was getting in on the fun, I wanted to throw a quick picture of my (first) tank up as well. Same make and model- first time that I’ve tried out a lot of techniques. You really get a lot of leeway with tanks in the way of weathering!
Nice job Toshi, it looks like you are a seasoned armor builder. Great work.
BK
Ahhh! I see what you’re Talking about now. Thank you for the visual! Thank you also for the read and reply!
Thanks BrandonK, you’re always there for me. I truly appreciate it!
Toshi
Sorry to sound the alarm- if it didn’t have any effect by now you’re fine. It will only affect the acrylic when it’s wet. When I said I put down a heavy coat I meant I flooded it on! You can get away with using the Dullcote if you spray a couple of mist coats, they dry fast enough not to affect the paint underneath. Seems like you went slow enough not to have any problems.
I weathered the Abrams based on a couple of real life photos via Google. Per GMorrison, antennas were needed. I tried sprue to no avail. My hands are too shakey for that. So I’m thinking electrical wires? Any suggestions fellow forum members?
Toshi


You’re not quite done with that yet Toshi. You have to scrub some of that off again to get the effect. You only did the first half of the job.
Like panel line washes on aircraft. ![]()
P.S. If you lose those decals you’d be better for it at this point lol. I have better ones that I can send to you if you’re interested. Since those didn’t work out so well to begin with.
Antennas… ?
Hmmmmm …got a cat?
!http://www.dynamicmediainstitute.org/galleries/kotin_alison/wiskerOrgan/whiskerOrgan_02.jpg
Cat Whiskers? Really? Never thought of that. LOL! Thank you for the tip sir, I greatly appreciate it as well as the read and reply.
Toshi
Understood and I will work on that immediately. No, don’t worry about my decals. I still have another variation of decals that academy has provided. I’m very touched, thank you for that gesture, your a real and true friend!
Toshi
This is your first armor build and you chose the venerable M1 Abrams. I want you to be proud of it when you’re done. ![]()
Well if you change your mind, I do have a lot of spare decal sheets with all sorts of markings. Some of them are pretty old, but they’d still work.
You have a great evening my friend. ![]()
Am I going in the correct direction as for the weathering? I’m unsure of what to do now.
Toshi

I have to admit that my suggestion of the sludge wash knocked you off course, but I will guide you back to a recovery that should get that straightened out.
Normally we do modulation before a sludge wash, which I should have better explained how to do. Your wash was too heavy and I take it upon myself as to the blame for that. I should have explained how that wash should be done before throwing you into it.
However this is also a learning experience I can show you how to recover from and that’s just what I’ll do. I guided you in, and I’ll guide you out again.
What I would recommend doing next is using the original color, lightening it up with a few drops of white, and adding some modulation to the centers of the panels. You don’t need to hit every little sectioned off piece, just the main areas. That should lighten it back up and make it look a bit dusty over the dark and dirty that you’ve already got going on.
Try going over it lightly at first. You want to build up the effect slowly so you don’t overpower it and end up with a total repaint.
You want to dust it. Going over the sides, but concentrating on the upper surfaces. Staying away from painting over the wash in the panel lines. It will be fine if you spray over them a little and if you accidentally cover them up you can just do a panel line wash like you do with airplanes to correct it later.
Just relax and take it easy. Let your artistic nature guide you. Do a little at a time, taking short breaks, recline in your chair and just look at how the light falls on it. It will guide you as well.
From what I can see in that last picture, you’re close. A little dusty highlighting and I think you’ll have something to be proud of on your shelf.
Unless you plan on hanging this one from the ceiling as well? lol
As I read your explanation I was drinking a seltzer. When I got to the end of the thread, in regards to hanging the M1 to the ceiling seltzer blew out of my mouth and nose. I could not stop laughing!
You are not to blame, as you correctly stated, this is a learning curve for me. I can see where this is going, no problem. I can make this happen. Thank you M.Brindos! You’re a phenom of a human being and a good friend.
Toshi
You are being overly kind, my friend.
Sorry about the seltzer. '![]()
I did take a break and took my time. I must confess, I’ve never sprayed my models with a AB at that low of a PSI. It was somewhere between an 8 or 9 PSI. I used a Mac valve.
I have a question, is this technique similar to what you would do with aircraft panel lines? If it’s similar, I now understand the basic concept.
Boy, what a night and day scenario! I’m still going to lightly go over the M1 body again. Then it’s off to the turret. Thank you sir!
Toshi


Yes! That is the effect you are looking for. Since the sludge wash was so dark and prominent you have used it as a sort of post shading. After you finish the turret, lighten up that color just a bit more and go over it one more time, keeping to the centers of the areas you just did and see what happens next.
You’ve got the idea. Roll with it, nice and easy. ![]()
Oh, and yes, this is what I do on my aircraft lol.