No worries I will warn people more clearly in the future when I post reference pics of models that are not my work. Appreciate the nice comments Rob.
Build Update:
38H Assembly Time: 6 Hours
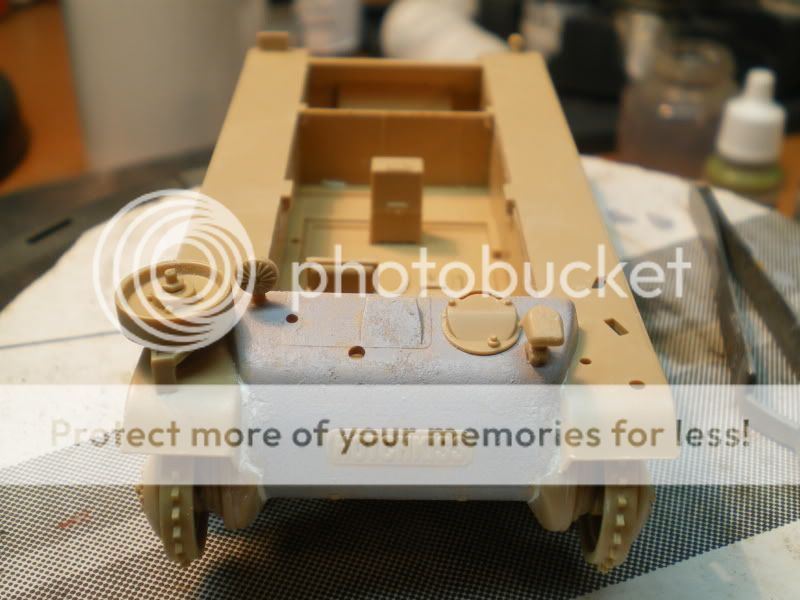
Yesterday was challenging to find any build time but I did manage to squeeze in two hours. I finished the very rudimentary interior and managed to get the fenders and cast front piece fit and glued. I still need to eliminate the seam by appling Milliput and I was thinking I could apply Mr. Surfacer or a cast a coat product to provide texture. Would this have been a smooth or rough cast surface?
Here a few pics:


I can’t help you as far as the cast texture is concerned Edmund. The fit at front side would appear to be anything but TamiGawa. I love the big Hotchkiss nameplate but those gaps… I also saw that Trump has one of these tanks with wurfrahmen fitted, might be an interesting subject.
Julian [tup]
Hi Julian,
Welcome to Build #5! [swg] Once I figure out where it should be a smooth or rough cast texture I will address the gaps. I love the Hotchkiss name plate as well but since it is cast everything should have a rough texture and my next steps I would think is to fill the gaps with milliput and then texture the remaining surface accordingly.
Yes texture the cast parts as you would a sherman turret.
LOL! And that would be how???
Thanks Andy I have read a few posts and magazine articles about how Sherman guys apply a cast coat I just never payed that much attention. I will research and approach it as indicated.
Just stipple on the mr surfacer ,wait a few mins and re stipple being carefull not to damage the lettering in the prosses.[tup]
Thanks Mate I will pick some up on the way home tonight!
Edmund,
You’ve addressed the gap above the Hotchkiss plate but just want to be sure that you also know that the gaps on the lower hull where the circular final drive housings mate up shouldn’t have a gap either. That looks to be a tougher challenge to tackle as the gap is pretty significant there as well.
Hey Bill.
The plan is pick up some Mr. Surfacer on the way home tonight. I will sand down the glue on the seam, apply Milliput to all the gaps and then let dry possibly overnight followed by the application of Mr Surfacer over all three angles of the coast nose piece except for directly over the name plate.
Build Update:
38H Assembly Time: 8 Hours
I was able to find Mr Surfacer at a LHS on the way home and after meeting my family commitments and the daily gym committment I attacked the gaps with Milliput. I then after watching a show with my wife and reading a tutorial or two on Mr. Surfacer applied three to four light stipled coats like Andy suggested.
I really like how it turned out. I also got some hull details applied. Here is some pictures of this small little guy in progress.
Build Update:


Lookin good mate, by the way your not allowed to do a better job than me LOL[(-D]
The artillery is observing excellent work thus far[;)]
Rounds Complete!!
LOL! Funny! If the plastic stays together and the paint stays on I have suceeded!
Seriously the real challenge you had in which you were very successsfull at accomplishing and is my main goal as well is for the end product not to be toylike.
Due it’s diminuative size and lack of detail avoiding it looking like a toy is a real challenge.
The lower hull and upper hull piece fit is going to be a nighmare and a study in patience!
Thanks Mike I will proceed with cautious optimisim!! [swg]
You would never know by looking at it that they were once separate pieces, looks good Edmund! I would recommend shooting some primer now just to double check the work and see if there are any spots you might need to touch up or add a little putty to here and there. The white can be a little decieving in terms of it looking great and then once you get paint on, seeing that it’s uneven or irregular relative to the plastic surfaces. If you check it now, you can correct before those areas become less accessible once you attach the superstructure. [;)]
That’s a great ideal Bill you would almost think you have built almost 100 models in a row with that suggestion! [:D]
I wll get right on that. I do have have a question on this vehcile. Do you think it had Hull Red as a primer or should I just use a primer grey and be done with it?
Looking good Edmund, the front of the hull came out great. Like Bill said, you can’t tell it was seperate pieces.
Rob
Morning Rob,
Yeah that Mr. Surfacer is some awesome stuff. I will never have anymore kids after using it but it’s cool! If California doesn’t like Metalizer products they probally banned this stuff!
I am working from home today so before I get into my inbox I am going to take Bill’s advice and shoot a coat of MM Acryl Grey Primer on the lower hull to ensure that I didn’t miss any cracks.
Excellent “nose job” Edmund, looks better than Barbara Streisand [swg]
cheers,
Julian