Funny. My first and last encounter with Vegemite was back in 1983. Was in a tennis tournament against an Australian tennis team which was on tour. Tried the Vegemite after the match, and couldn’t spit it out fast enough without offending anyone. I love Aussies, have Aussie friends and colleagues, think Australia is great, but you can keep all the Vegemite to yourselves. By the way I won my first round match, but lost in the second round to a guy who was the fastest little guy I have ever seen!
3 Likes
Haha, what a tale! I can promise you nobody would’ve been offended, in fact other than complaining about the heat and blowflies our favourite national past-time is observing our guests reactions to an over-applied Vegemite snack…
Best of luck with the build, and loving the progress so far! I know what you mean about losing the groove, but your last step was a considerable undertaking so it’s important to be in the right headspace. A half-hearted effort might not have negotiated the nose gear as effectively as you did…
1 Like
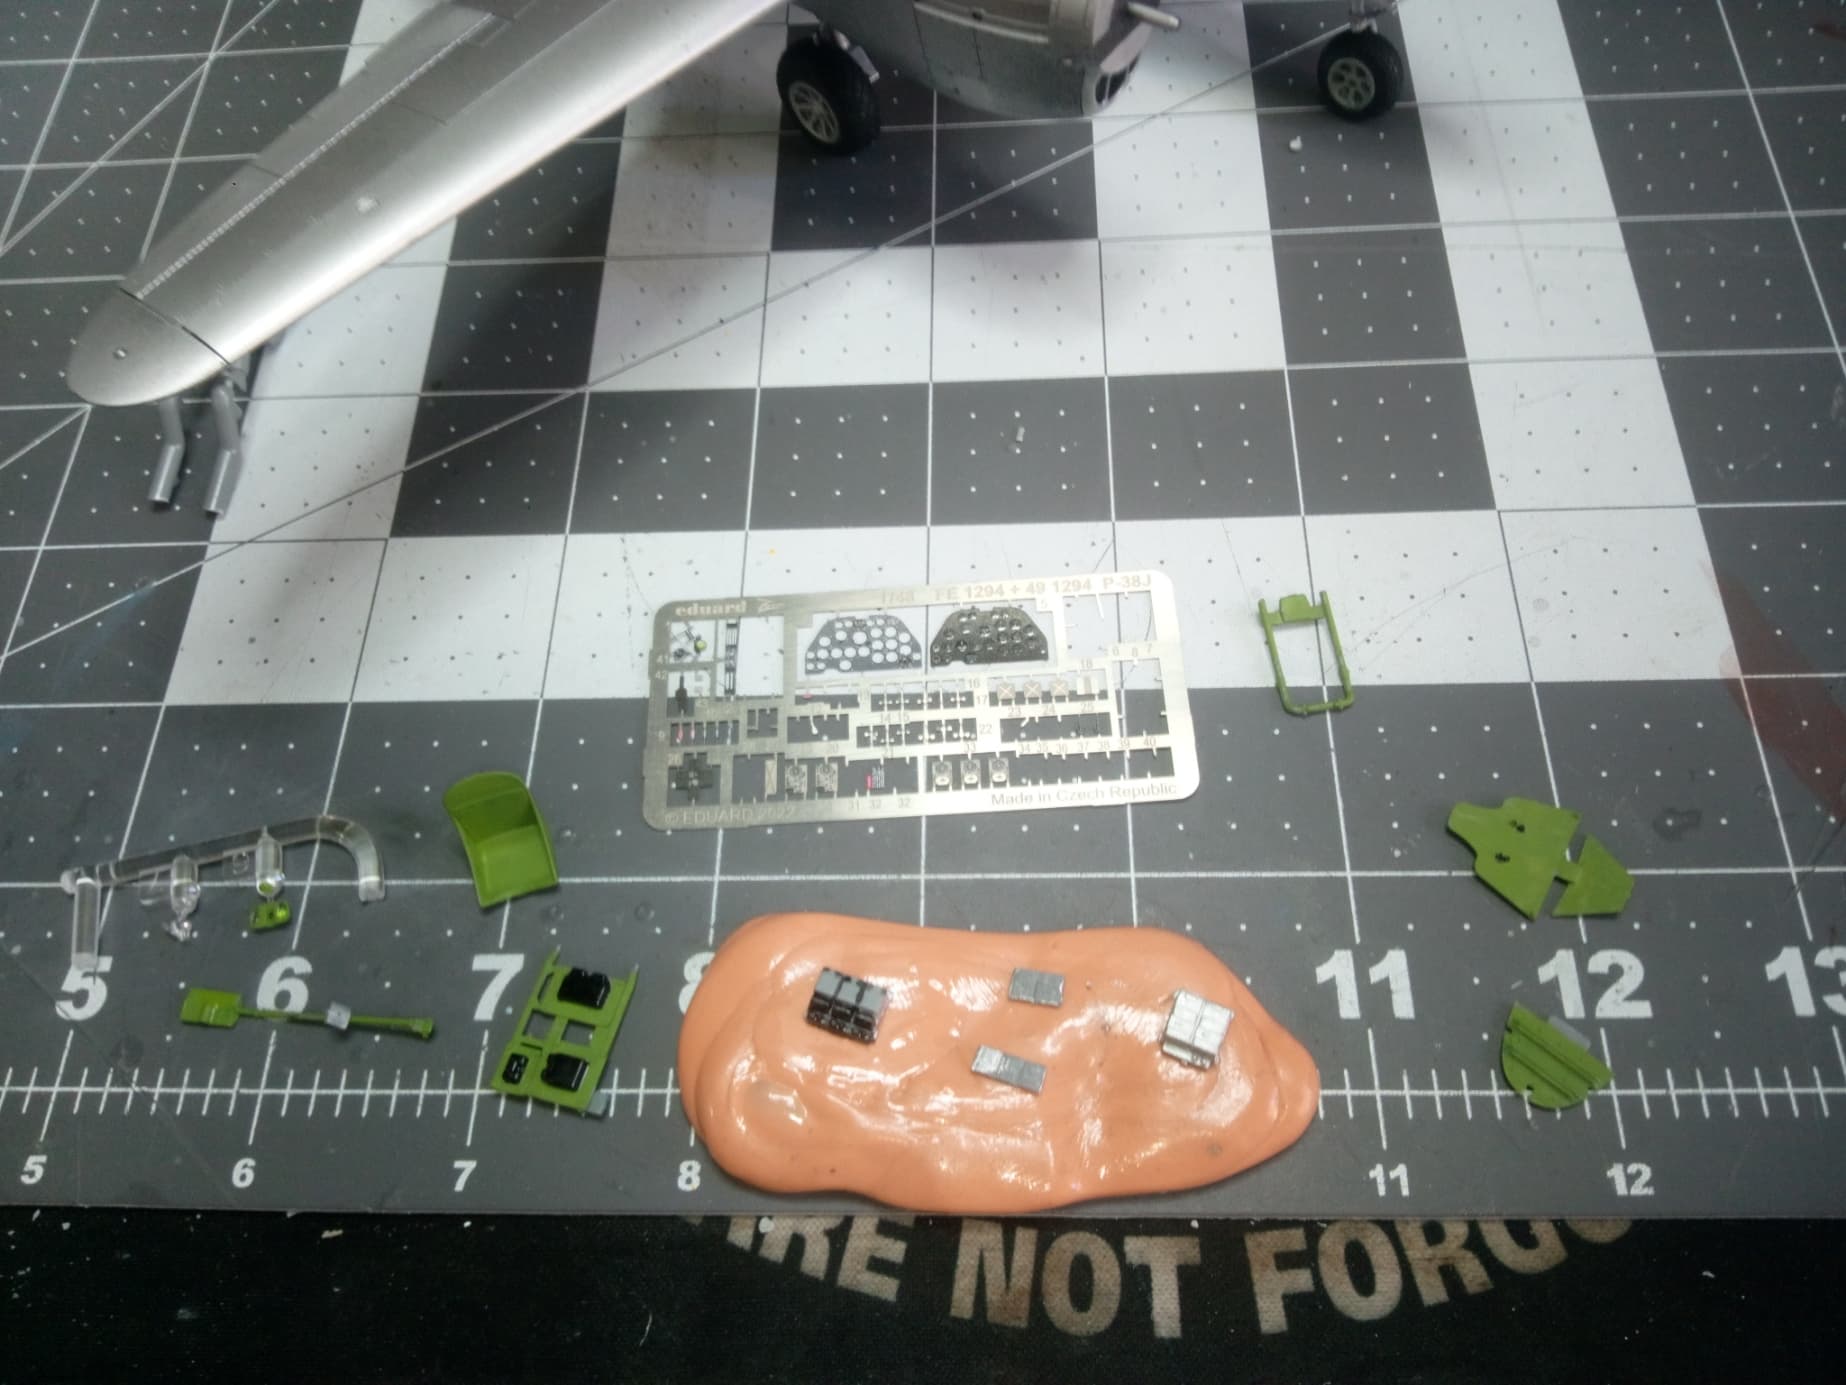
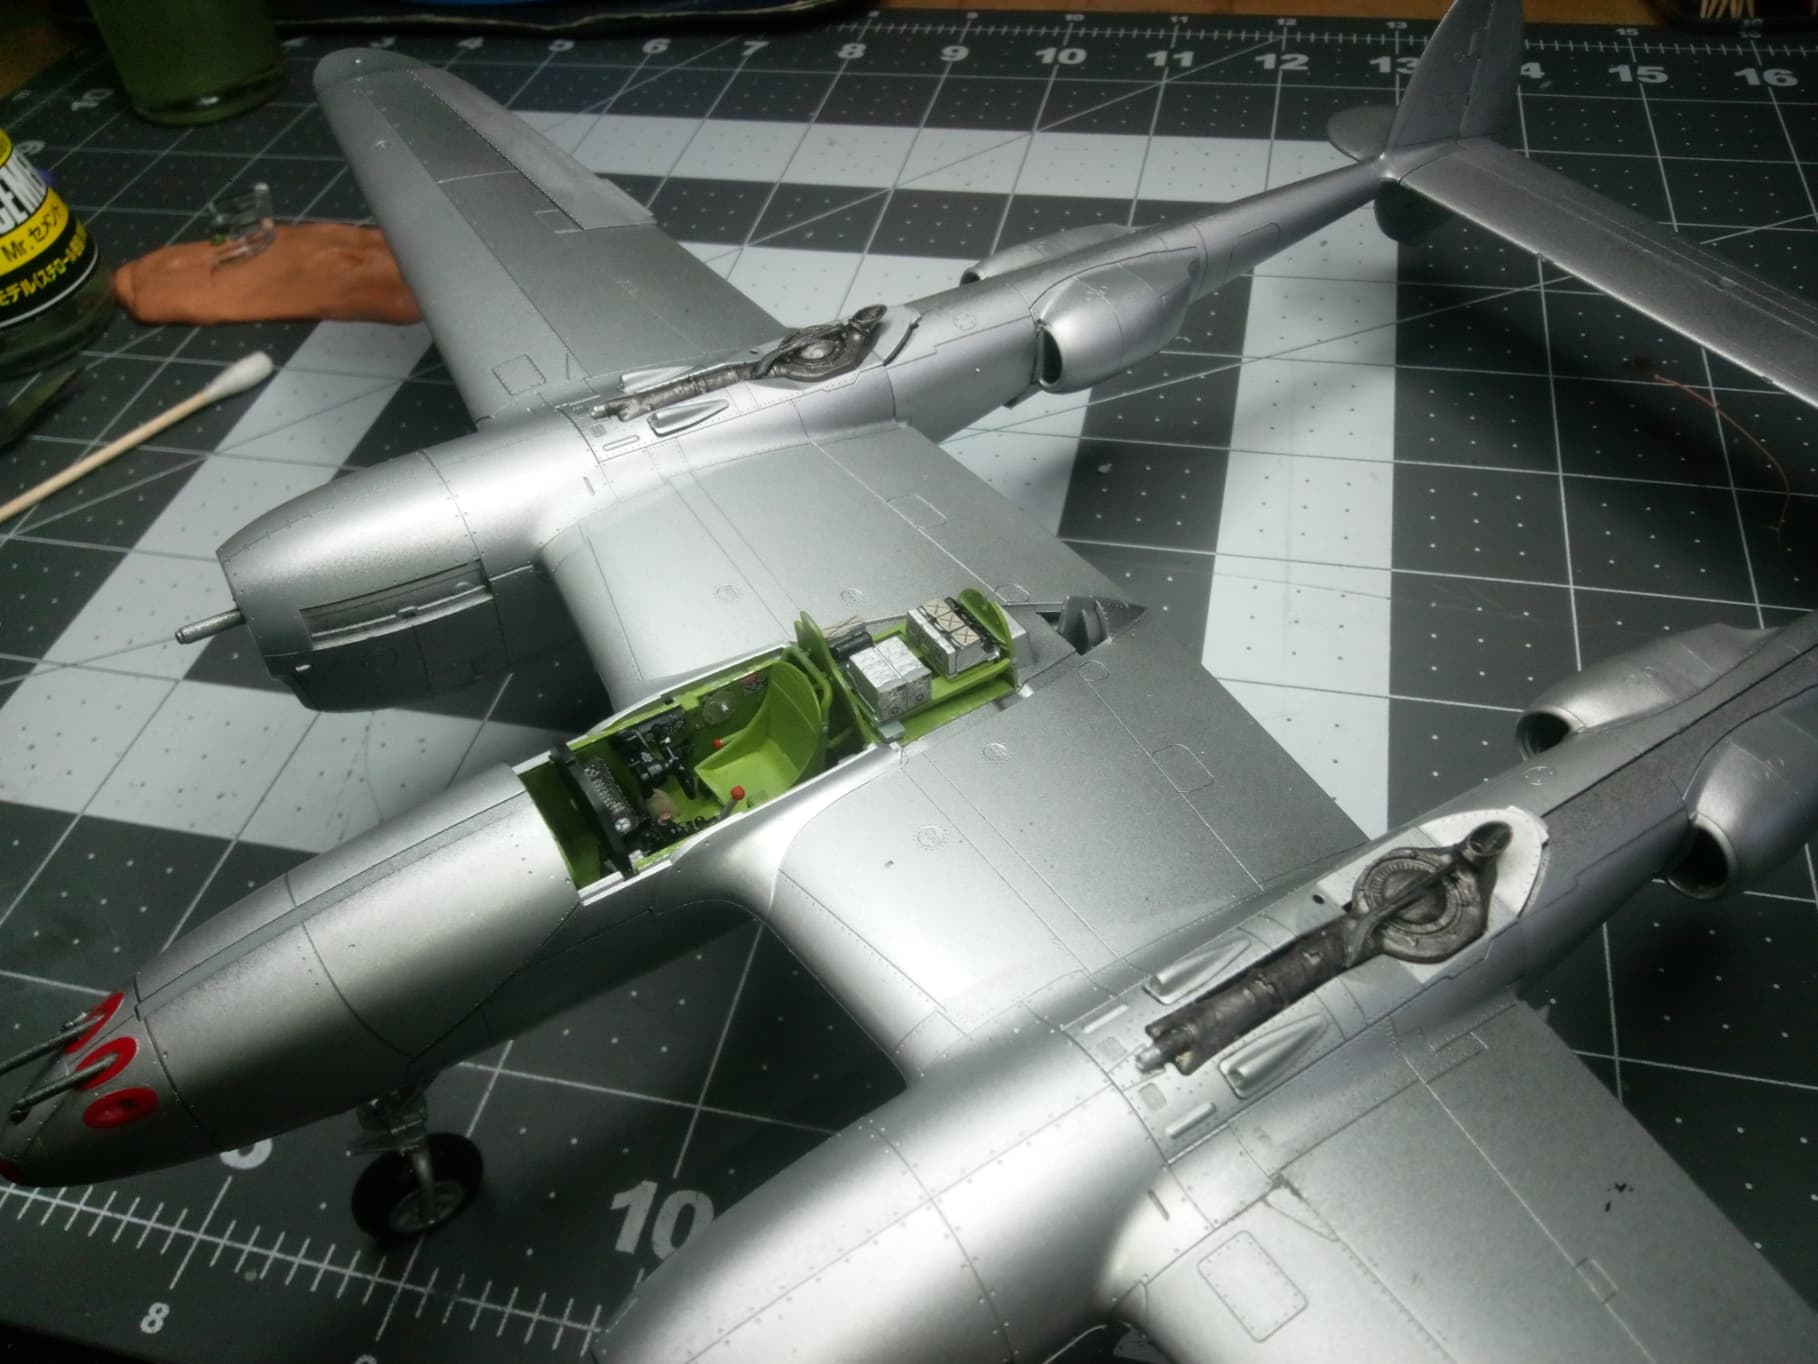
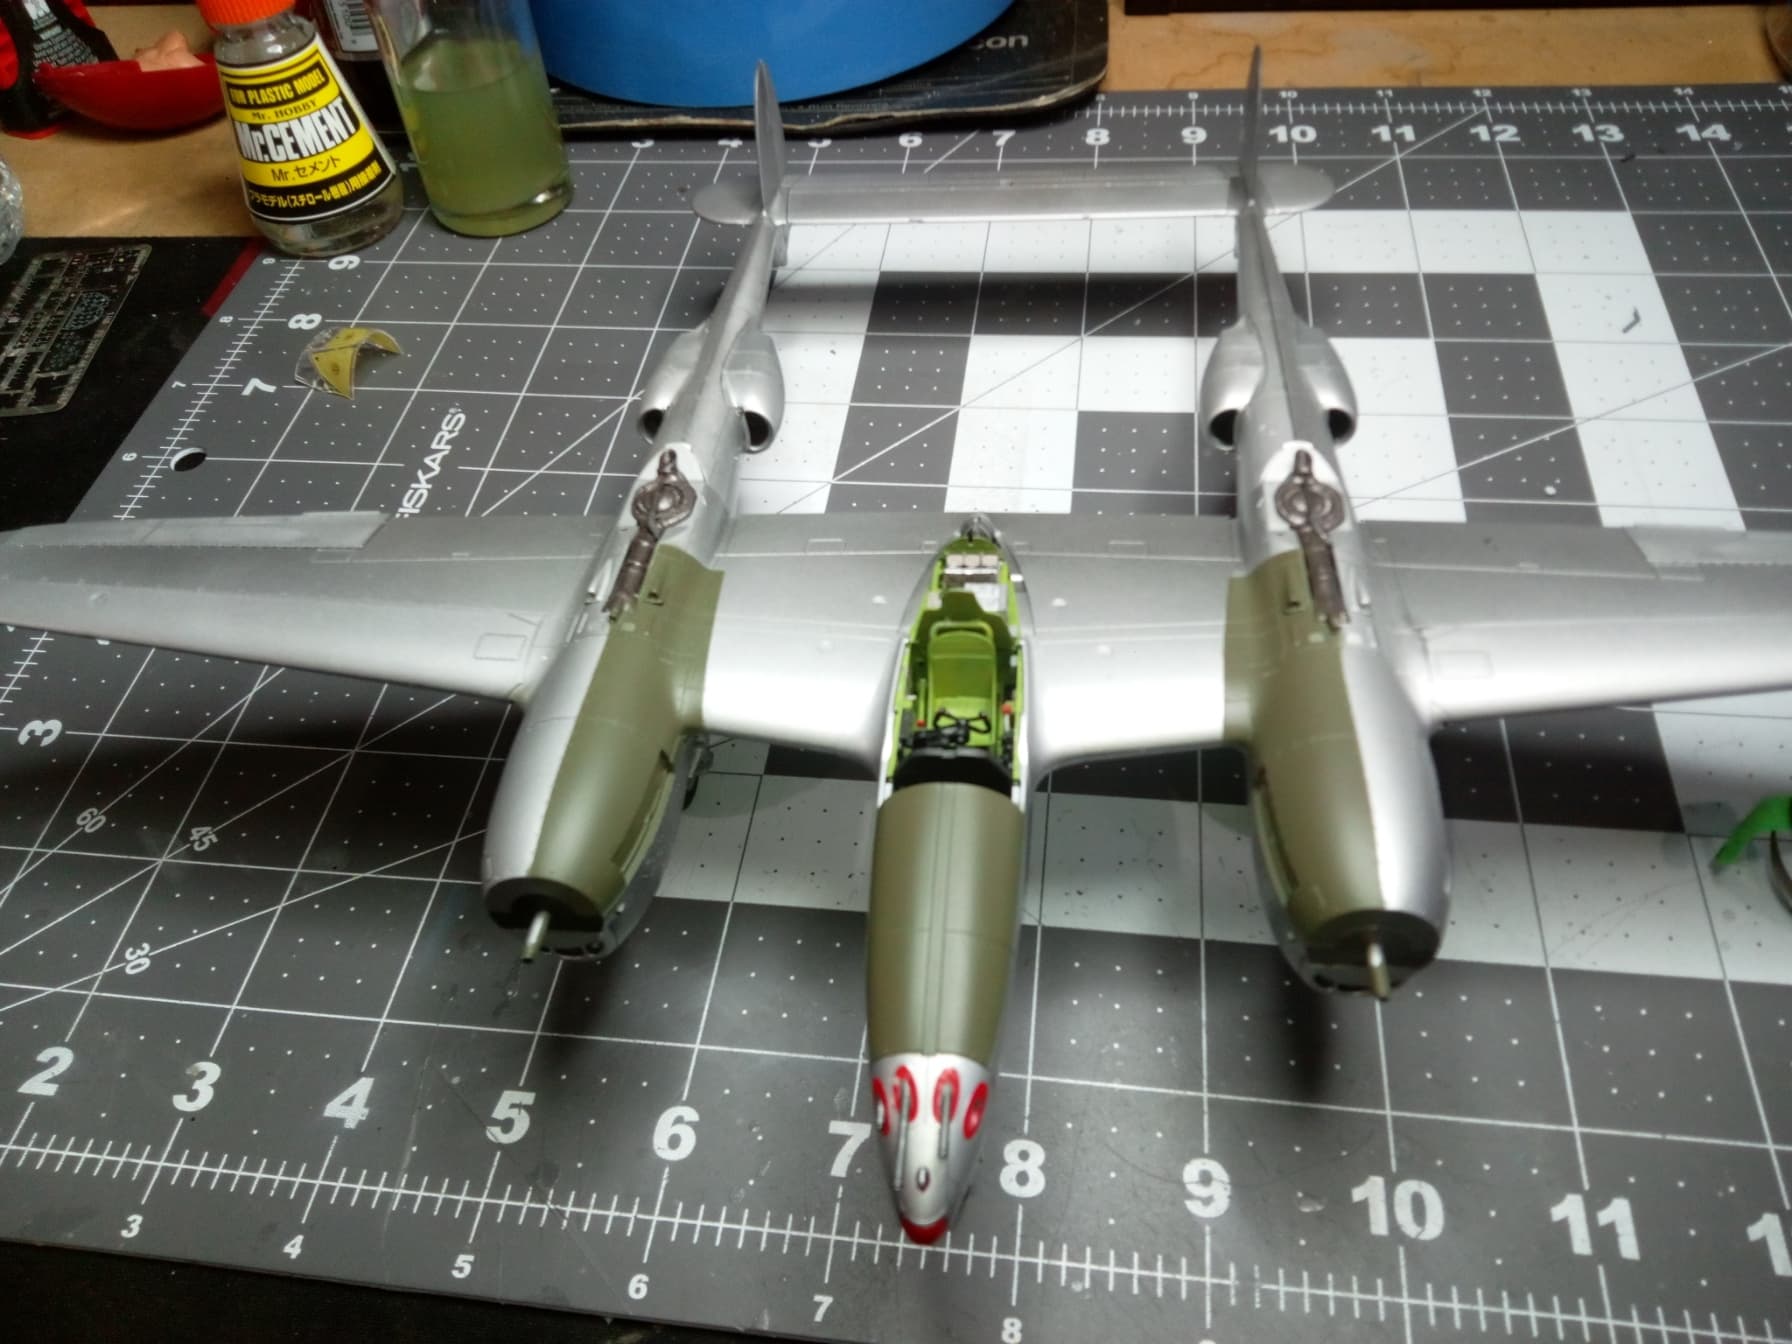
Got the rest of the cockpit equipment (radios, seat) built and installed today. Some of the PE bits were as small as a grain of sand, but they sure make the radios look real. This took me the full session. Here’s a couple of pics:
Happy modeling!
6 Likes
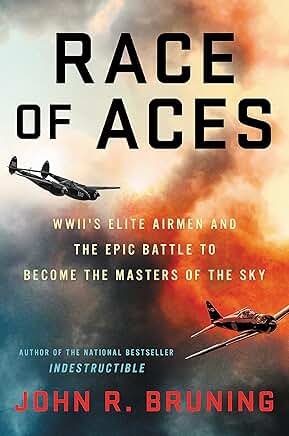
FYI, if you haven’t read this book already, recommend you do. Very interesting and informative detailed account of the SWPA aces and the competition to be Number One.
3 Likes
Looks great, what a beautiful, large aircraft! I had no idea it’s wingspan was so much larger than a modern jet, and about the same as A-26 or mosquito bombers until I saw your photos on your cutting mat.
And I agree with you on the microscopic PE stuff. I made the executive decision not to use some of mine on the F-86 I’m working on, because they were literally smaller than the drop of glue that I would have to use to attach them, so what is the point?
Maybe I just need a technique that I’m missing? I find some to be damn near impossible to install and look good. I just received some PE specific glue that maybe is better. Plus, some of these PE bits would require a magnifying lens to even see, and if the canopy is closed, forget it.
1 Like
I will be definitely checking that out (of my local library)!
Yeah, I’ve definitely edited some of the PE. This Tamiya kit has great detail which was better than the PE which was supposed to replace it. I use Loctite Time Control Super glue applied with an applicator that comes with then DSPIAE Glue station, or a sewing needle or watch lubricator tool. I use a bit of Scotch Mounting Putty on the end of a toothpick to pickup the micro-bits and place them, removing the part from the putty with the tip of a hobby knife, then nudging the part into place with tweezers or toothpick. Works for me. Hope it helps you.
2 Likes
Got back to the bench today. Volume of accomplishment was small, but time consuming and tedious.
I got the canopies masked and I have to say, while masks are great there about as bad to attach as PE! The kit came with Tamiya masks, which are not die cut. I had to cut all the little pieces our one by one, then attach to canopy. I’m doing open canopy on the kit, and the little rollup windows were the worst!
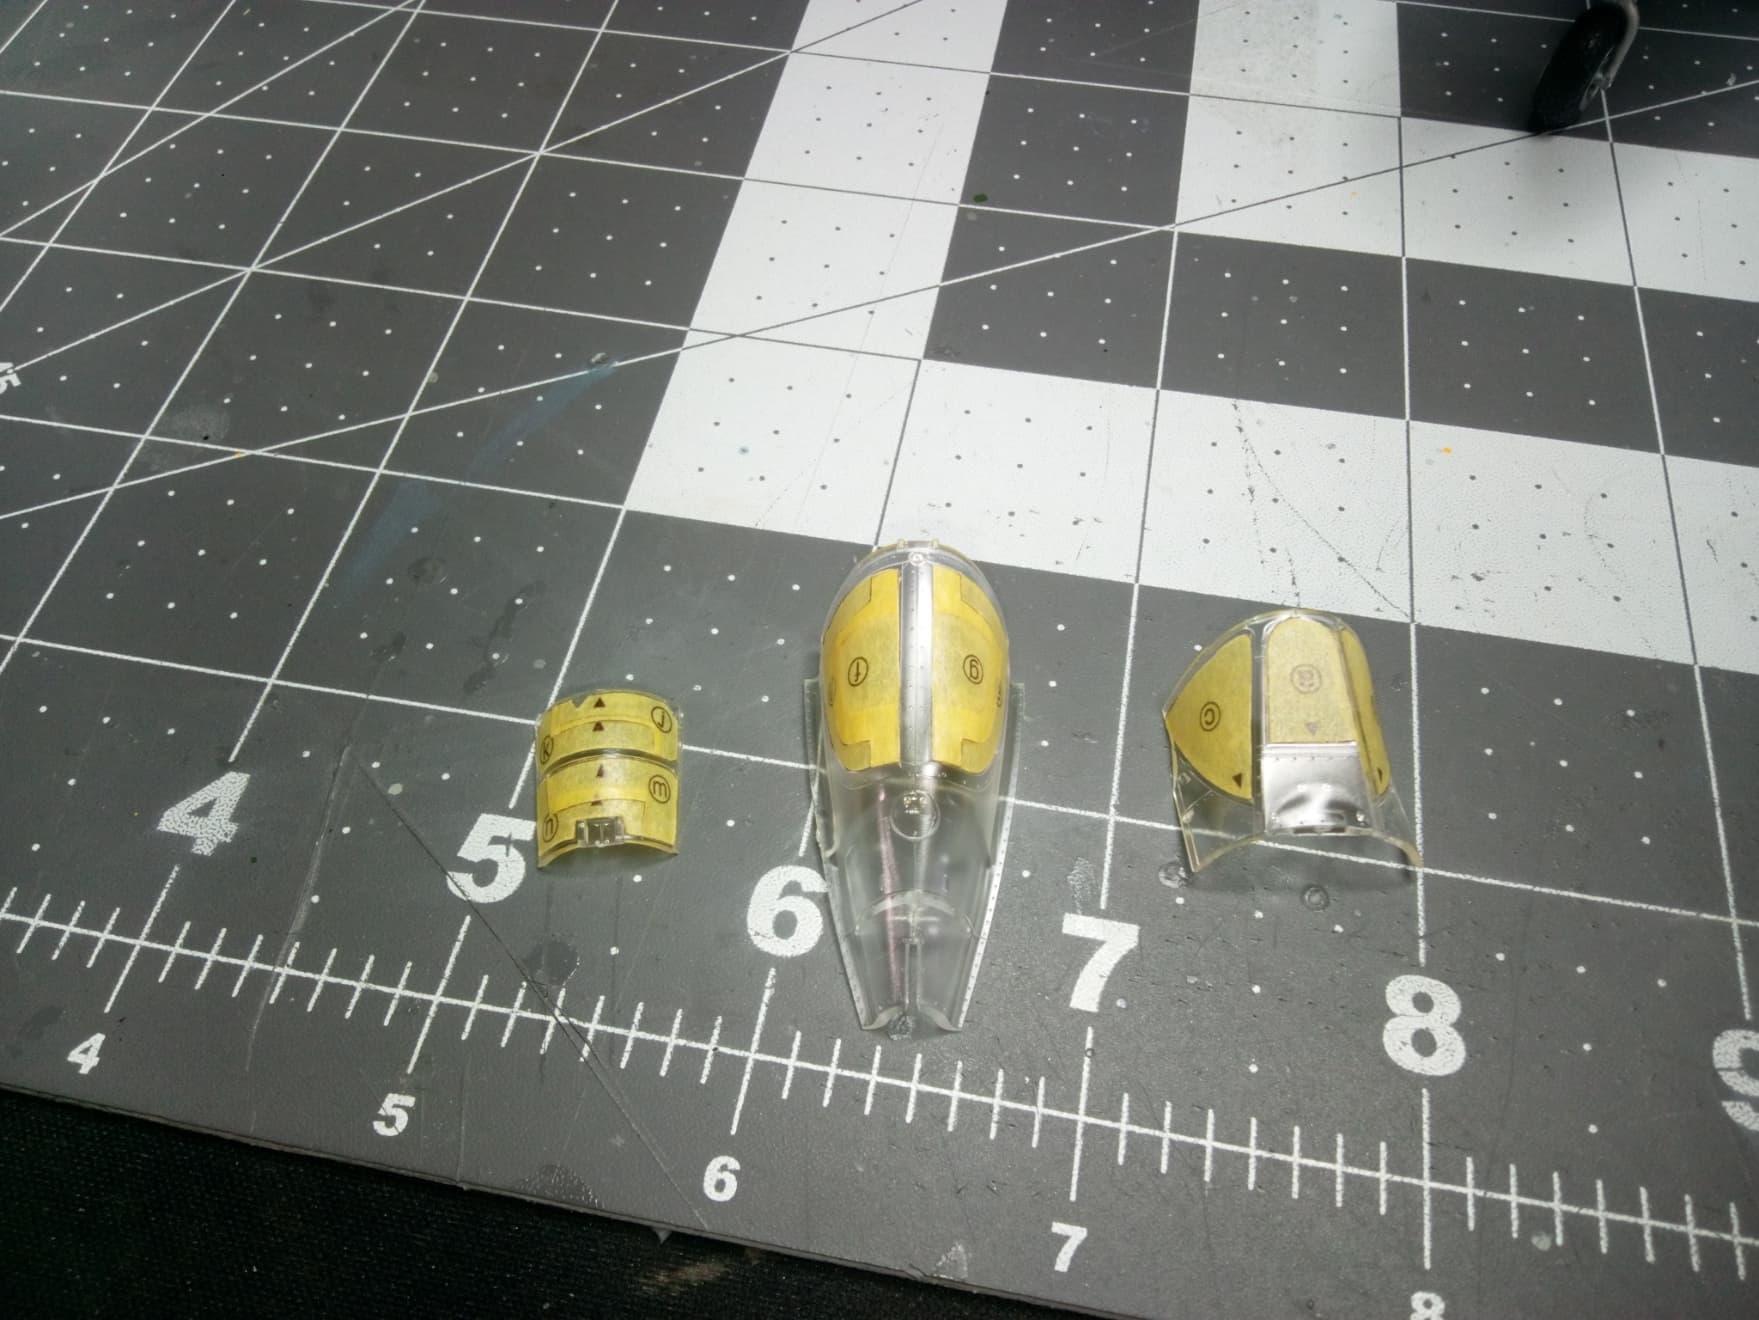
I then masked the plane for its antiglare olive drab. As you know, careful masking takes time and patience, and I’m very happy with the results, shown below:
I also primed all the landing gear doors, props, and prop cones. Tomorrow is an off day, as the power will be out all day due to a neighbor and their need for a new meter. I may try to paint my pilot figure, as this is close up work and I have a lighted magnifier. Until next time…
Happy modeling!
5 Likes
That is very helpful, thank you!
Not sure if (a) I want to break my record streak of not having purchased a jar of Marmite in over 50 years, or (b) risk finding the cat(s) licking my models!
I wonder if it’s any better than just using chipping fluid or hairspray…
1 Like
I’m avoiding anything Australian that ends in “mite”.
1 Like
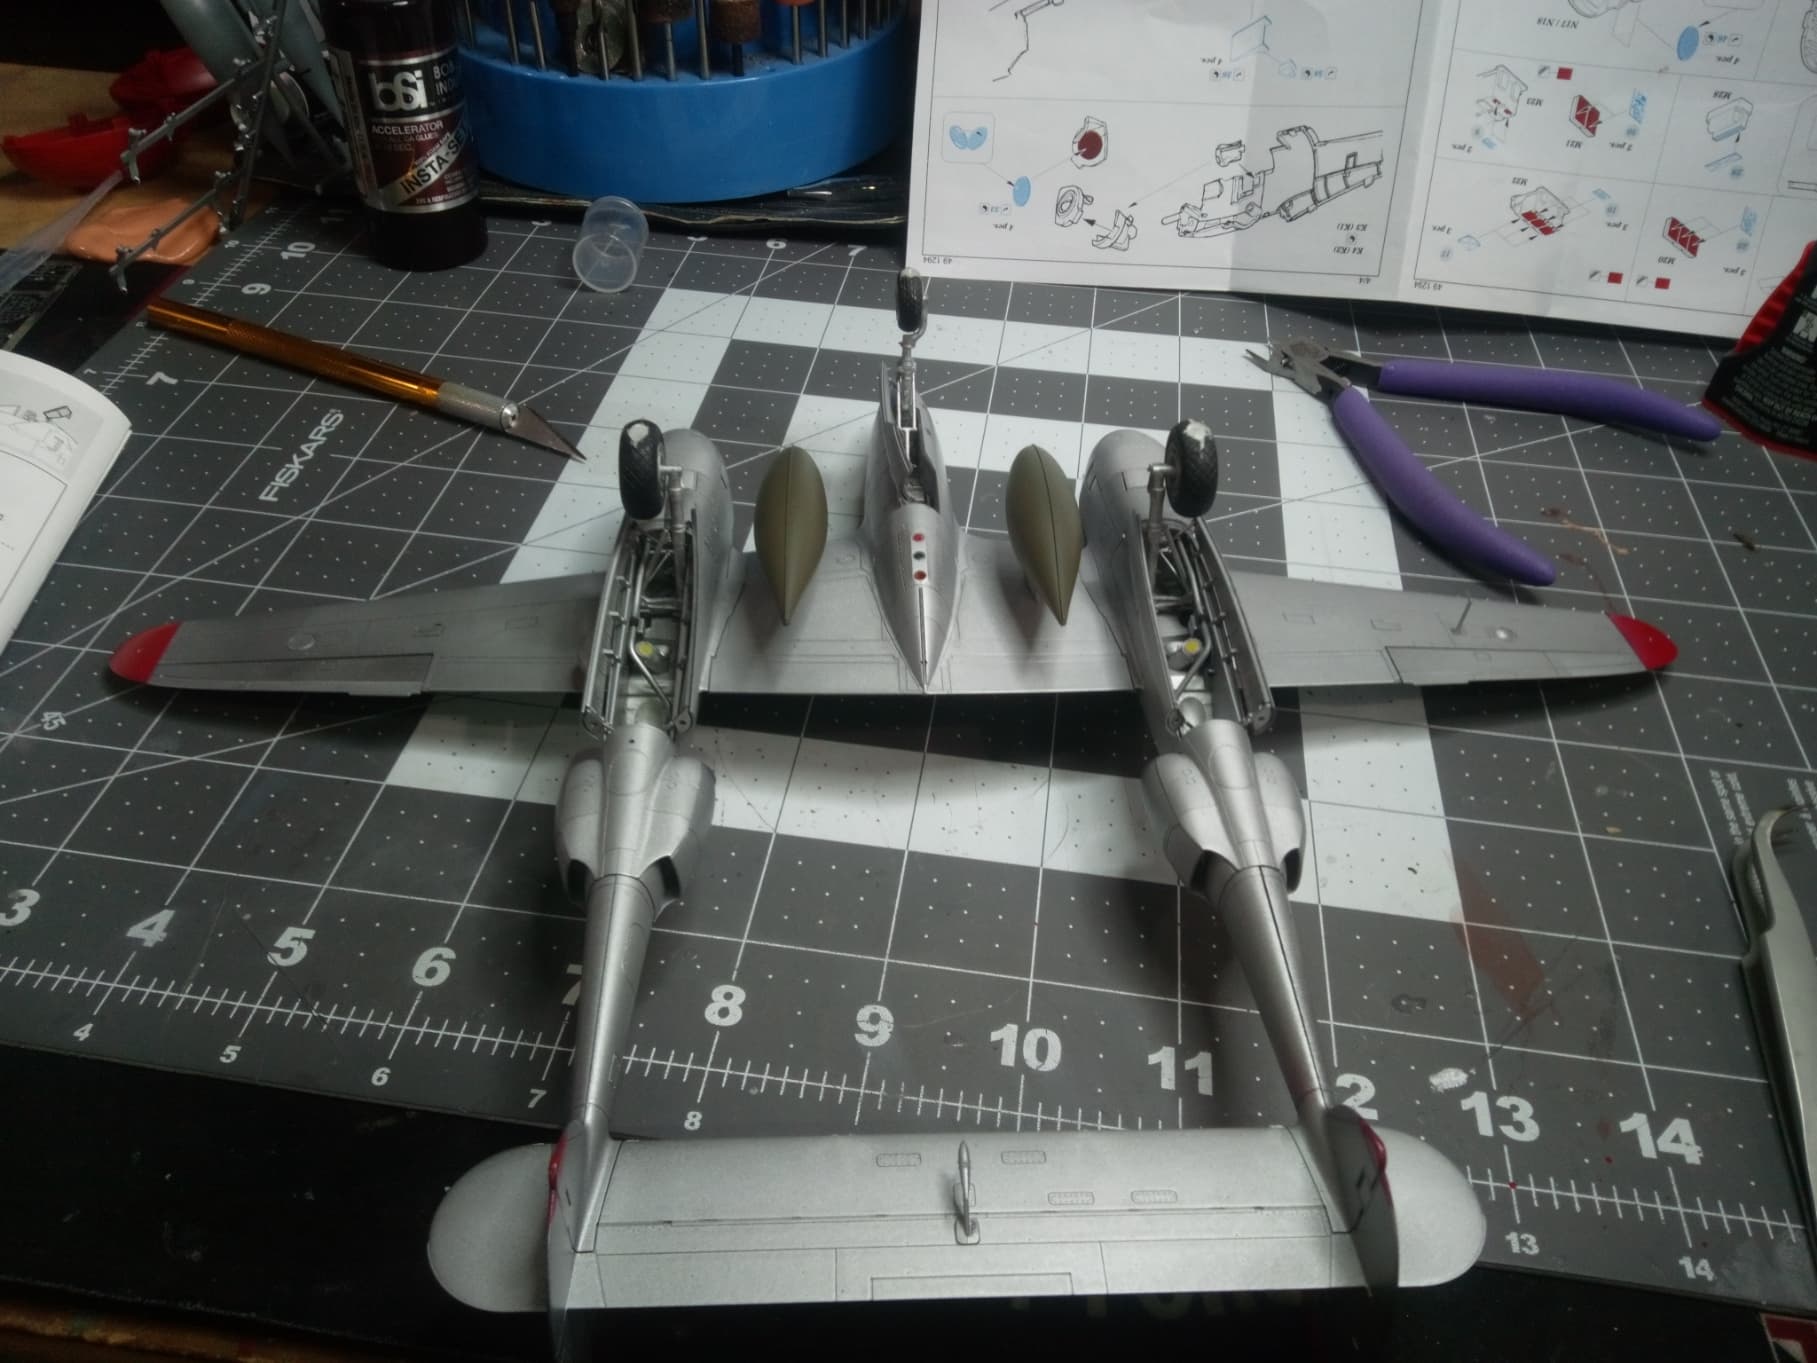
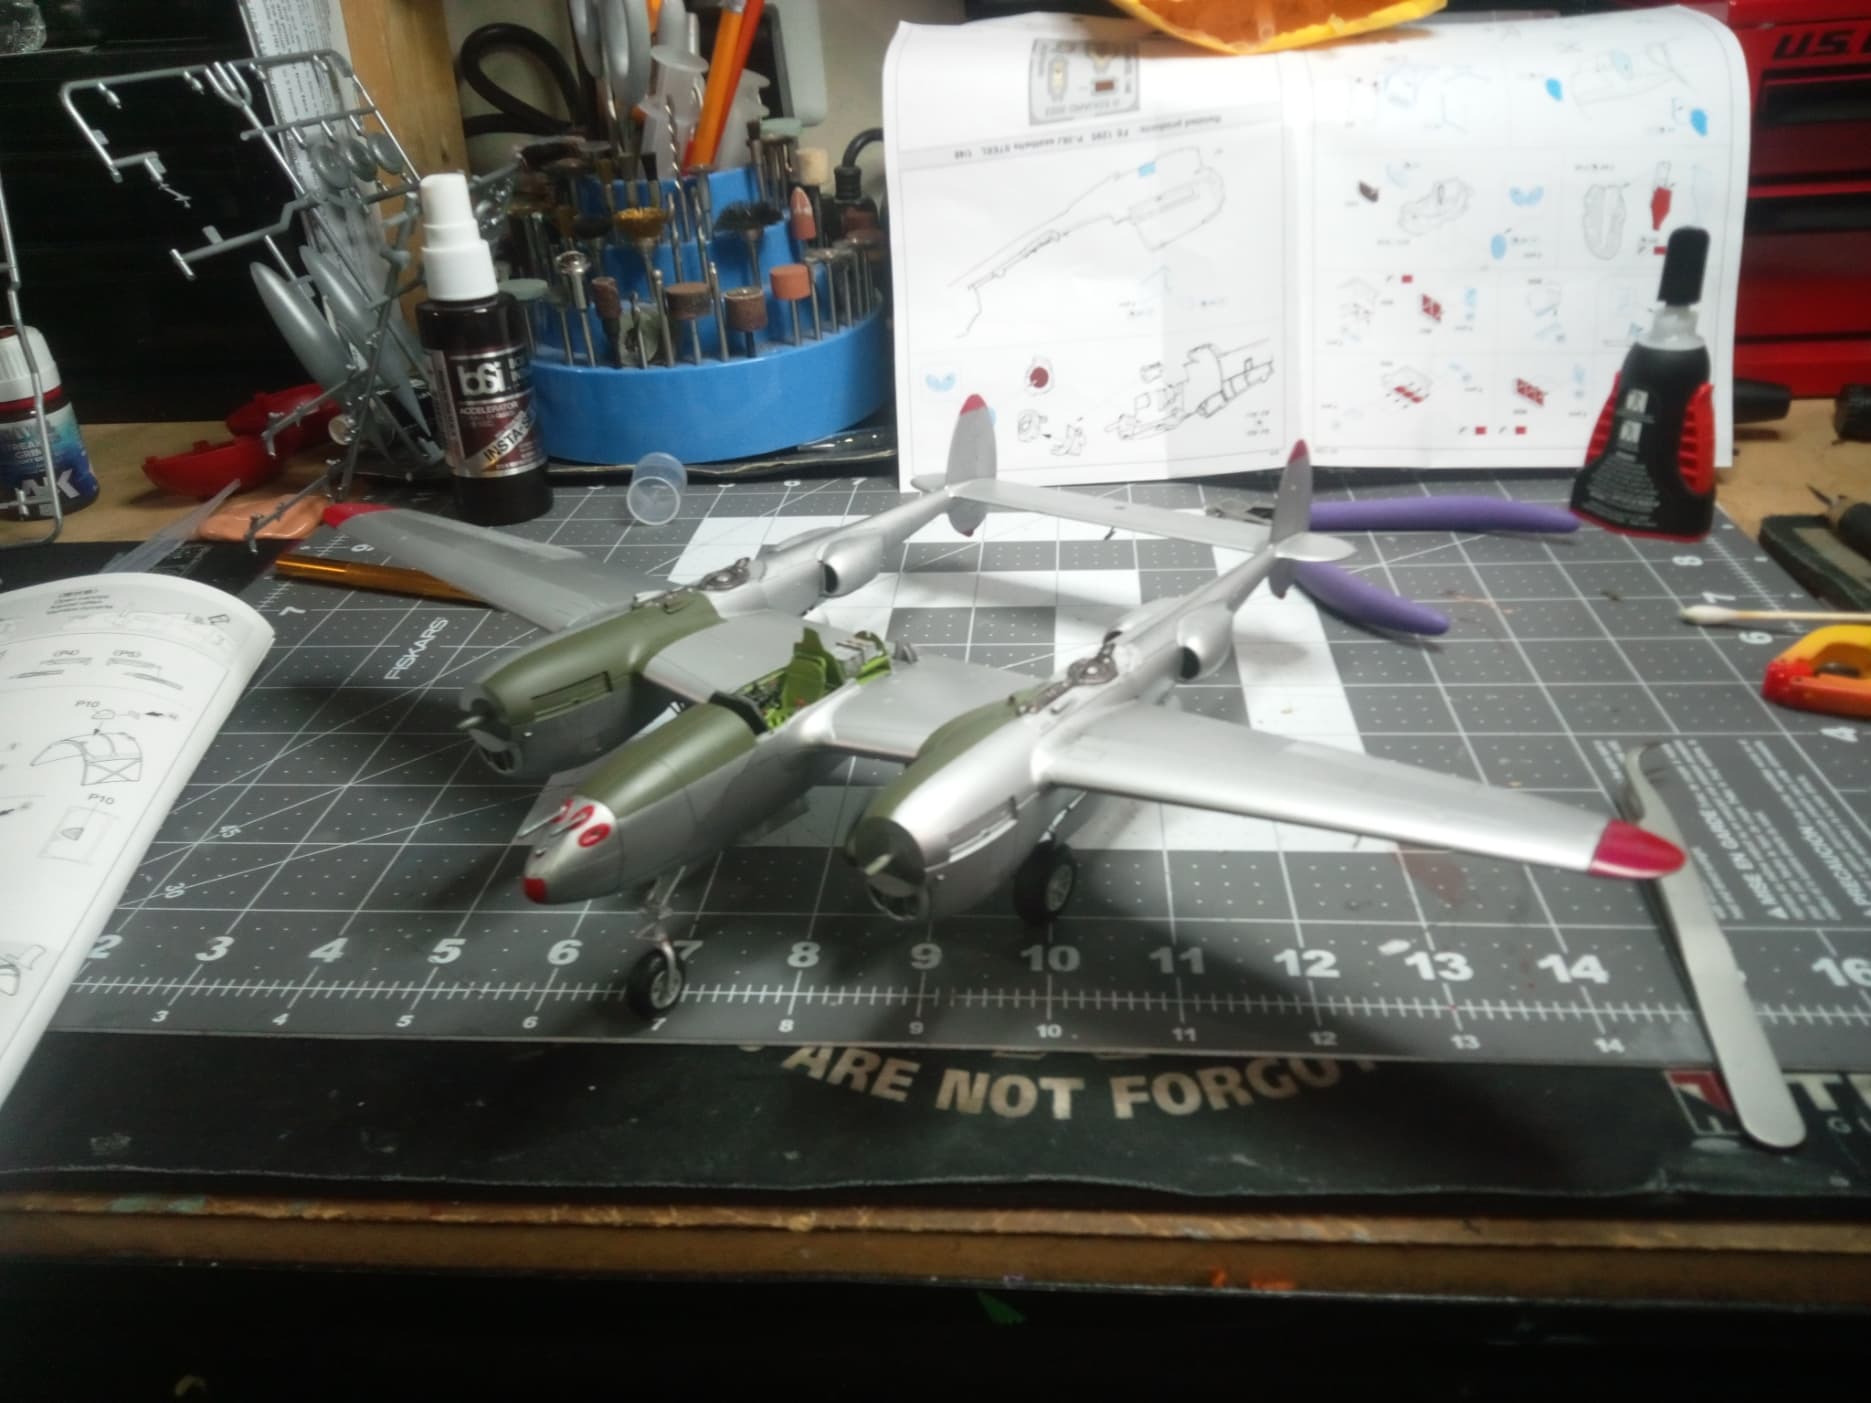
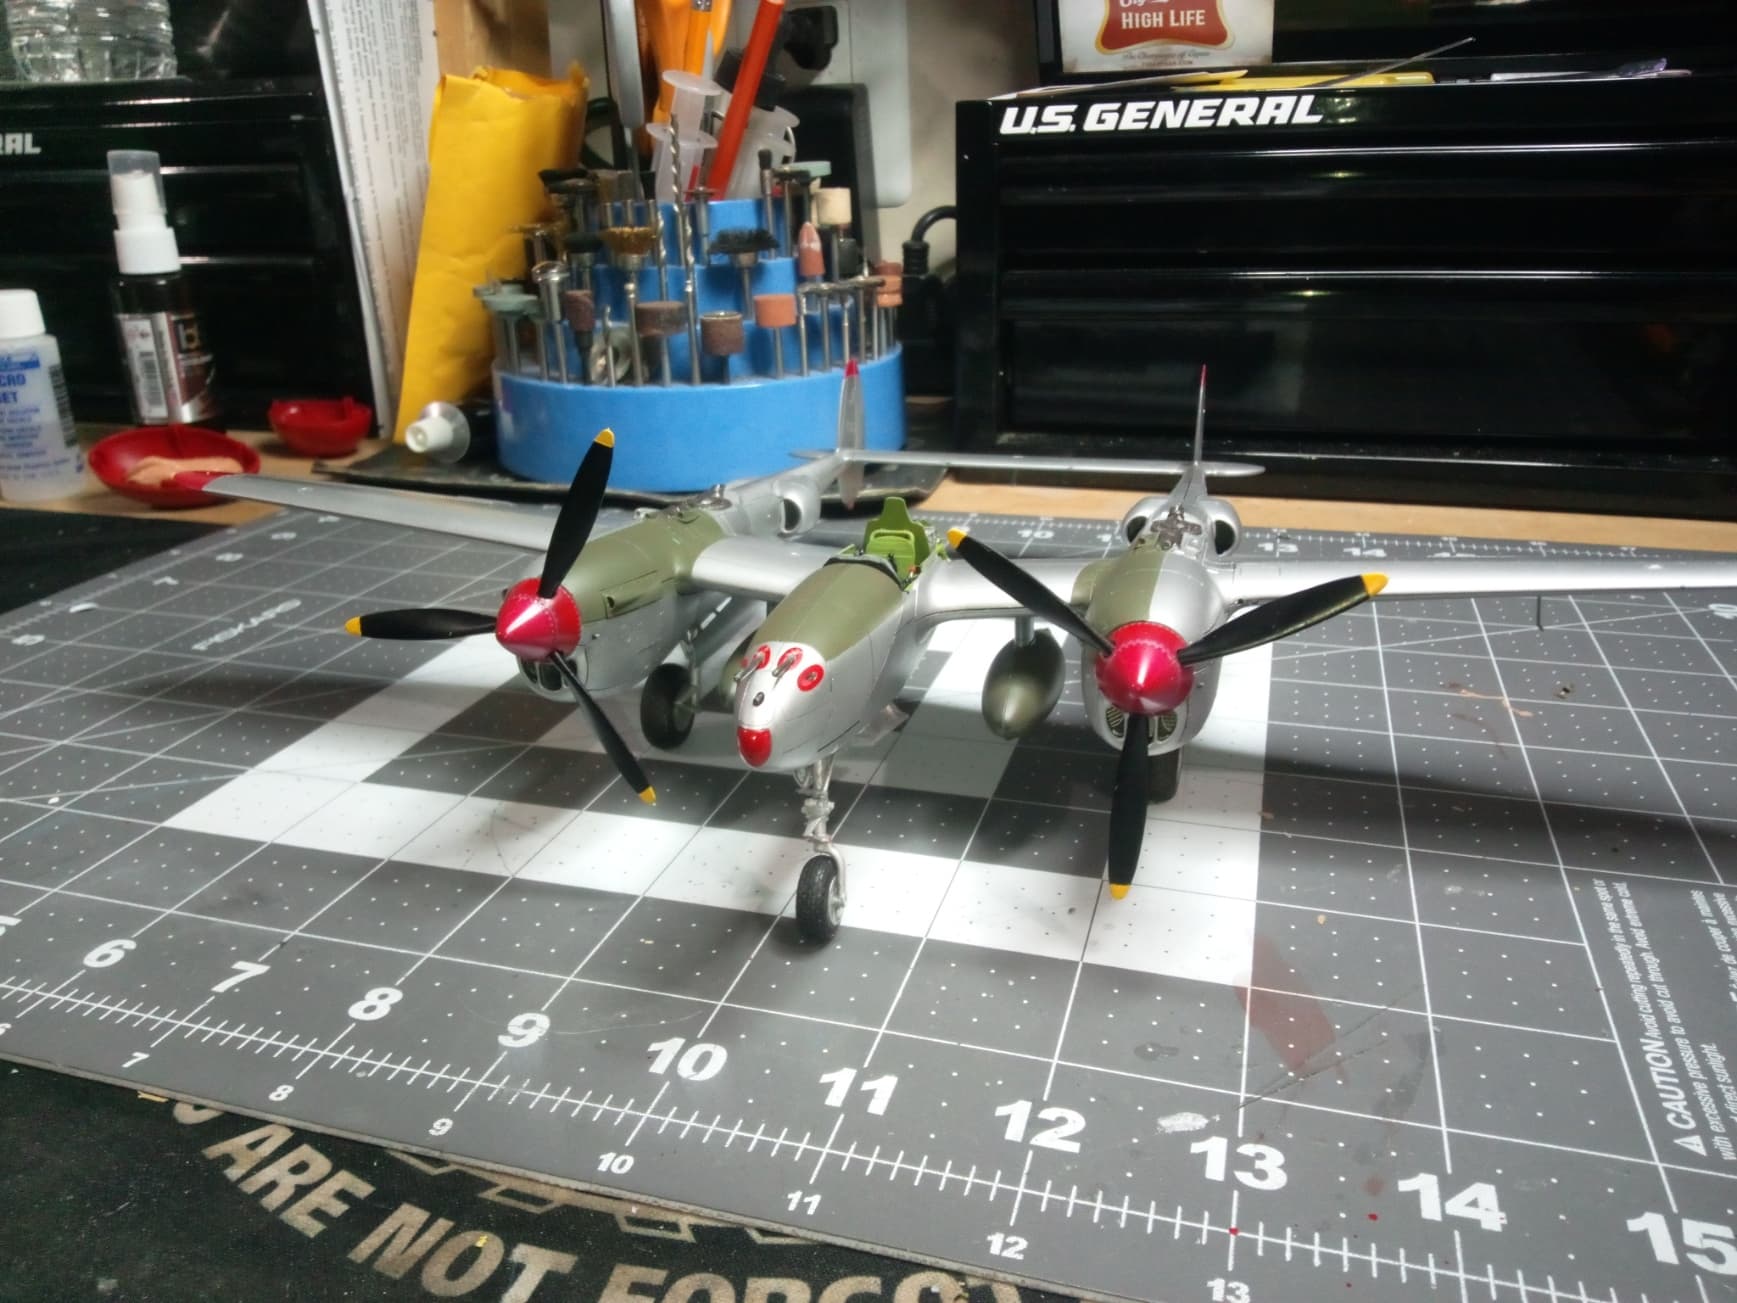
Got back to the bench this week and completed lots of stuff. Got the red painted on the wingtips and tails. Got all the canopies painted and their parts installed (gunsight and rear canopy stuff). Got all of the landing gear doors installed. Drop tanks installed. Nothing left but to install the props, paint the pilot, gloss coat, decal, dull coat and install the canopies. Inclement weather will prevent me from shooting the clear until next week unfortunately. Gives me time to paint the pilot.
Notes on the gear doors. The main gear doors install like a dream, simply slotting into place. Super engineering. The nose gear door was a pain in the rear. Mine was warped. Gluing into place was extremely difficult and forced me to use words that would make a sailor blush. Got it in but it’s not perfect. Also, here’s a tip: install the little door actuator arm before installing the door itself. Trust me, it will go smoother for you. While attempting to put this in after the fact, more unfortunate words were forthcoming before the part zinged out of my tweezer’s grasp, never to be seen again. Oh, well, it’s not like it would have been seen by anyone anyhow, but I know it’s gone and makes me ![]() .
.
Here’s a couple of pics of my progress:
So with the major things done on this plane, I will begin building phase two of this diorama, the Tamiaya 1/48 6x6 CCKW Fuel Truck. I will continue to provide updates in this thread on the truck build, as well as the completed Hero pictures of the P-38J as soon as completed, probably around 10 days weather permitting.
Happy modeling!
7 Likes
“Marge” is really shaping up nicely @mrb865. Bongs mount is one that I’d really like to build out of all the Aces.
With that being said, “Marge” is one of the tougher aircraft to research as the information or the lack there of that is out there. Or I should say, accurate information.
Sadly, non of the aftermarket decal companies represent 42-103993 correctly.
Just like the Tamiya kit along with Hasegawa’s offering, red wingtips are called out but with what’s out there in regards to photos and researchers info, this airframe likely did not have red wingtips.
What gets me is the fact that 993 had 25 victories which does not jive with the timeframe the photo was taken.
The Tamiya kit, the Super Scale decals along with the PYN-up decals which I have, all have a common scoreboard showing 25 kills.
The timeframe for each of the kits/decals is March of 1944.
Bong did not get his 25th kill until April 3rd, of 44 but 993 was lost on March 24th of that same year while piloted by Capt Tom Malone.
So yeah, I am scratching my head with this one..
As for his P-38 42-104380, this airframe was more likely to have had the red main wingtips per researchers and only carried the name Marge.
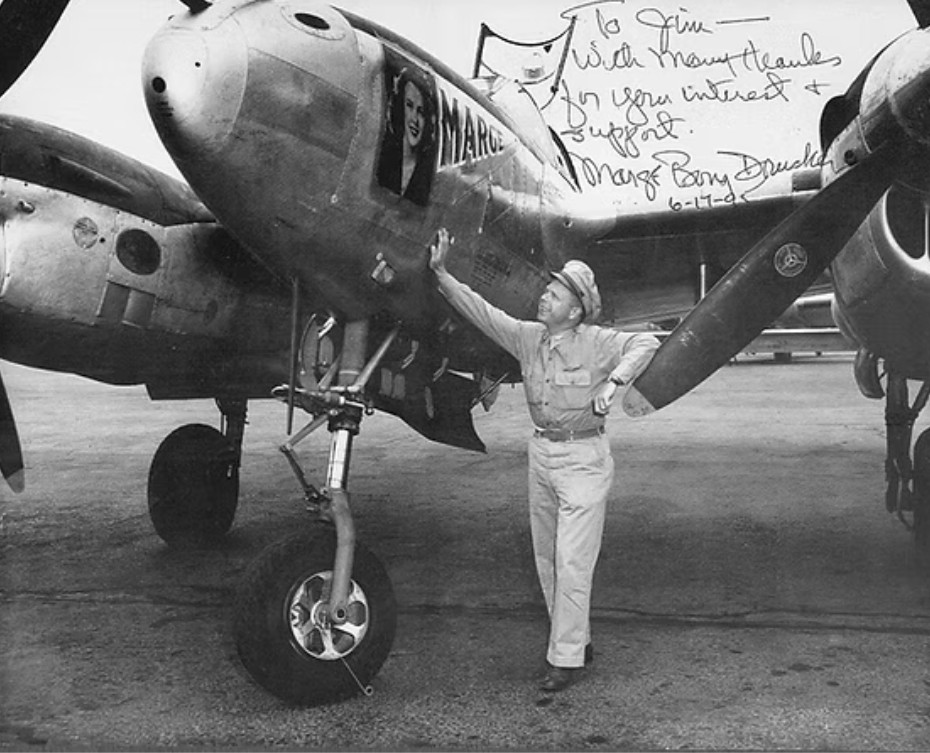
The Lightning he used for his war bond tour, was a TP–38 that had the radio equipment deleted and was replaced with a second seat.
Here’s a pic of Bong along with the TP-38 and if you notice, the scoreboard showing 40 victories was not applied yet.
Lastly, here’s the PYN-up sheet that I’ll be using.
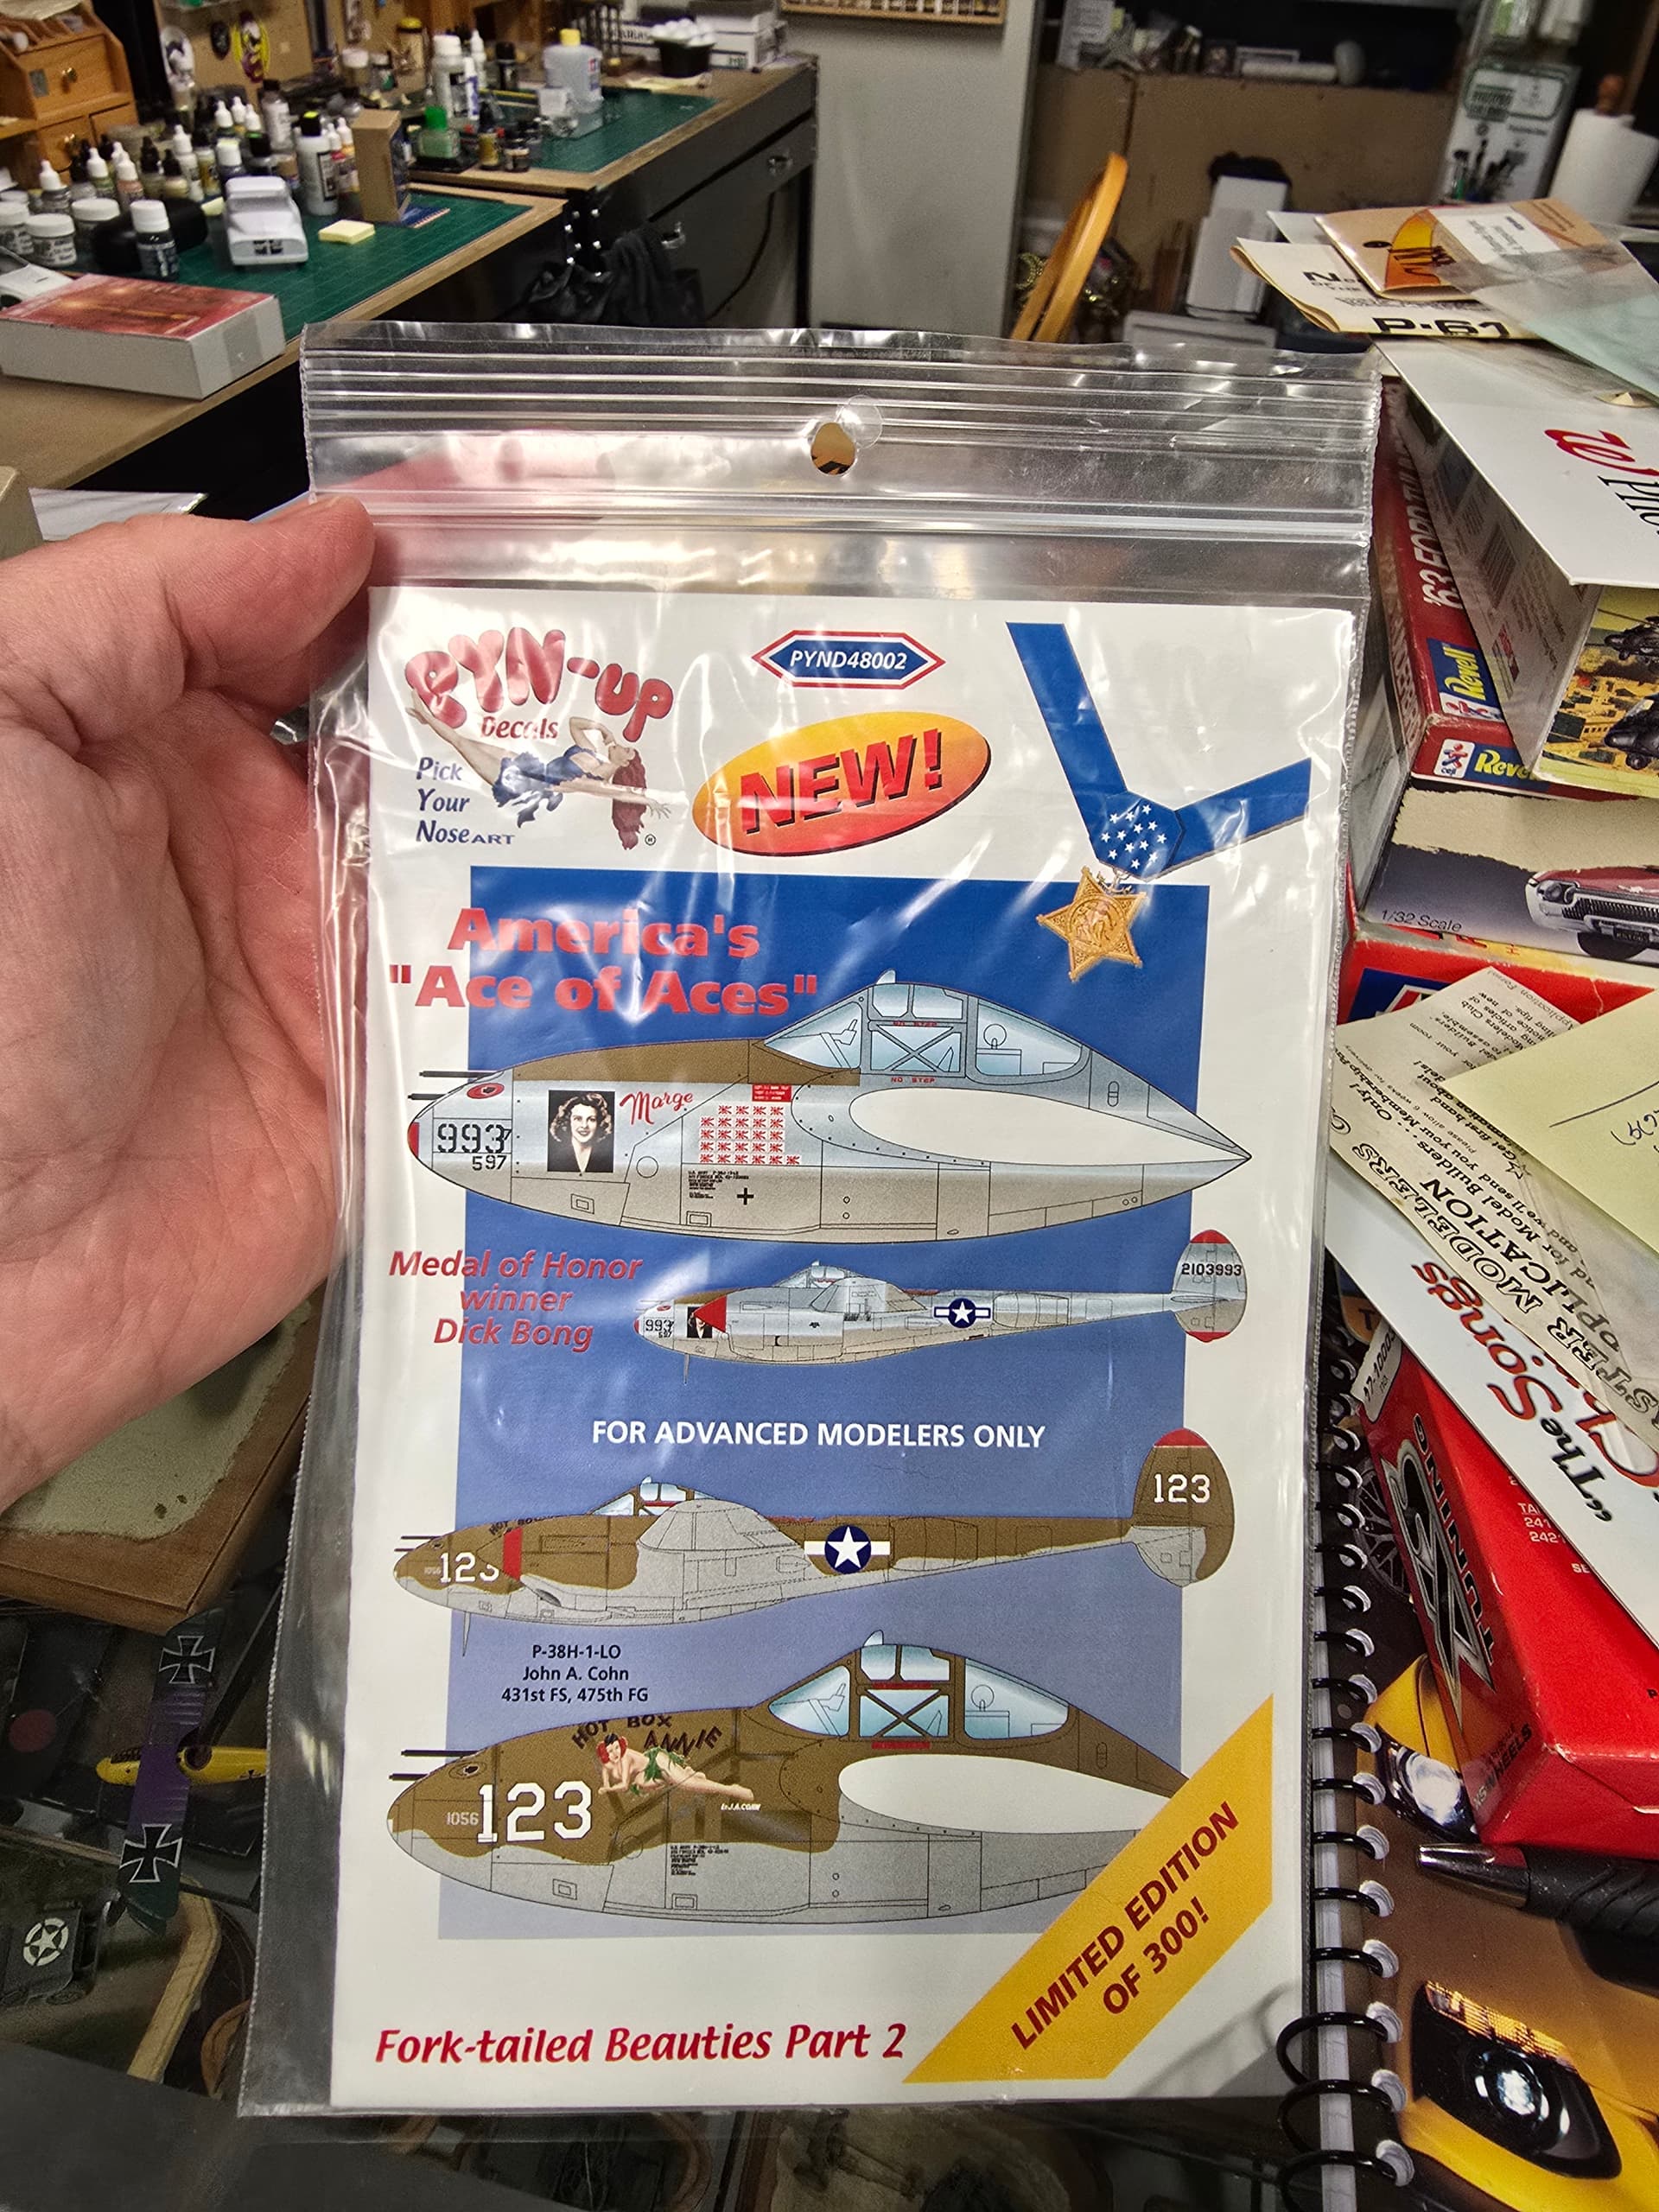
At any rate Mr B, I am really looking forward to seeing Marge done!!
Did I mention that I love doing the research ![]()
Happy Modeling,
Mike
4 Likes
Ok I Love research as well… and Bong’s "Marge’, the first Marge, (there were three Marge’s) yes had 25 victory markings, FACT! one of the victories was downgraded to a probable while Bong was on Leave just before the plane was lost… So the pictures according to official records is correct… Bong’s Marge had 25 victory flags on it when it was lost… It also had a red Nose & wing tips… The empennage tips were red as well… He had them painted red cause he liked the color red, it had no official meaning…
Rather than me retype it all. I’ll give you the link to the Pacific Wrecks page for Bong’s first Marge
and you can read their extensive research there yourself…
and most of that research came from Bong, Bong’s family and the USAAC records as confirmed by the adjutant’s of the squadron/group he flew in… The official record in other words…
Click on the photos on the left, they show an official 5th AF photo of the plane with Picture and 25 victory markings, and the lower photo is a pic of the crashed plane with Red wingtips…
The Decals kill markings and Kit color callouts showing red decorations are very accurate
Marge II…
Marge III…
The second two planes were painted in the exact same way except for the red nose… The second plane also had a Pic but it kept falling off in flight and he kept replacing it until he was sent home… This was the plane Lindbergh flew during his SWPA tour…
The third plane has a pic glued to the nose for his one photo op in the US, it was subsequently removed…
EG
2 Likes
Thank you to Butz and Egilman for their tireless research. I’ve decided to just go with the box art due to the lack of clarity regarding exactly how this plane looked and when. My diorama was premised on the morning Bong takes off and beats Rickenbacker, but that doesn’t line up. Maybe I’ll Make it the morning Malone took off and crashed it. At any rate, I got the props on last night and that concludes the major building. Nothing but decaling to go. Also started the fuel truck, here is some pics:

Happy modeling!
7 Likes
I think your right on it brother, what you’ve got matches the official pics…
The only thing I can see is the gun camera window, that little patch at the absolute end of the nose, would not be overpainted in red… Other than that it matches exactly the way Bong himself described it…
Your on it…
EG
2 Likes
Look close at the nose, there is a camera hole there. It’s small, but it’s there!
The Tamiya instructions called for drilling a hole in the nose and couldn’t for the life of me figure out why. No parts were to be attached there. Did the research and duh! Camera port.
2 Likes
Brother your absolutely right, I dug out my copy of the Dash-1 on it and yes, it is a little relatively tiny hole in the middle of the cover…
So yeah, I can see painting the cover red…
My bad sorry…
2 Likes
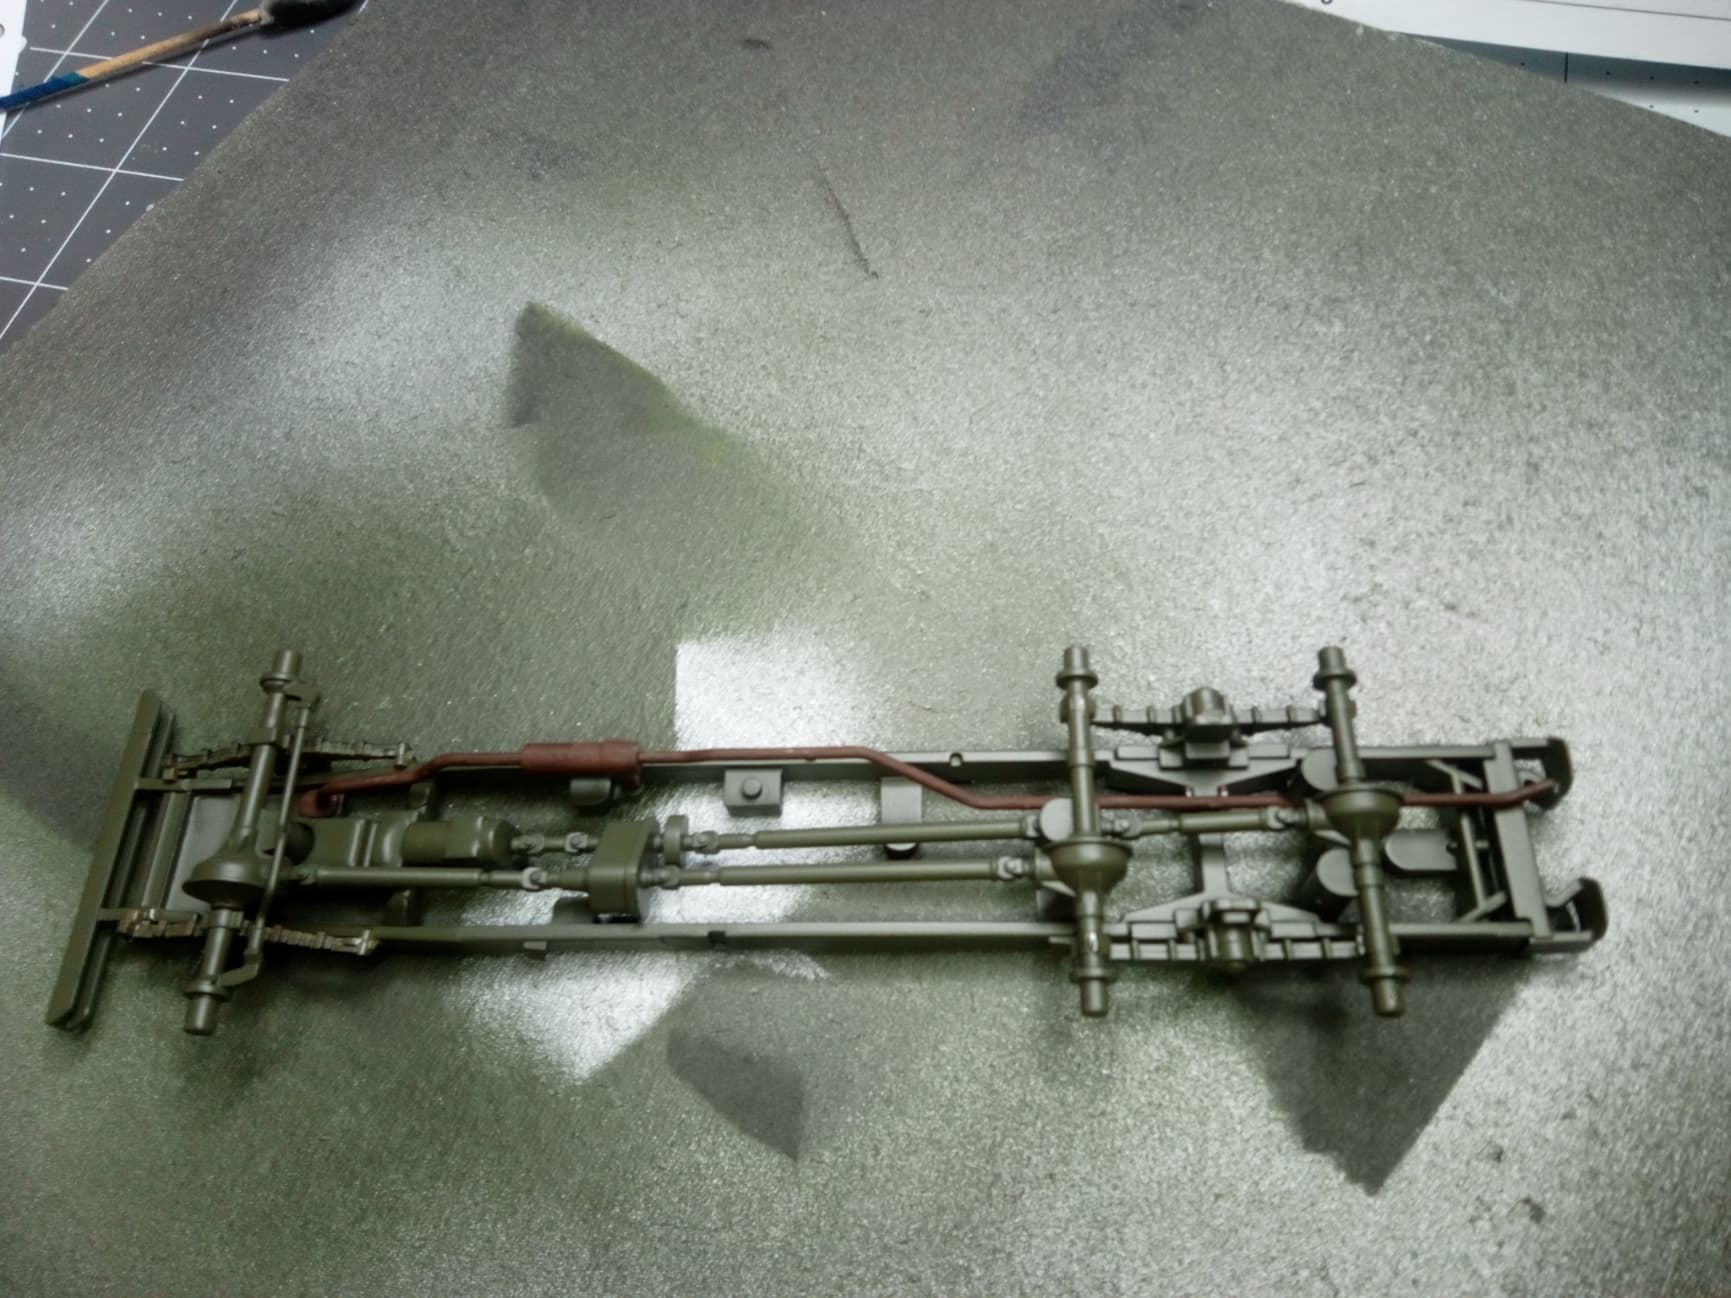
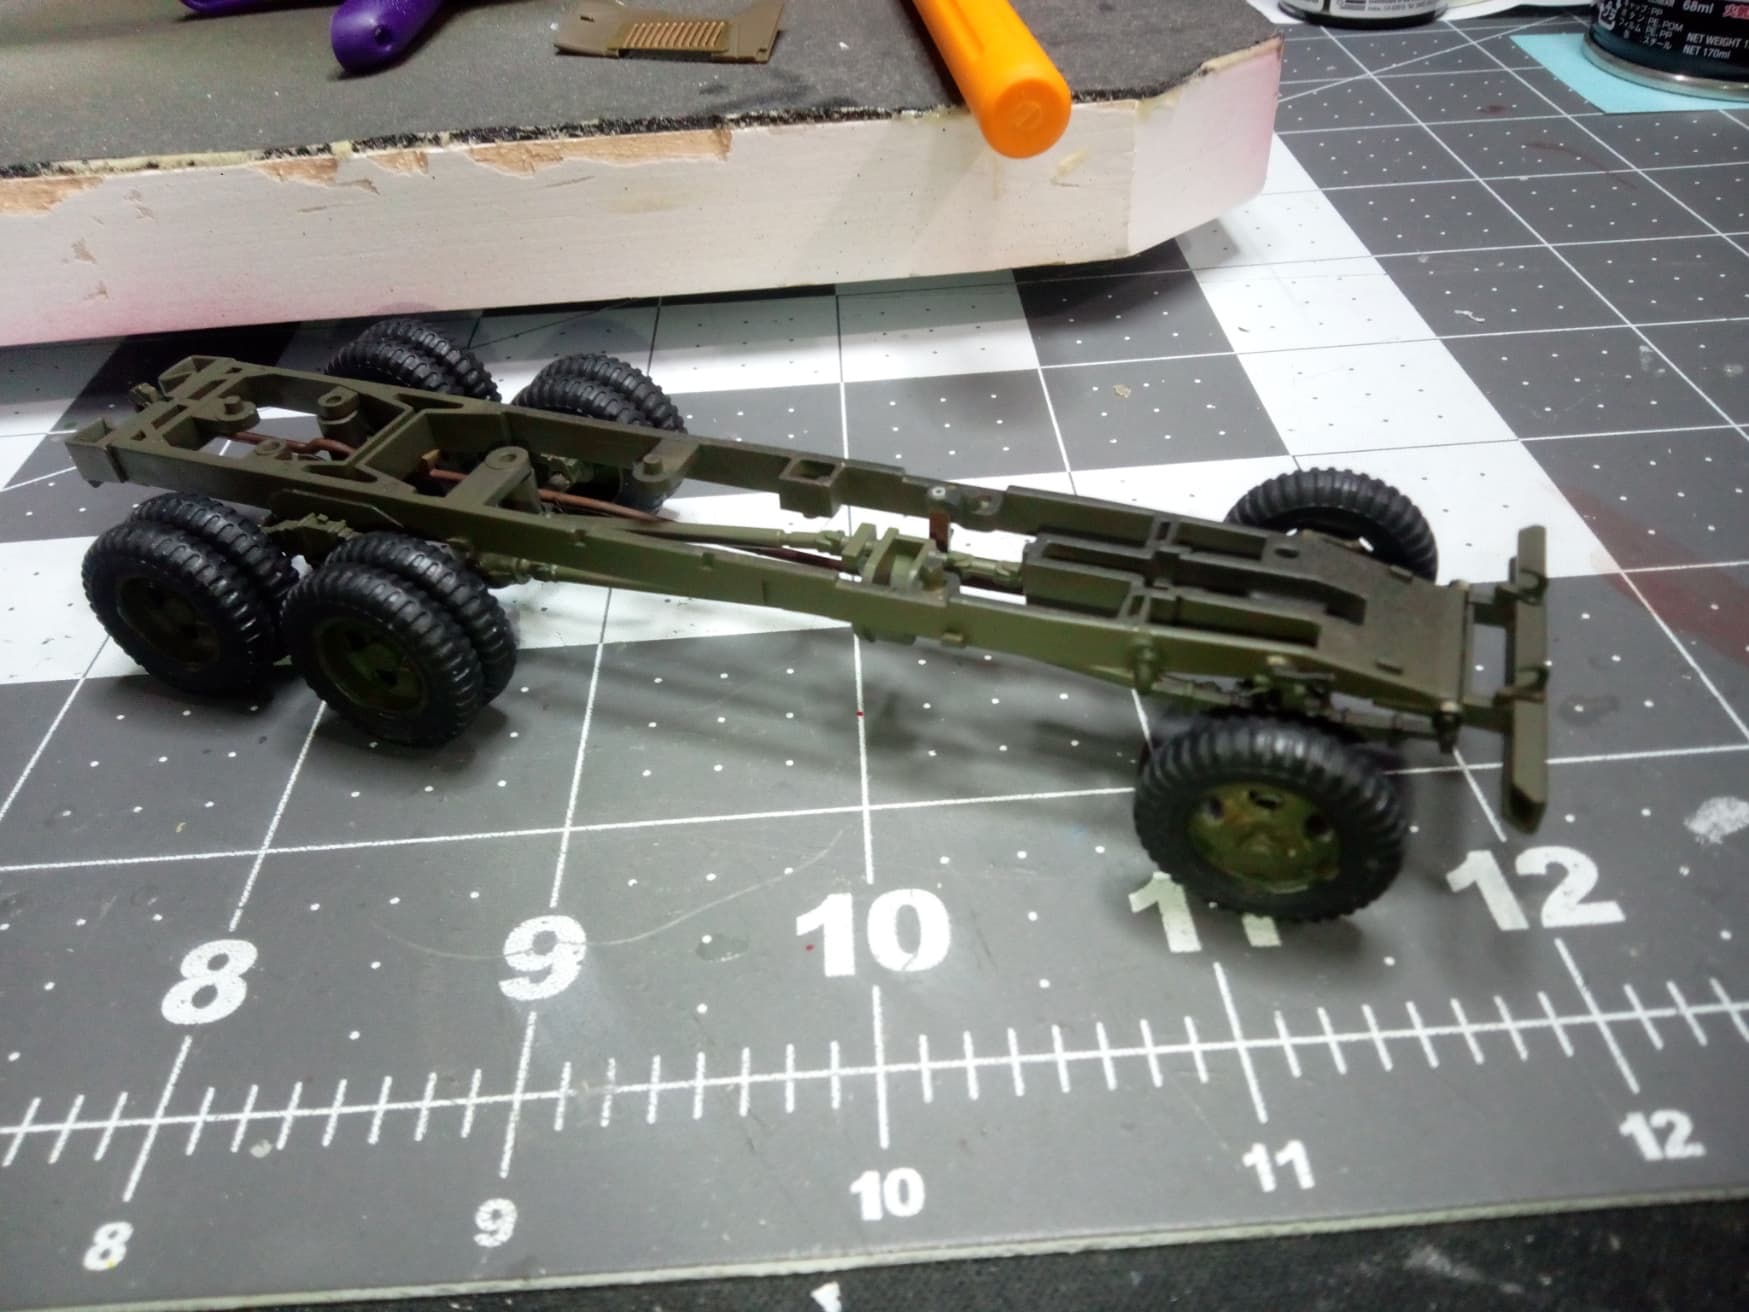
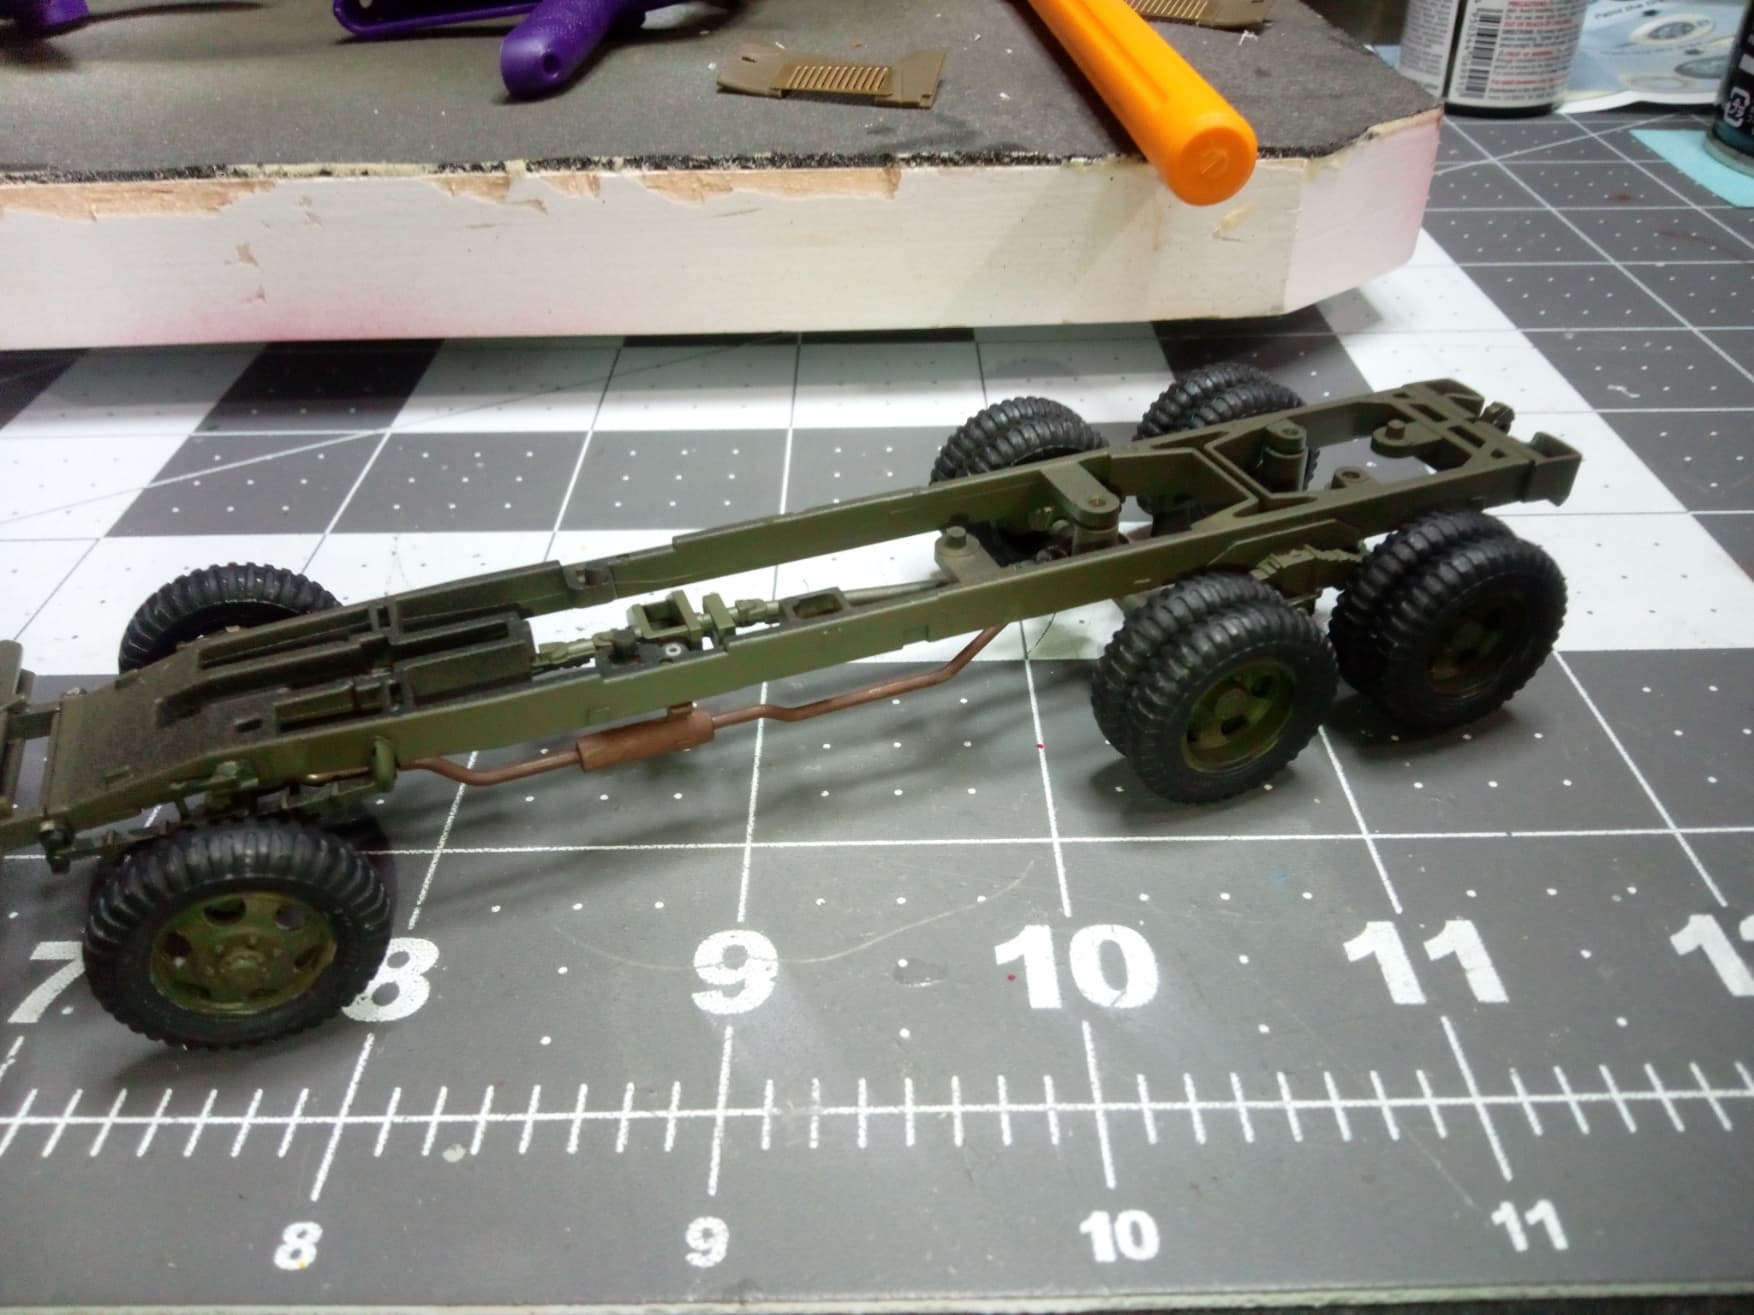
Back at the bench today. Lots of starts and stops due to dropping my dog off at the groomer and having to go get him, but a got a bunch done on the fuel truck. I got the rolling chassis completed. I added some aftermarket sagged wheels in place of the kit wheels. They look great, were made for the Tamiya kit I’m building, but they didn’t fit right out of the box. I had to drill them out to fit the axels. No big deal.

Next up was working on the floorboards, firewall, cab, etc. This was a pain. This kit doesn’t have much in the way of locator pins or snap together type parts, and this section of the model basically has to put five separate parts together all at once. Here’s the instructions:
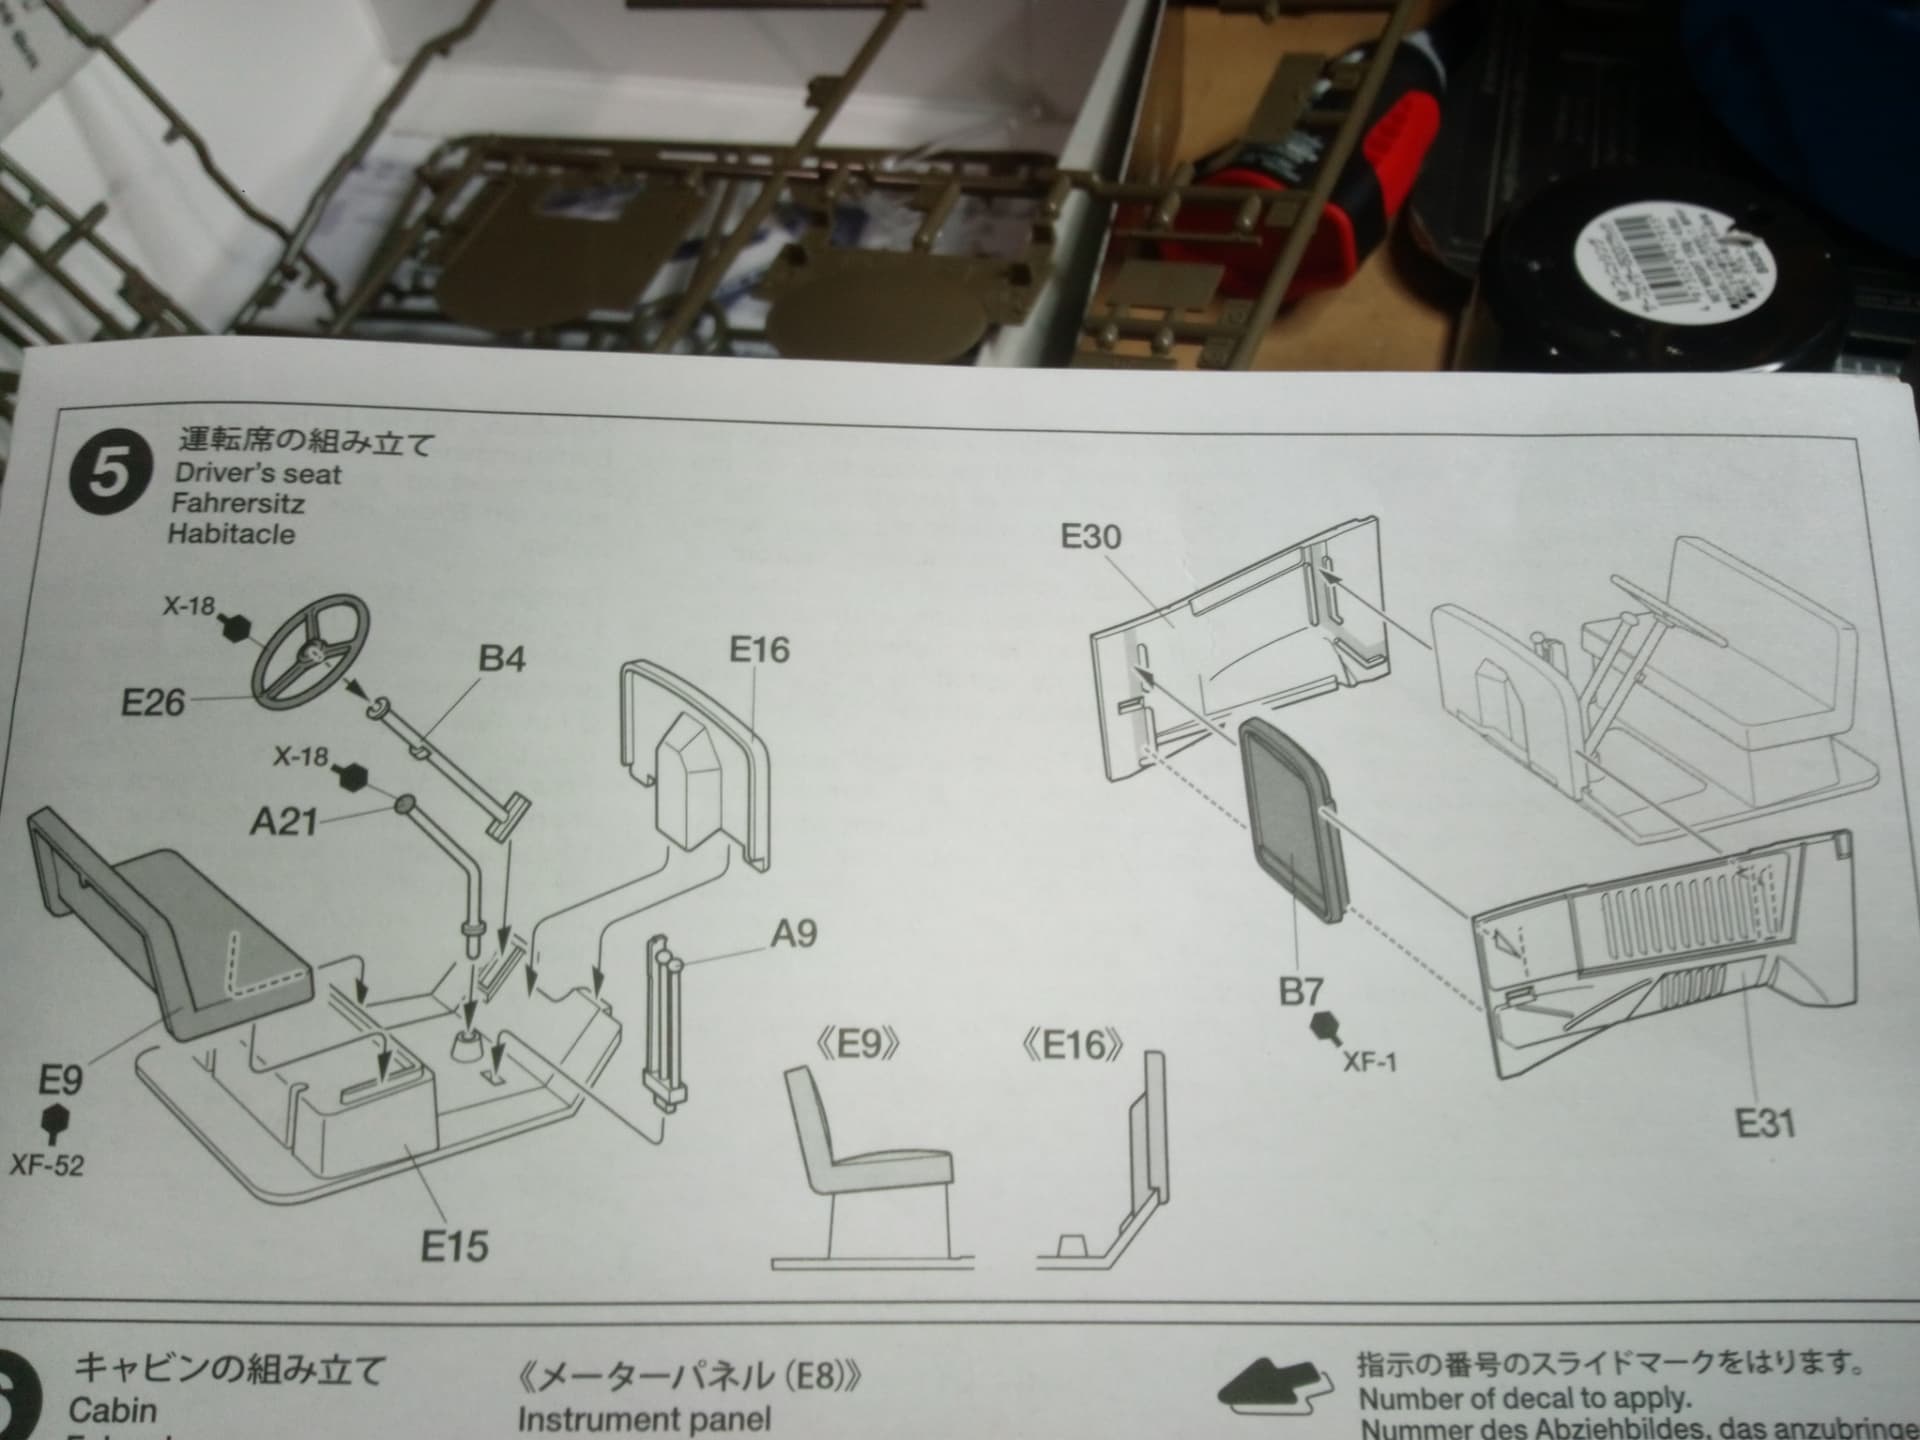
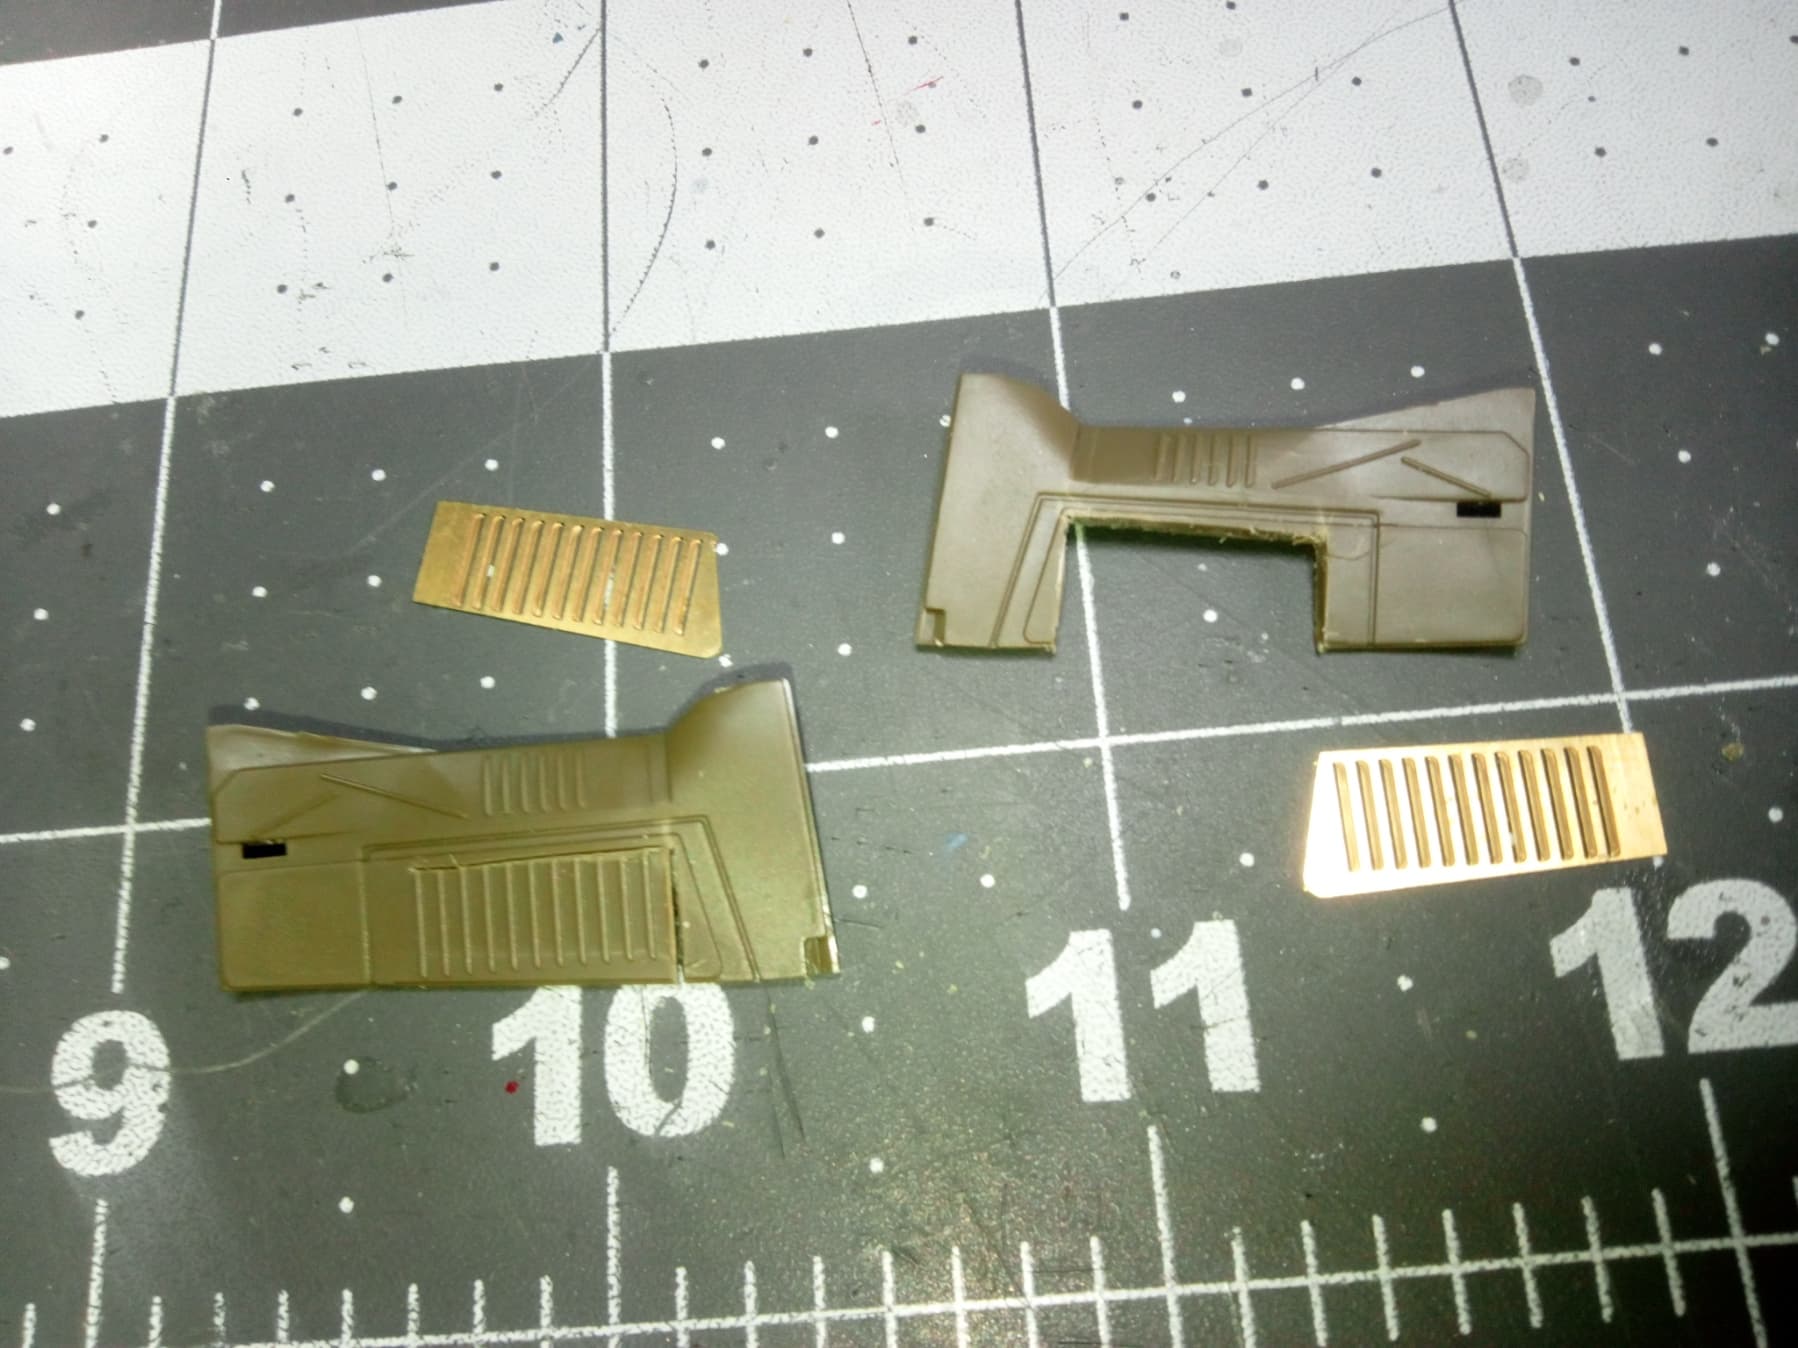
It took about five hands to get it all set and square. Before I show the completed unit, I upgraded parts E30-31 by cutting out the louvers and putting in PE louvers…big difference! If you zoom in you can see through them just like the real deal.
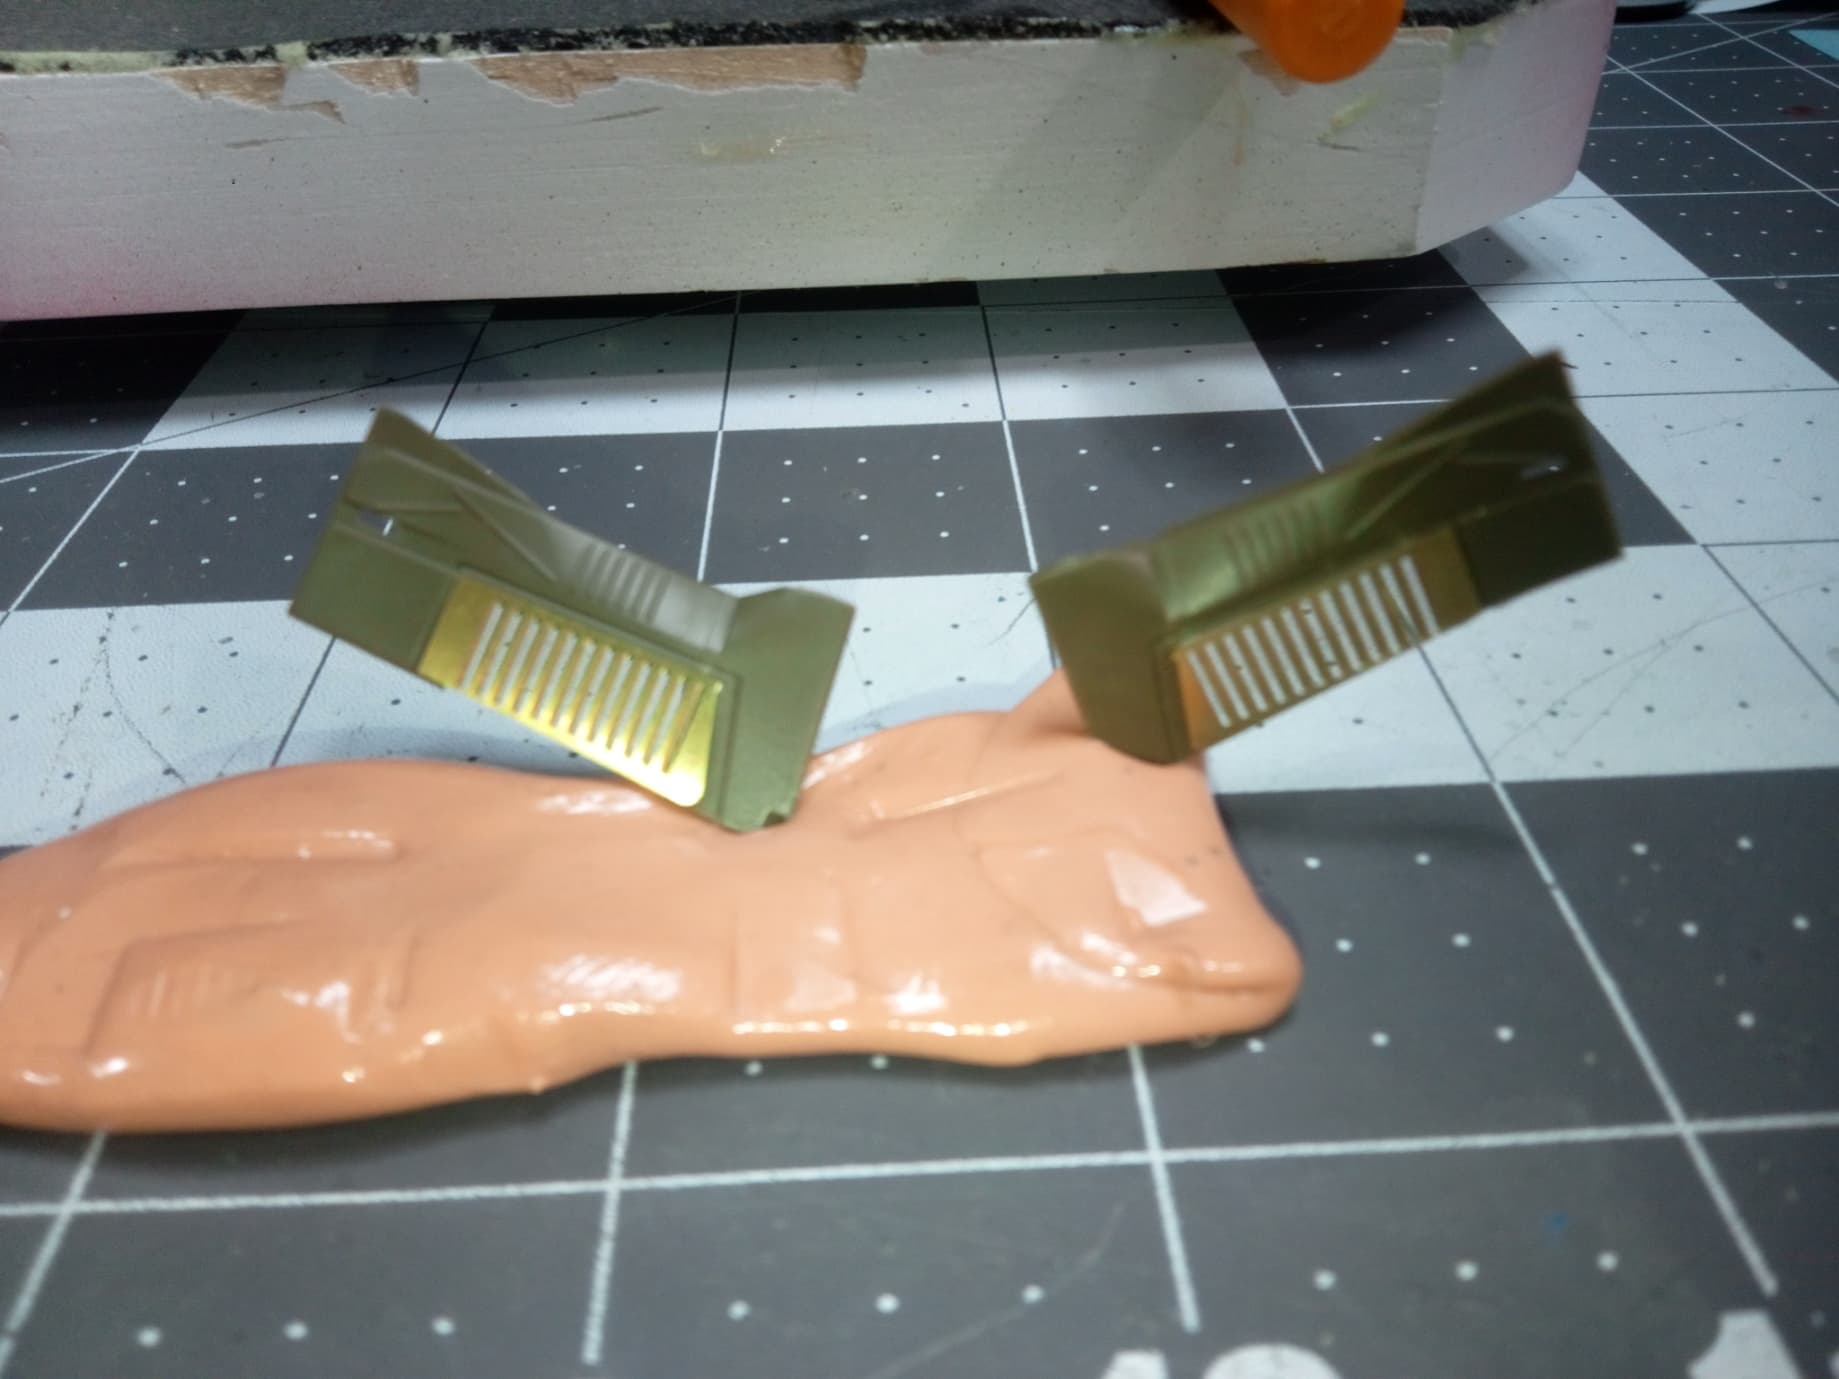
Here is the finished ensemble:

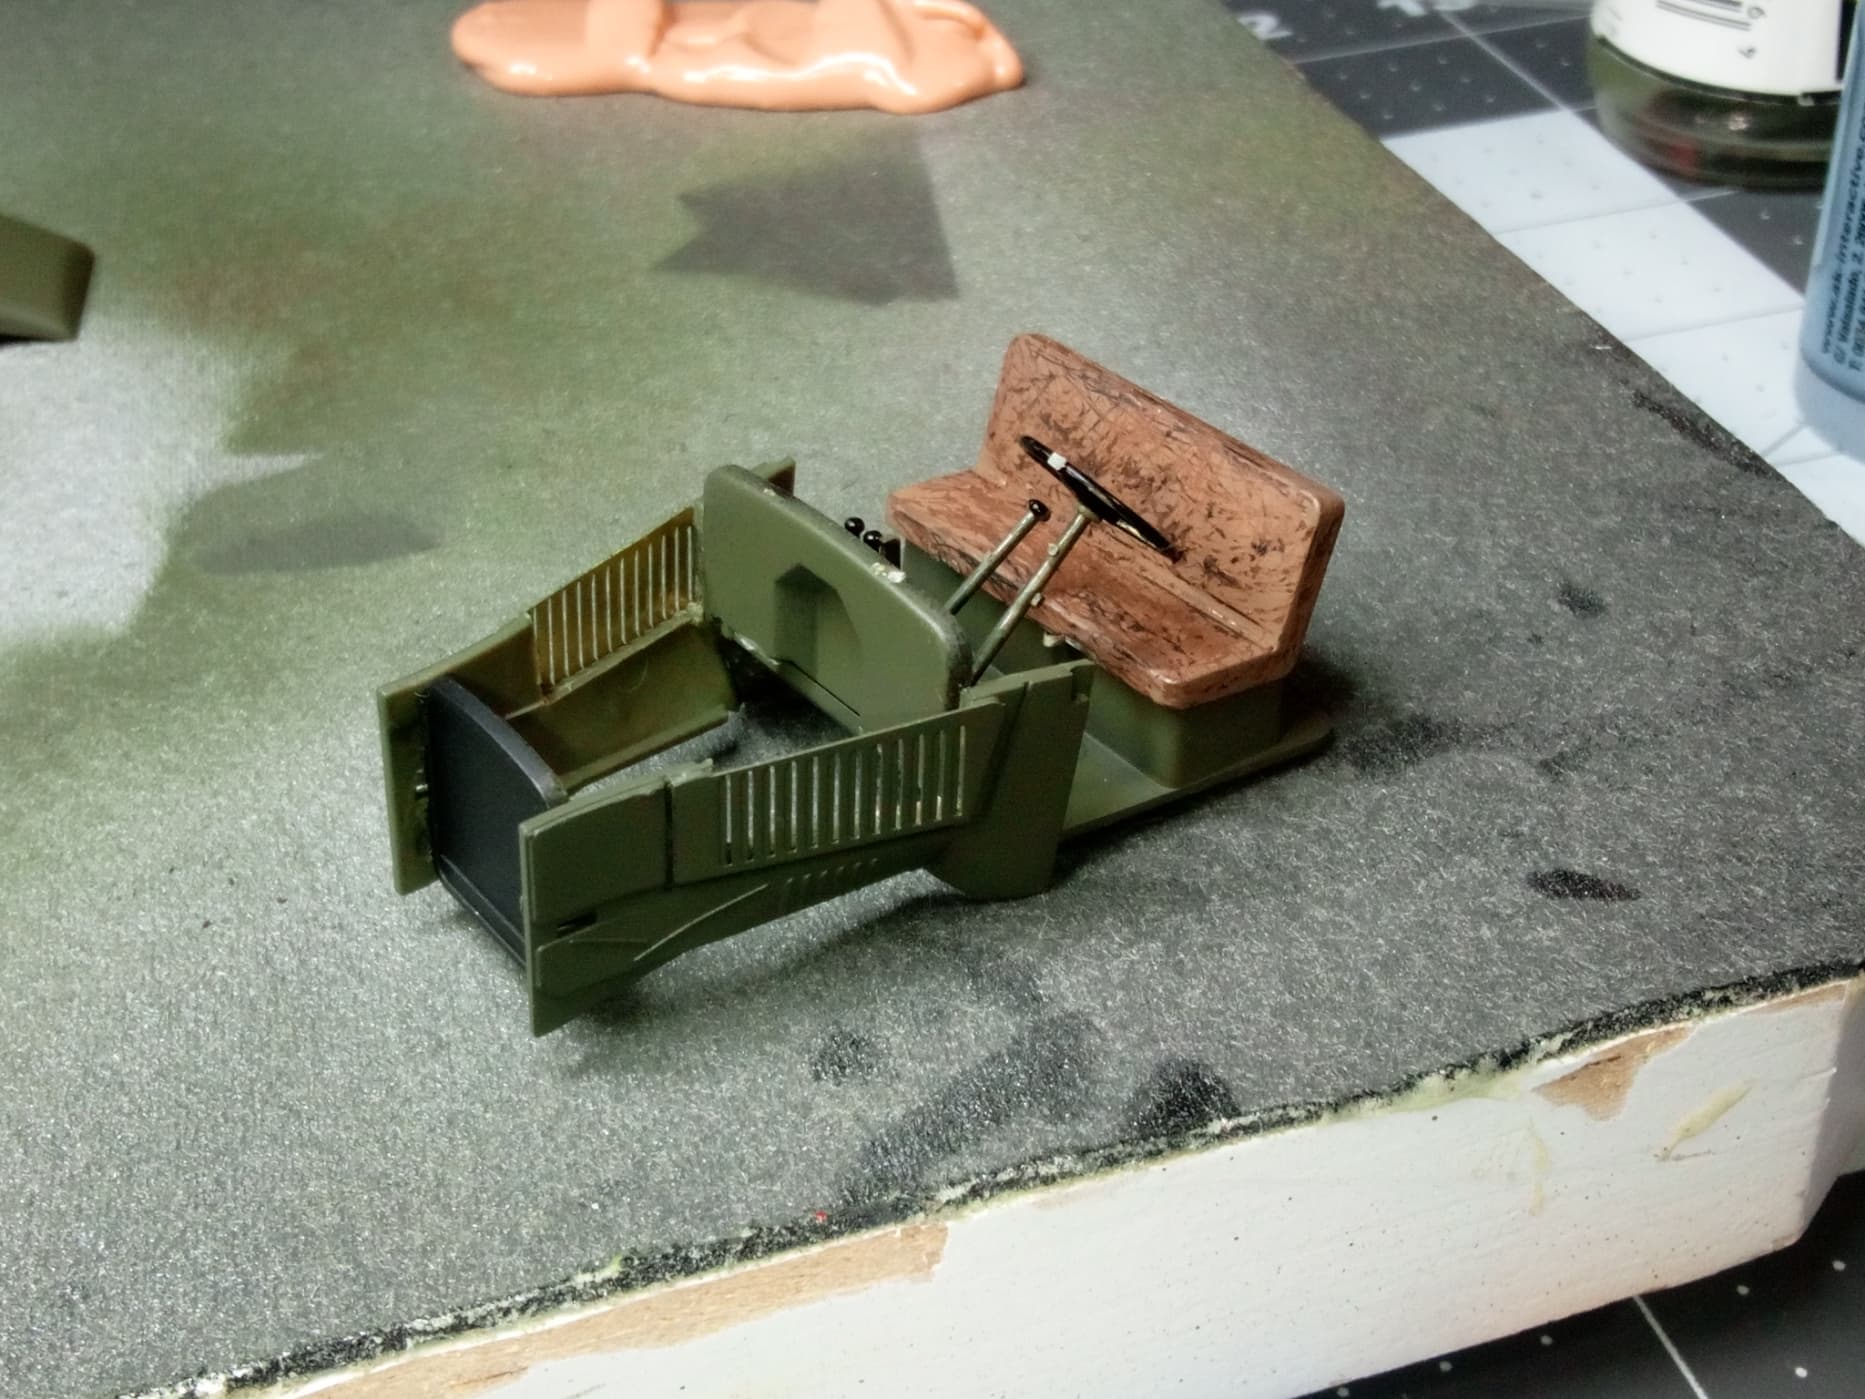
I then added the seat which I decided needed distressing. So, black primer, flat dark brown, chipping medium, and flat buff, and you get my very first attempt at making smooth plastic look like distressed upholstery. What do you think?
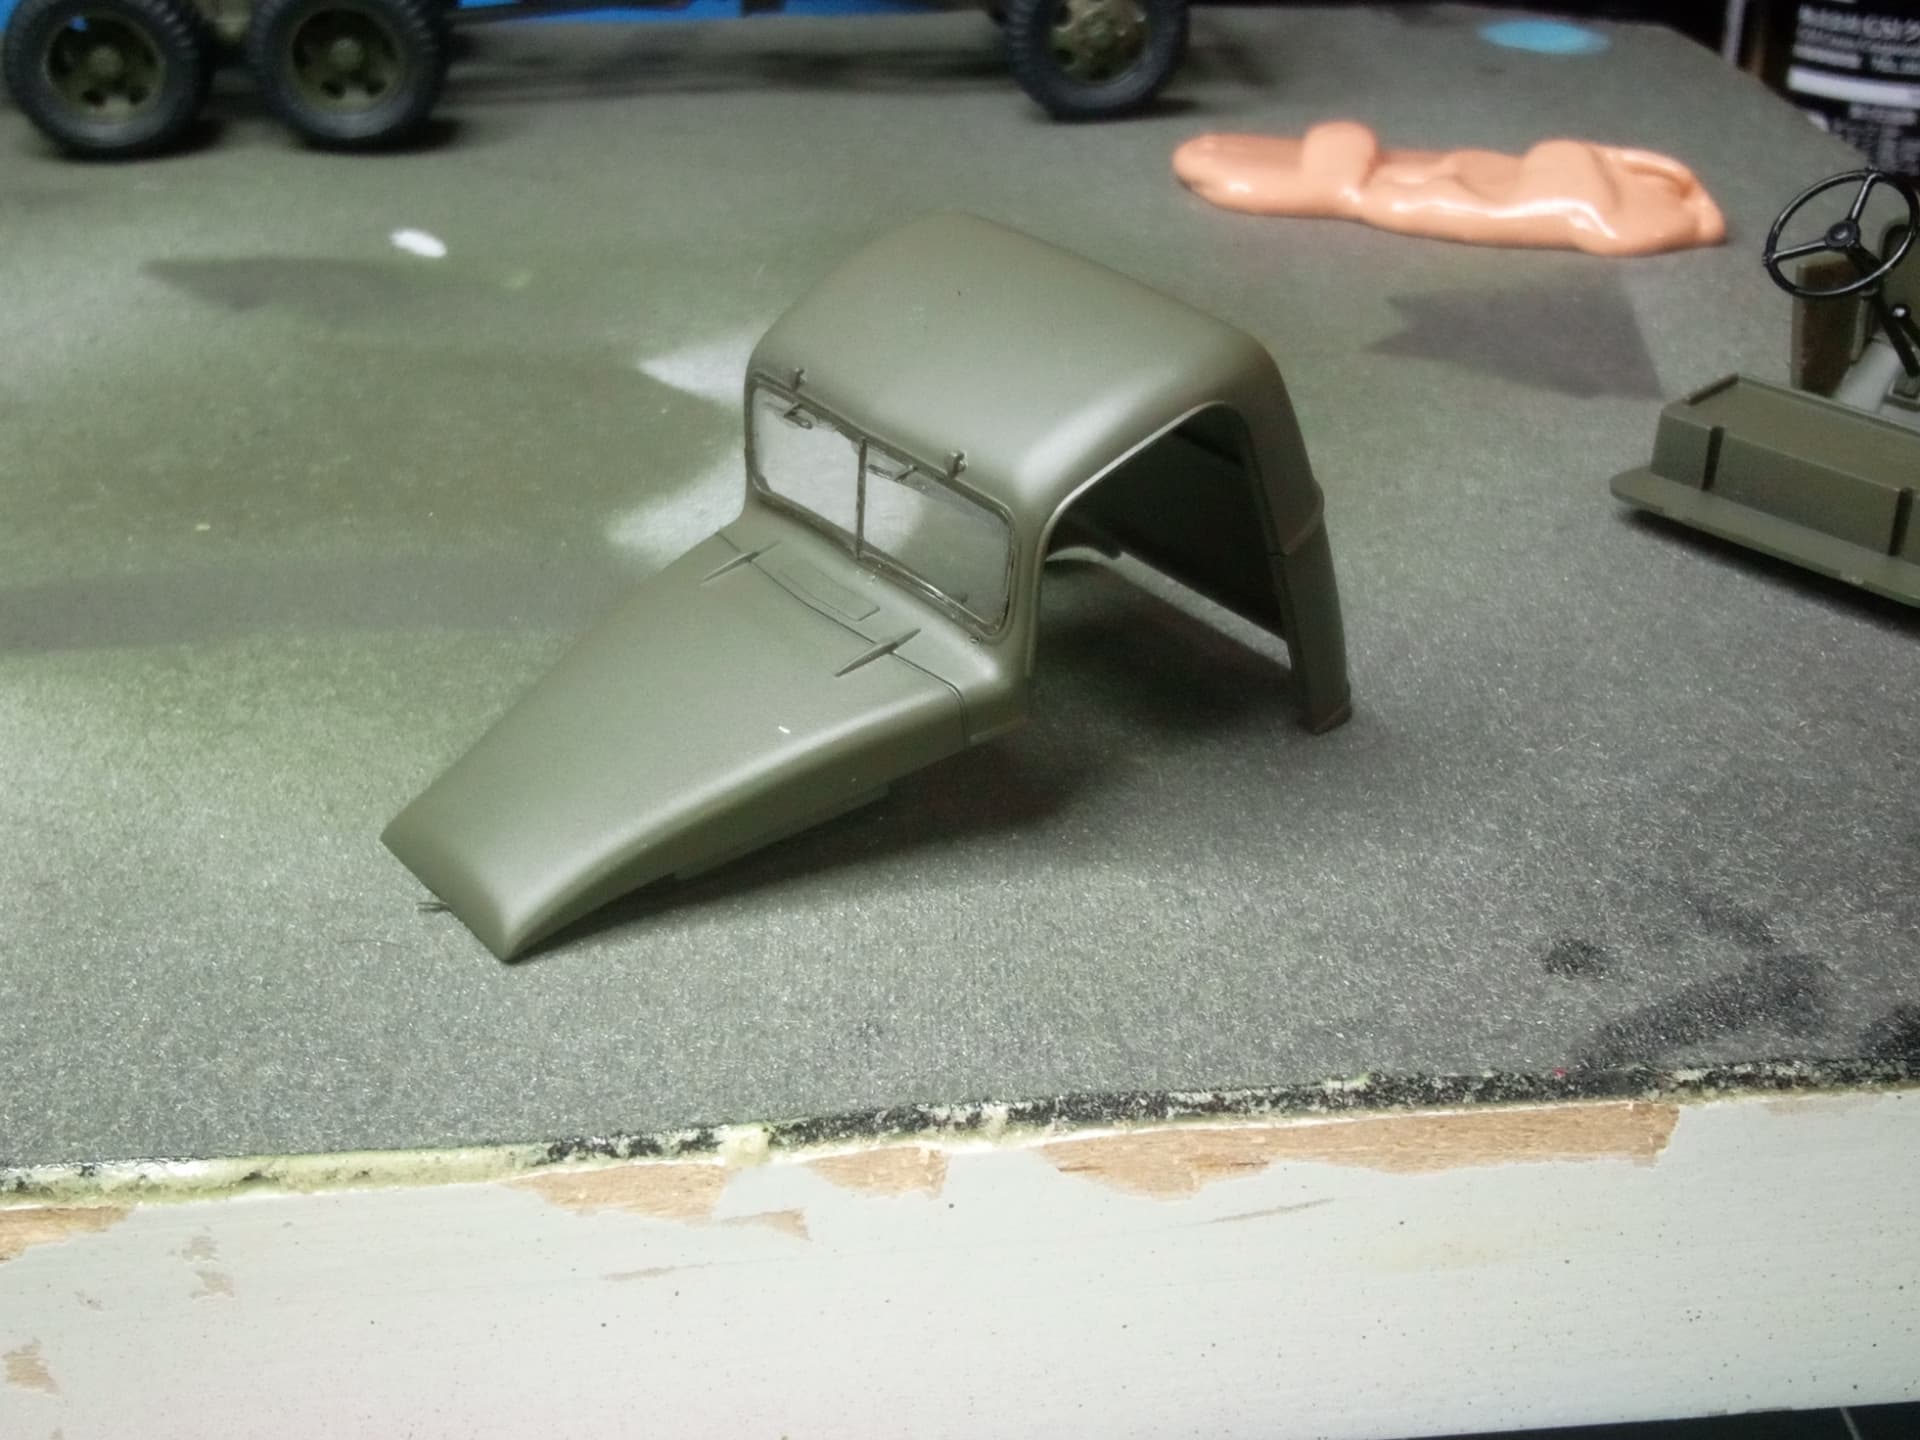
Started to assemble the cab. Got the roof and dashboard in. Fought the ill-fitting windshield all the way. There is very little in the way of tabs or supports for the windshield, on top of the fact that it is misshapen. I got it, but I’m not real pleased with it. Then the dinner bell rang, so that’s it for the night.
Back at it tomorrow
Happy modeling!,
9 Likes
I almost bought that kit last weekend because of you! I had it in my hand and put it back. It looks impressive and I’m really looking forward to the next phase.
1 Like