There are some photos in this book, but it’s more intended to detail the guys INSIDE the cockpits doing the flying: www.amazon.com/…/ref=sr_1_1
Well, I need to get caught up here…
Joe R… That sir… is going to be an amazing build! I await your start with baited breath!
BB…Welcome sir! You also have a great topic to build.
Allen… The old “H” Paasche is a wonderful old brush… in its day, I have the H in the various sizes and you are correct. What a PITA to clean or swap colors, Still its a good brush for some uses. The V series is great too but again, siphon feed and hard to clean. My 2 cents? Get a gravity fed! Cleans easy, easy maintenance, easy to use. There are some beautiful gravity fed guns out there in just about any price range. I bought a MaxPro from TCP Global and love it, but would truely love to get a real good one someday!
I will be starting my build here soon as I finish the Japanese 3 GB. I will be jumping between the ones Ive signed up for trying to do a couple or three for each as the year goes on. After all, We cant all posses the iron will and fortatude of Clemens and have three or four GB hostings and be building for a half dozen others at the same time! (LOL) sorry bro…Just kidding!(*grin) Take care all!
Doug
Half a dozen GBs? I could take that as an insult you know? [;)] It’s more like 13… [:$] Most of them end at the very end of this year though, so I have plenty of time (although I’m afraid I have to drop out of one or two of them…
I second the tip regarding a gravity fed brush BTW. It doesn’t only make cleaning easier but I also allows you to spray at a very low pressure (you need a certain amount of air pressure to get the paint flowing in siphon fed ABs.
Thanks for the advice guys. I ordered a Badger Patriot (Joe) from Amazon for $59.99 and free shipping! I ordered from amazon.com because my parents live in Florida in the winter, so I could buy it and have it shipped there. They will then send to me. The .com site will not ship to Canada so they want you use amazon.ca. From there, the exact same brush is $127.50 + $8.00 shipping…ridiculous. Thanks again all. [:)] Allen
Sweet score Allen. You will really like the Patriot. The added bonus of your new airbrush is that Badger has absolutely fantastic customer service. They will replace anything faulty for free and should you require repair or refurbish you can send the brush to them and they will fix it for only the cost of parts and shipping. Happy Airbrushing.
i have one of those and it’s great. easy to clean, easy to use
Am I the only one without a Patriot now? [:|]
Nope, but I do have 2 badgers, a 100 and 150, but no patriot.
Maybe a none Patriot user’s GB [:D]
(I am kidding)
For the love of pete Bish, do NOT make such suggestions to Clemens, even in jest. He suffers from an acute GB psychosis that is dictating his entire life. We need to refrain from encouraging him in an attempt to nurture him into some degree of normalcy.
I know, I need to think before I type. [:$]
LOL, guys you are scary…
LOLOLOL!!! By the way, Congrats Joe on a great game and a well deserved win by your Broncos!
Indeed Doug! Congrats to the Seahawks! One of the best games I’ve watched in a while. I am definitely stoked for the Super Bowl.
Okay, I just got my V-1 Rocket today.
I only have an Aztec Airbrush. I like it although the other brands sound like they are easier to clean.


After opening the plastic bag, I’ve decided that I may not be able to get the V-1 done by the end of the year. That is said with extremely heavy sarcasm LOL
lol, ye Ken, all those parts in there, it could be a struggle.
Ken, you should switch to Eduard Fw 190s. They are way easier to build and the parts count isn’t so high either [;)]
Well, I have some progress to share:
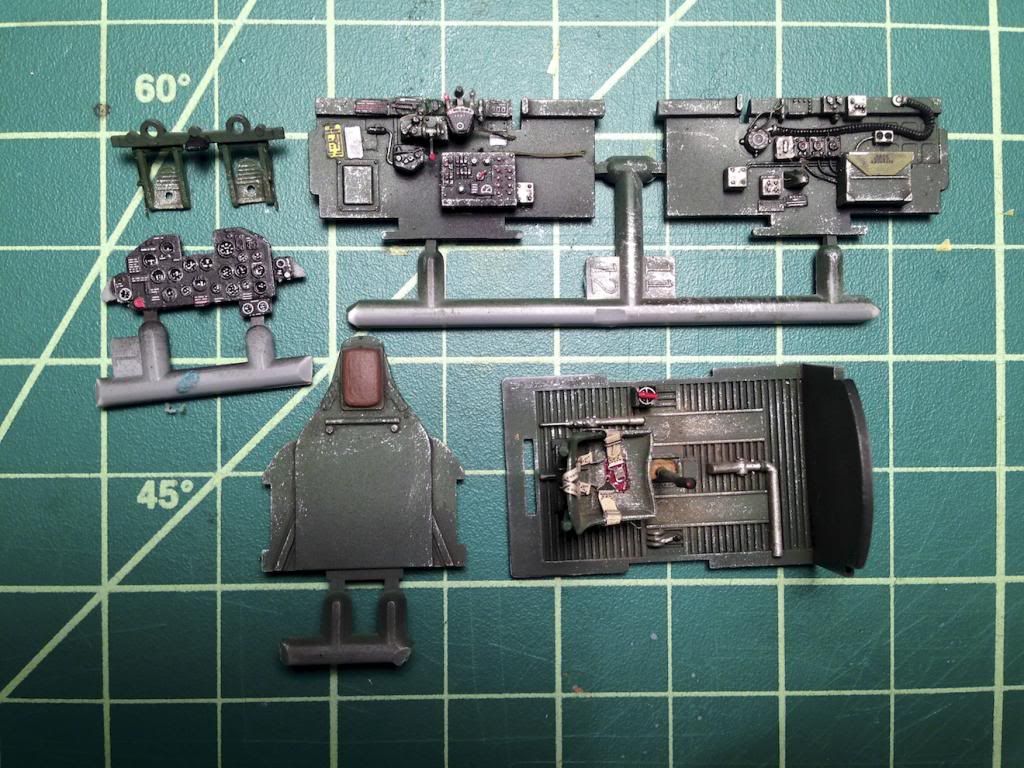
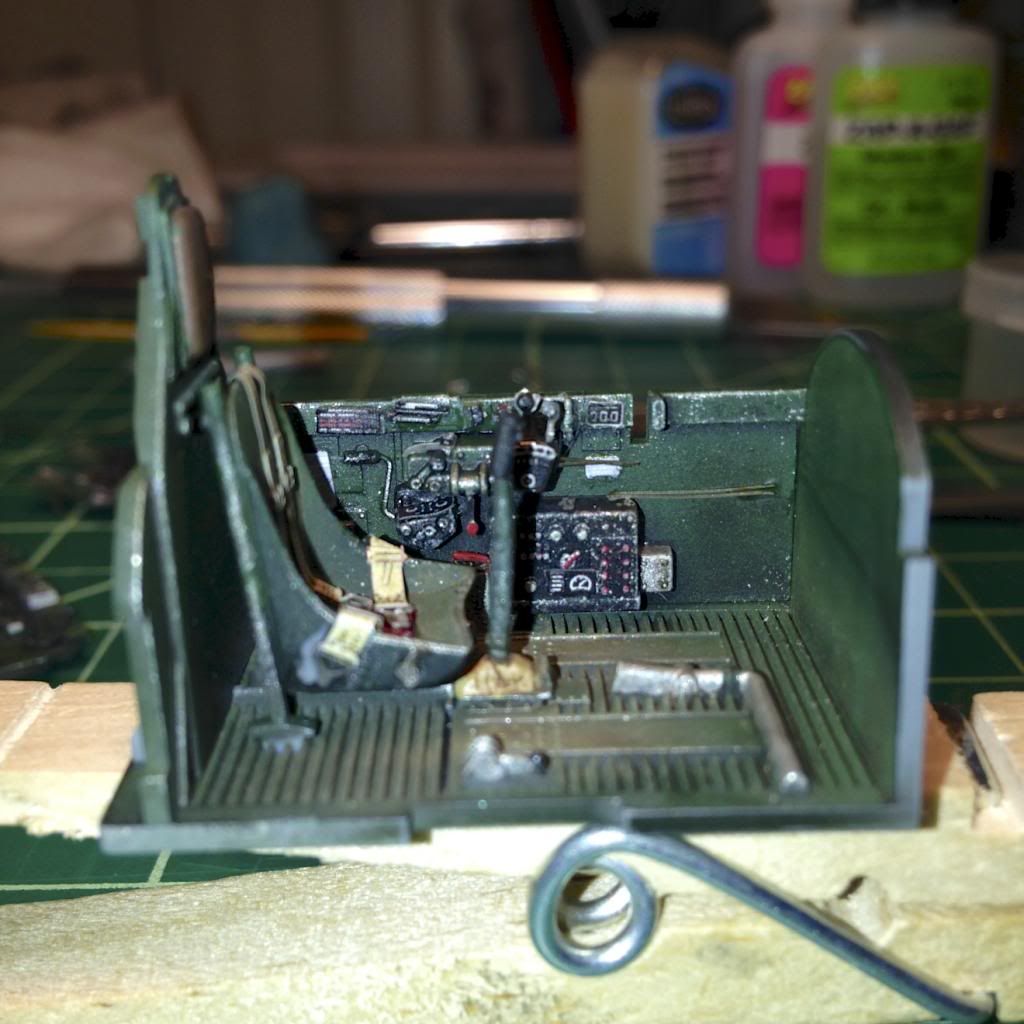
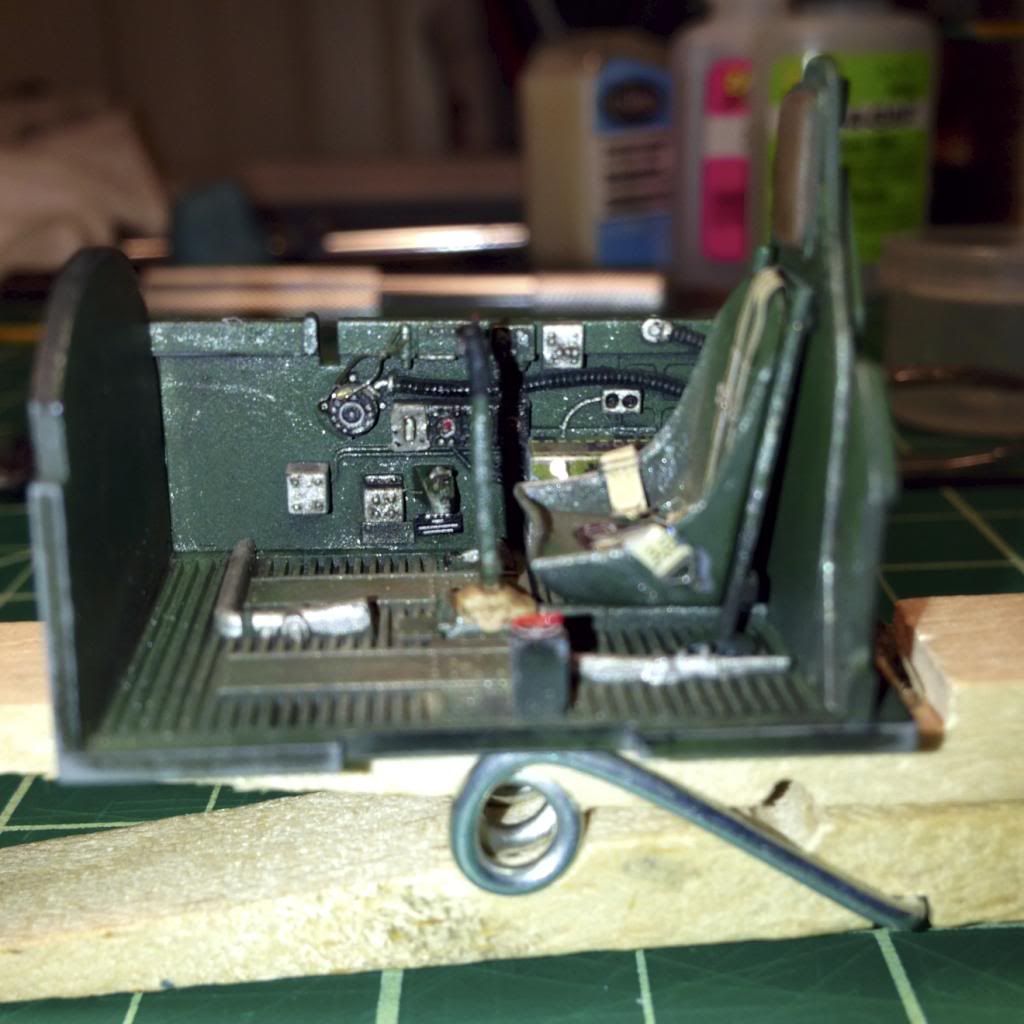
The seat and walls are not yet glued in, but I wanted to take the pictures. iPhone macro photos are not flattering, but everything looks ok at normal viewing distances.
The cockpit & IP are the Tamiya parts augmented with p/e from the Eduards P-47 D 20 detail & Zoom Placard kits. Tamiya acrylics, dry brushed enamel silver, an oil wash (black & burnt umber), and “European Dust” MIG pigments. I attached the flat-coated outer IP photo-etch to the inner etched panel (instrument dial faces) with Future to get a glassy effect. Hard to see in this photo, but I think it worked.
Speaking of attaching photo-etch, I really need a better way to work with those #$%'n little handles and such. I have been using Zap CA, both the thin and medium viscosities, and have had at best mixed success. Attaching placards is one thing, but trying to get a handle with a half a hair’s width of surface area to attach to the curved surface of the throttle quadrant is beyond frustrating. I’d say the CA holds on the first attempt on less than 30% of the tries. I’ve even started using the Zap accelerator (coat the surface with accelerator using a seeing needle, dip the end of the handle in CA, join & pray), but can’t say the results are stellar. The accelerator adds some noxious fumes to the game as well.
How do you guys do it? Someone must have a better way than I. Even when I do successfully attach the piece, the bond is so fragile the pieces fall apart if I look at them funny. Not sure how I am going to mask the cockpit interior when it comes time to paint the exterior… again, advice is welcome.
That’s all so far. I plan on adding some cables to the back of the instrument panel, closing up the cockpit box, and then turning my attention to the Double Wasp. I do love those big Pratt & Whitney radials.
Fantastic work, Blue! I just love me some nice jugs (Thunderbolts, that is… [;)])
Regarding the PE: I use thin, slow drying CA for tiny parts. It works quite well, but the parts are still easy to break off. I only attach such tiny things directly before glueing the cockpit together and trapping it between the fuselage halves. I have some trouble with PE parts as well ATM, but my frustration is caused by the PE seatbelts supplied with the Eduard Fw 190 kits. Those seatbelts are a royal pain in the [cnsod] to get in place without looking wierd or completely messing up the cockpit finish (superglue residue on the seat). I’m a huge fan of HGW’s fabric seatbelts though. They look awesome (way better than PE), assemble easier once you get the hang of it and you can drape them around any seat without having to worry about them looking awkward. I’ll never use PE belts again if I can get my hands on some HGW replacements…
Big Blue… WOW what an amazing job you’ve done on the pit! Just beautiful.