Thanks, Trey! Very much appreciated!
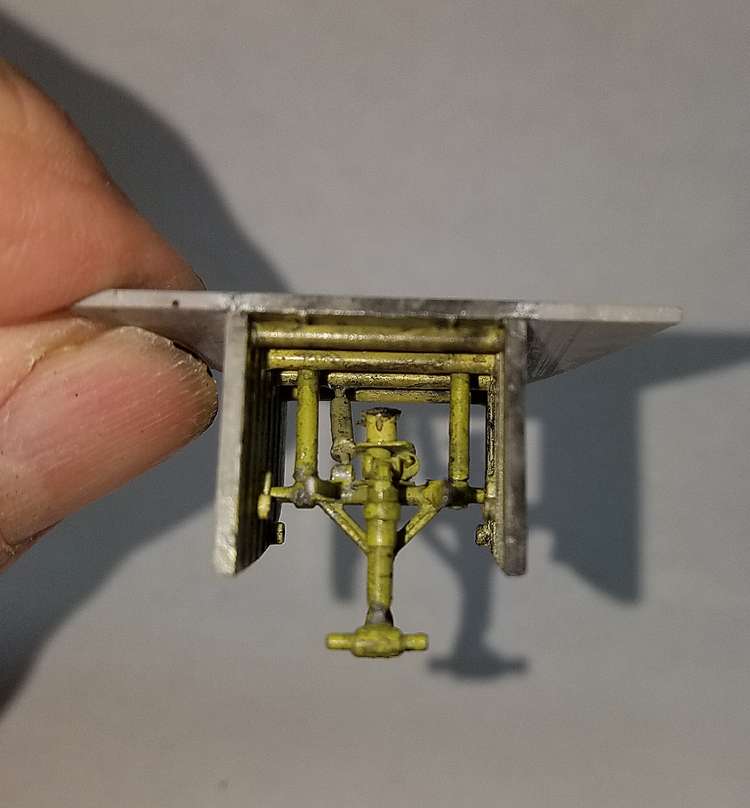
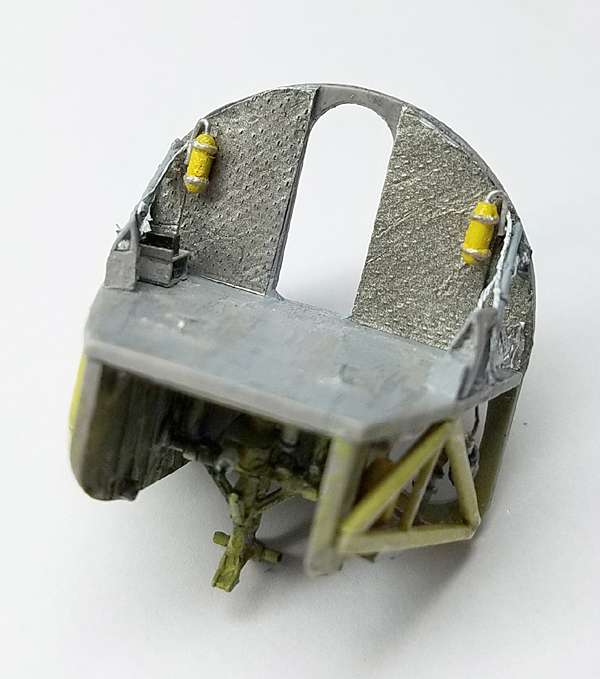
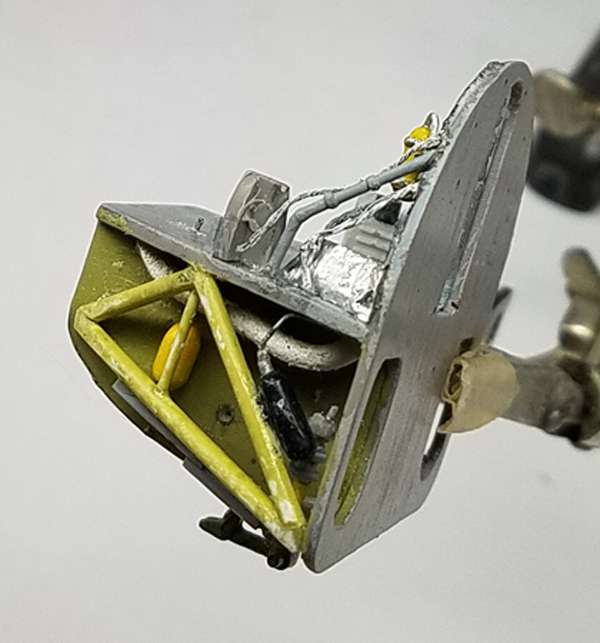
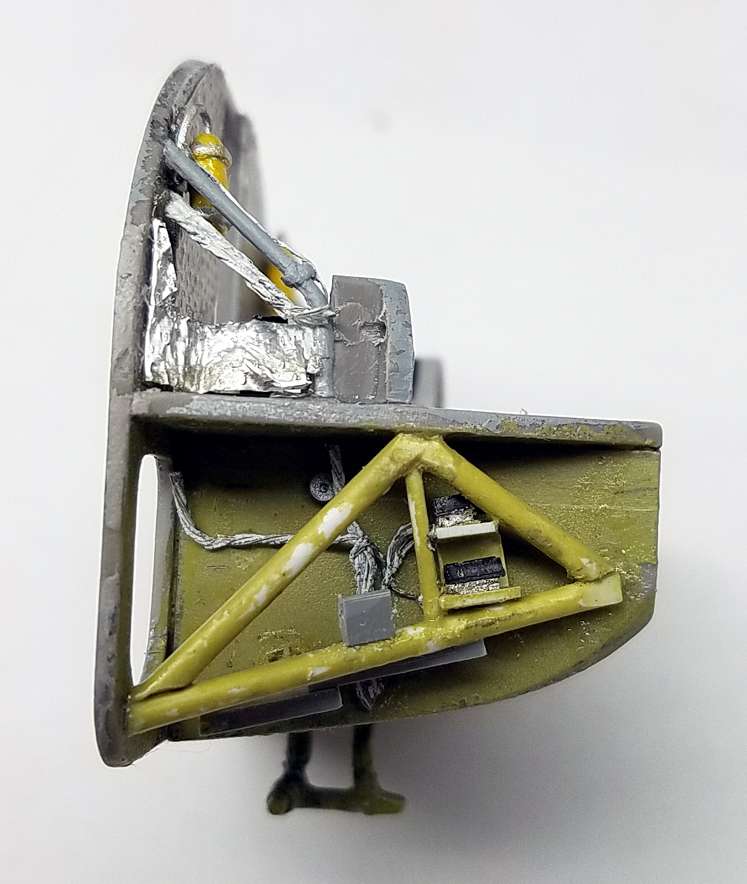
The kit nose wheel well detail is not quite correct or complete but that’s not a big deal, especially since it’s going to be hard to see any detail in there. However, I have to feed my urge to mess with things so I added some braces and supports that weren’t included in the kit and I kludged together some motors and hydraulic pumps. I stopped short of adding wiring harnesses and hydraulic lines but I may add them later.
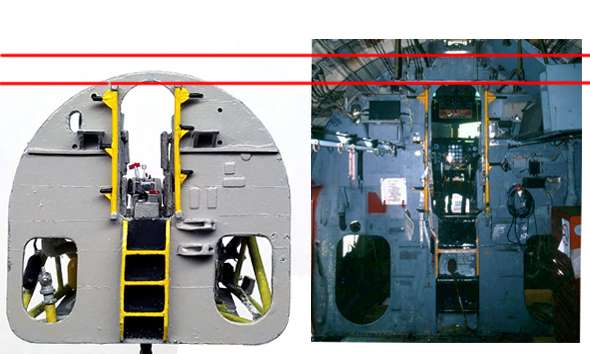
Below are front and back views of the nose wheel well.

Thanks for looking!
Cheers,
Russ
Good work, Russ. Beware, I’m watching[8-|]
Thanks, John! Glad to know you’re keeping an eye on me [:)]
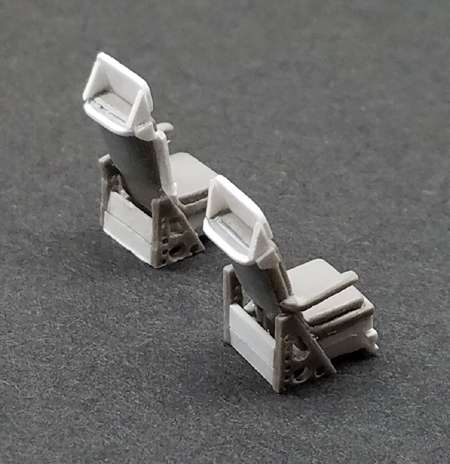
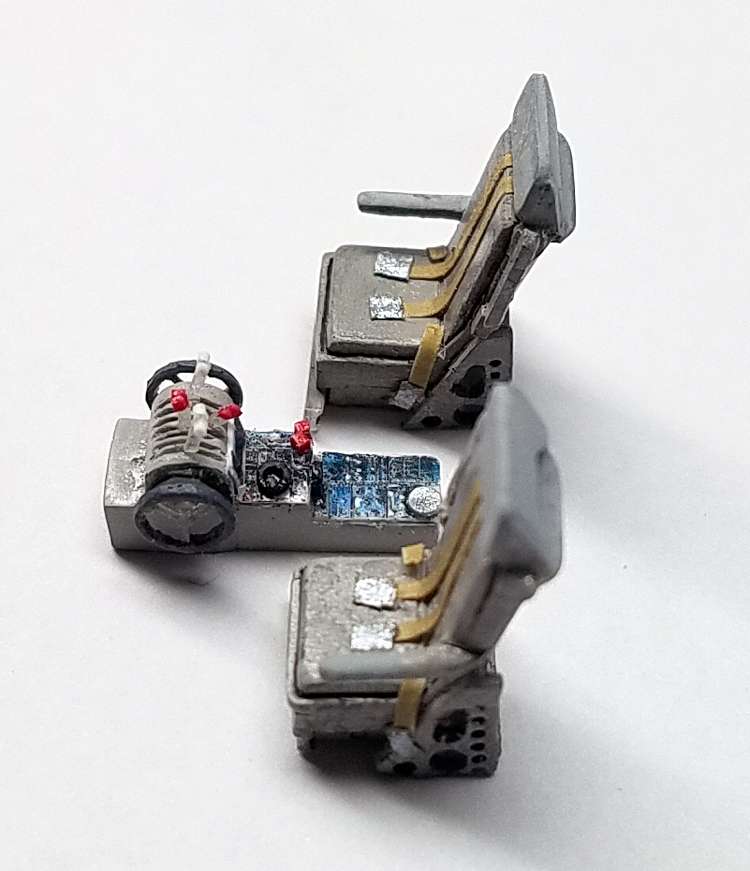
Been very busy lately but I managed to do a few things, like upgrade the crew seats. The kit seats are nicely done out of the box but there are a some things that needed fixing. The headrests were too small so I scratched some new ones. And the armrests were too thick so I trimmed them down a bit and shaped them more accurately. I posed the inside armrests in the up position, as they normally were for easier access when the aircraft was on the ground.
The pictures below show the seats prior to painting, which I’ll have to do later. I’ll then add the seat belts and the panels behind the headrests.
Cheers and many thanks for looking!

[8-|]
[:D]
Hello, All,
Hope you are all safe and healthy!
I’ve had more time to build lately, so I started back working on the IP. I had to trim my new glare shield to match the curve of the front windshield using the cuss and fit method [:)] Luckily it is only 0.5 mm thick, so it was a lot easier to work with. The picture below shows how it looks so far. The actual glare shield had a much more intricate shape but without accurate measurements, it would be extremely difficult to replicate.
I built a steering wheel assembly to place under the left edge of the IP. The kit control yokes were too small in diameter and also too long, so I made new ones and added some thumb switches.
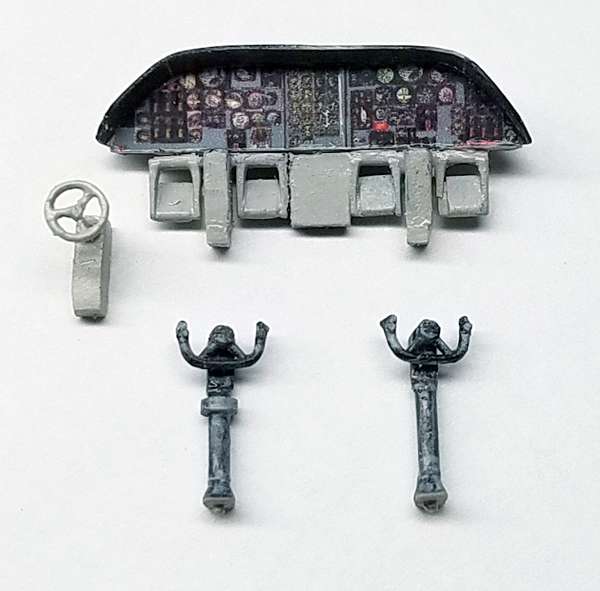
I painted the seats and added the seat belts. Then I tackled the center console. The one that comes with the kit is too high and the overall detail is pretty poor, so I cut it down and added some detail, and I replaced the throttle cluster with a scratch built one.

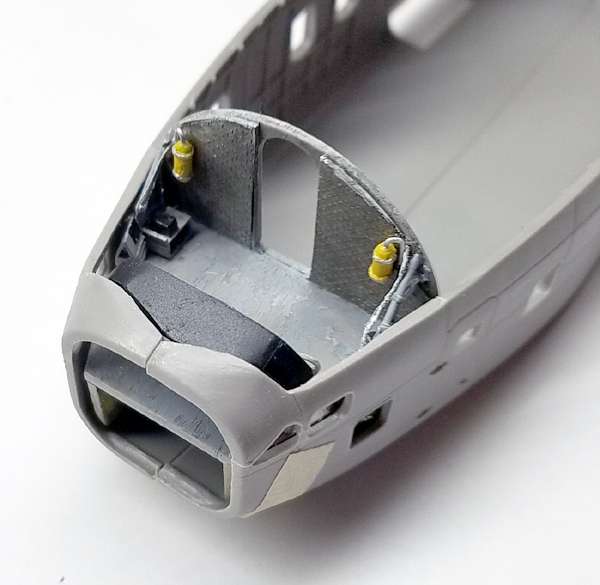
I scratch built the small avionics rack that was located between the copilot’s seat and the right fuselage (barely seen on the left in the photos below. Then I added some insulation, the cabin braces, oxygen bottles and some miscellaneous piping and cabling.

I added some detail in the cheek compartments since it can be seen through the nose windows.

Cheers and thanks for looking!
I came across an interesting discrepancy between the Roden C-123 kit and the pictures I have of actual aircraft. The kit fuselage appears to be about 2-3 scale feet shorter at the top of the forward bulkhead as compared to the real aircraft. This would mean the upper curve of the kit fuselage is narrower and shorter than it should be.
Is the taller fuselage actually a modification in later versions? I haven’t found any pictures that show the shorter bulkhead. In any case, it’s not a problem - unless you’re a fanatic about C-123s [:)]
Just a quick update - I completed the cargo deck flooring and began adding ribbing detail to the sides of the fuselage.
Cheers!

Nice work. The curve of the top of the fuselage on the one I built looks about right, maybe part of the issue may be the height of the floor.
Excellent looking floor and ribs! Really grabs your attention
It’s hard to tell. It sort of looks like the door to the cockpit is jut too high on the kit part.
I found a good straight on photo of that bulkhead in a 123K taken from the cargo area.
I set decimal dimensions to the kit part and to the photo.
The overall proportion of height to width is the same. The proportions of the door openings are the same and the size relative to the overall height is the same.
The major discrepancy is that the door and the two lower openings are too high in the kit part. Which means the flight deck is too high in the kit fuselage.
Of course that can’t be fixed, but the overall shape looks right. Easiest fix if you cared would be to lower the top of the door by about what you marked.
Those two lower openings sit just about at the cargo floor level in the actual a/c, but oh well.
Bill
Thanks for the good words, Mongoose!
John, Bill,
I think you guys are on it. If the openings and the floor height are off, that would account for the difference. But you’re right Bill, it does look proportionally about right and it’s not something I’m gonna worry about.
Thanks to both of you for checking it out!
Russ
By the way, John, your build has pointed out some issues and errors in the kit that I wasn’t aware of, so many thanks for your info. And I didn’t know you were an engine mech. What planes did you work on? Did you work on the double-wasp engines?
It’s been a long time since I saw a 123. The lasttime was when we were heading home on our freedom bird had to stop for the night at Clark A.B. and it was parked over by a C-9. I think the ship you atr doing was a light ship with a ton of flood lights on the bottom. I have seen photos of the so called gunship version dthat dropped clusters from a crate placed over a whole in the floor.
I have A & P and Air Transport Ratings, and was a helicopter mechanic in the CalARNG. We had CH-37’s which had R-2800’s. I’ve also worked on R-985’s and R-1340’s by P & W, also managed mantenance on PT-6’s and JT-15’s. The only Wright’s I remember working on were the R-1820 and R1300. On the small side the Continentals and Lycomings. On the radials the core of the engine is always worked on by FAA certified overhaul shops so I mostly did trouble shooting and cylinder changes on them.
Nice work, John! Thanks for sharing it.
That’s some cool experience, John! Ikar, the one I’m modeling was a specal ops aircraft - not a candle ship or gun ship. Their names and descriptions, and the units they were assigned to were constantly changed to confuse both the enemy and us lol.