This is my second attempt at a Wildcat. I’m new to forums and have been peeking in for the last two years to brush up on skills and such. I’m also still relatively new to modeling. I did a couple my last few years in college, but have recently tried my hand at improving my craft and learning the history behind these modern marvels.
I welcome all criticism and any advice along the way. My aim is to improve what I do and to have a nice piece of history that I can maybe pass along to someone down the road to share.
Ha. I know. I know. This was my first post and didn’t realize any pictures put up had to come from a online source. So when I put up the post they told it had to be checked out by the moderator. The photos I have from my build are on FB. If I can just apply them from there then that’s what I’ll try to do. If it comes down to getting some other Photobucket deal, I guess I’ll just have to bite the bullet and do that.
So they’re coming. =] Actively participating in a forum like this is still a bit new to me. =]
So, I’ve already completed the build, but what I wanted most was feedback on my methodologies. So I’ll share a couple of pics in between without being too monotonous.
I started obviously with the Tamiya 1:48 Wildcat. The only aftermarket add ons I’ve thrown in are:
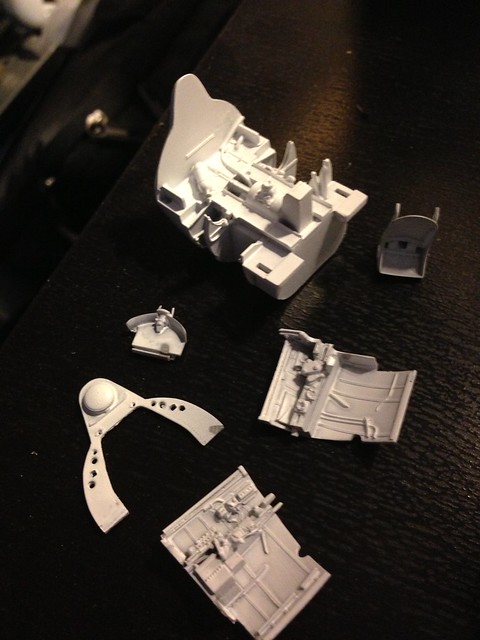
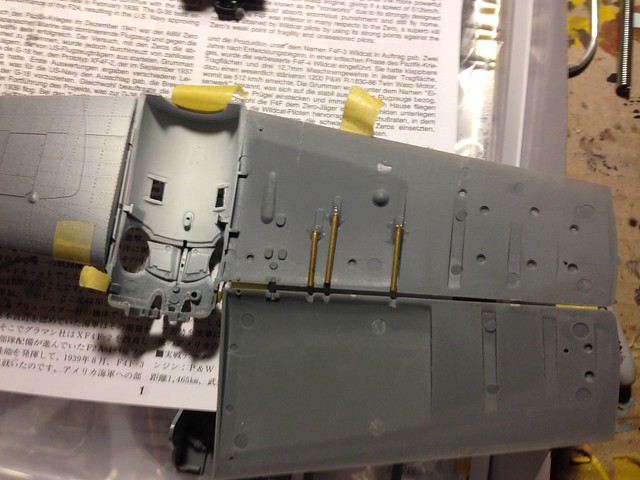
Aires cockpit
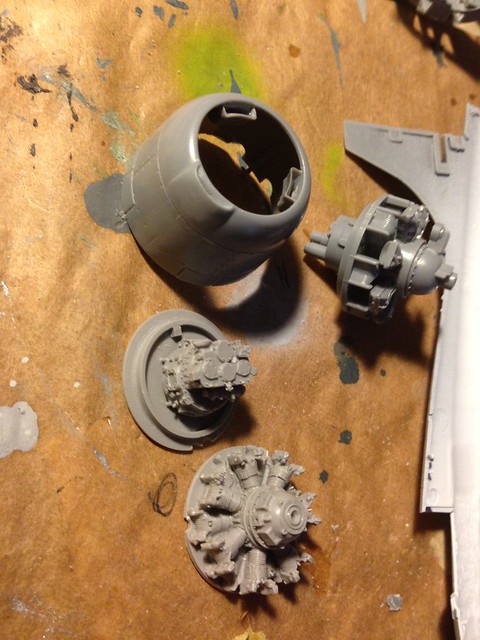
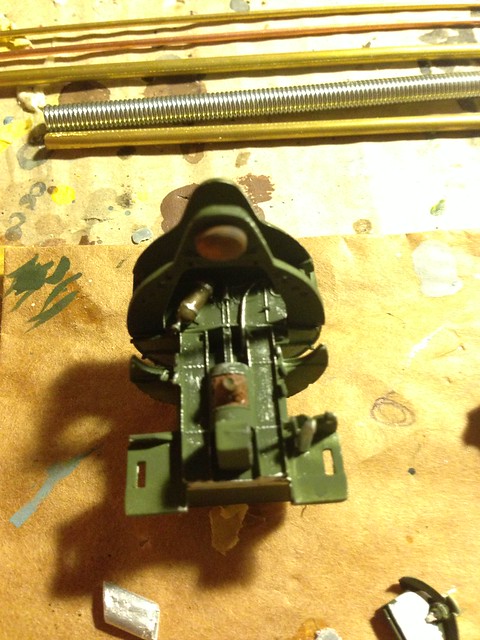
Quickboost engine R 1830- ? (it’s not the -86 I think it’s a later version used on FM2s but it’s getting covered up sooooo…i can deal with it.)
I like to scratch-build where I can. That’s part of the fun anyhow, right. I do like what Aires offers with the well known level of detail as well as the open floor for the wildcat. So I wanted to include it. The engine is an obvious upgrade that provides a wonderful starting point to bump it up with some brass rod and stretched sprue.
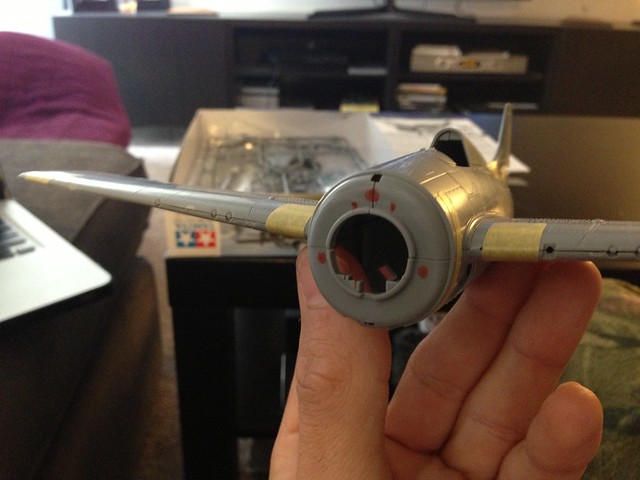
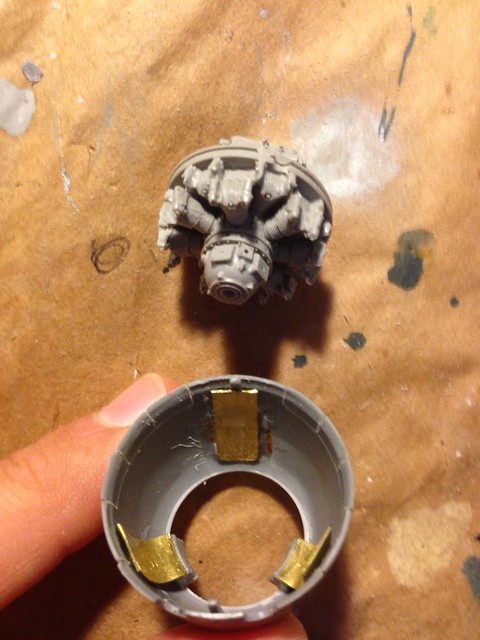
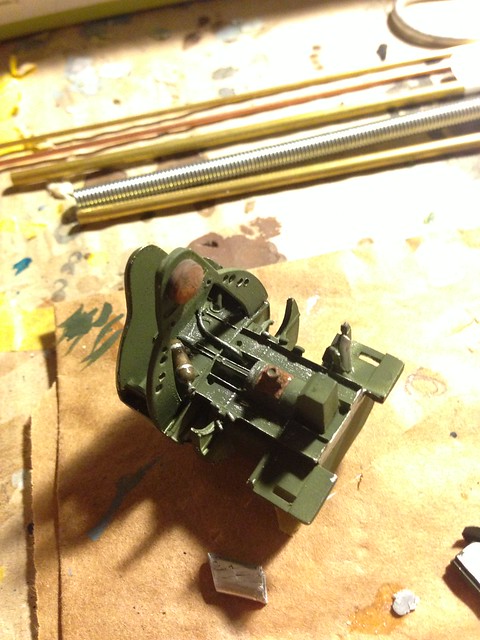
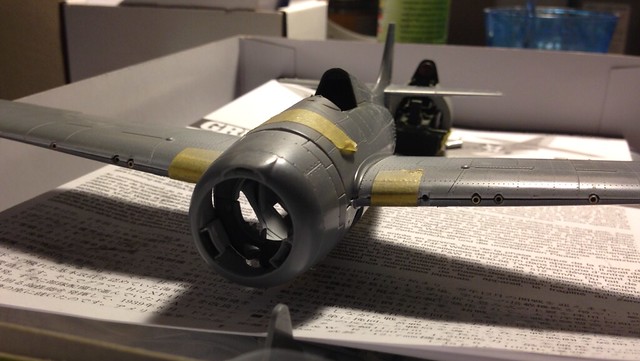
I started my build like any other by test fitting everything. Most of you already know I’m sure how easy this one is to put together. The Aires cockpit makes the fit a little tricky, but with some patience it will come together. I do want to add the pic of the test fit where I hoped to include some more scratchbuilding of the intercoolers and carburetor. The quickboost engine actually proved to be too big to build up these parts. but here’s where I started. (again this is the first photo I’m posting, so I apologize if it doesn’t work. I’ll try again if not. Feel free to throw me some help =] )
It’s not complete, but this offers a glimpse at what I started. I waited to see how the engine would fit as I continued working. I did have to go back and adjust the duct for the carburetor. I later closed up the sides of course. and carefully! There isn’t a lot of room with the quickboost engine.
Here’s a look at the differences between the kit engine and the quickboost. You’ll later see where I opened up the spaces for the intercooler and carburetor scoops.
I took some extra care with the leather headrest. I’m an art guy so I wanted to show the deeper reds and wear that the leather would show. So that’s hand painted. The cockpit is Bronze Green.
Thanks! The paint chipping is Tamiya’s Flat Aluminum [XF-16] dry brushed onto everything. I try not to overdo it, and I try to place myself in the shoes of the pilot and engineers working on everything. I consider where they’re feet might go…how they’d step on or around certain parts, etc. The straps around the O2 tank are painted in Tamiya’s TitaniumSilver [X-32]. The tank itself is of a color that’s akin to a bronze looking metal. Everything I’ve seen of any O2 tank like this commonly had this color this early in the war. Paint schemes to organize better came later on from what I’ve found.
If anybody can show they were incorporating this in the Pacific this early I would certainly like to hear. Whether it’s broad or isolated…I like details!
I’ve always believed I have a certain “ceiling” that I can attain in model building. One of the reasons is that I’m not that artistic-minded. This thread is a perfect example. Those able to view things with an artistic eye are able, in my view, to go further than the average guy building models, no matter how long they’ve been building. I just can’t attain that “artistic” look, no matter how hard or long I try. Great job on the build!
Well, thanks for the nod Darren. That’s encouraging to hear. My first degree is a Bachelor of Fine Arts which has given me a firm foundation no matter what medium I’m approaching. But I’ll share something with you I’ve been finding as I complete each build. With these last two planes behind me I finally feel like I’ve reached a milestone (which is partly why I feel like I can share any of this with all of you) but at the same time I come to realize even more where my limits still are when it comes down to scratch building and taking care of the little things. I’ve seen sites that blow my mind with what they’re doing with some of their builds. Many of them seem to be Czechs and other eastern Europe type of guys that have no doubt been doing it for their entire lives. And as humbling as it is to see their process, it is still inspiring and helps me believe that if I keep plugging away at it I can eventually get there. You know…probably. =P
I’m really hoping to get plenty of feedback, and I would certainly like to hear yours as well. I’m going to be putting up a bunch of photos today. Anywhere along the way you happen to know a nicer way to do something…throw it at me. =]
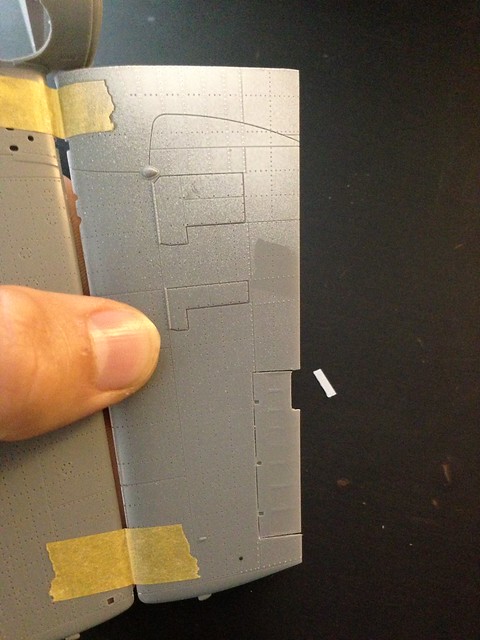
I removed the kit’s .50 cal barrels and replaced it with brass tubing. The .50 cal in the middle was slightly retracted in order to allow the ammo belts to feed to the more inboard gun. I wanted to make something myself instead of jamming some after market part in there. Master Model makes some really nice things but I tried this out. I’m happy with the results but I do think the opening of the barrel is too wide and the thickness is a little off for a 1:48 scale. But honestly that’d be pretty tiny regardless. There’s a tab embossed on the inside of the wing that I found suitable to tack it down to. The tab is the chute the shell casings drop out from. Normally, I’d open this, but I found it sufficiently deep enough to leave alone and allow it to be a hard point to place the barrels.
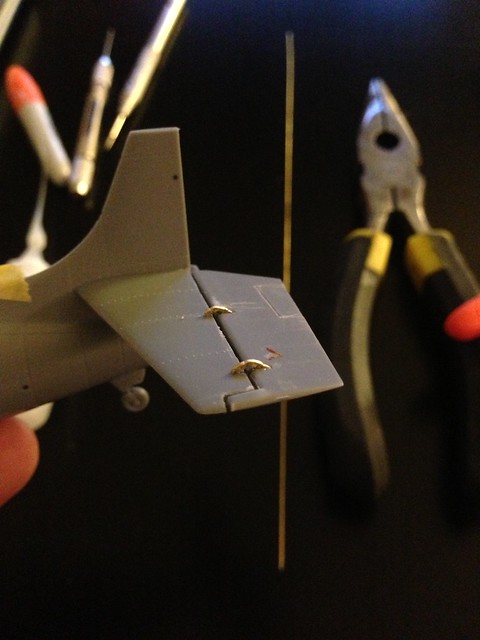
Here’s one I wanted to toss in. I took off the trim tab on the port wing. I don’t have the pic where I fashioned a brass actuator for it to place it back on with, but you will see the result in later pics.
Here I removed the elevators and replaced the hinges with brass rods that i pinched down with a set of pliers and filed into shape. I’m quite pleased with them and I think it’s a nice bump up on the kit, but I’m curious to hear what others think about the size and scale thickness. I think it worked out well, but when you stare at something long enough…