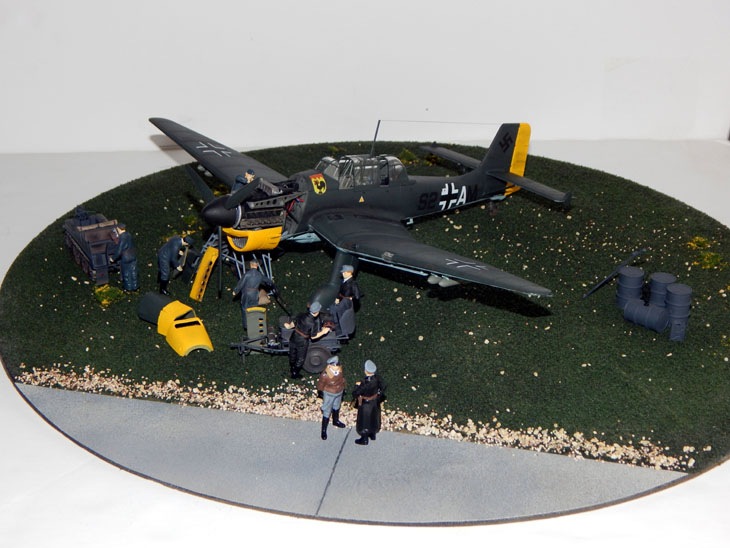
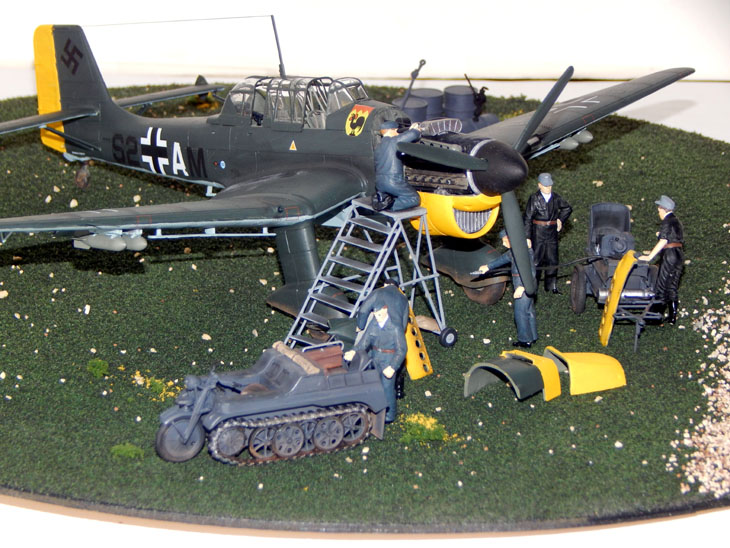
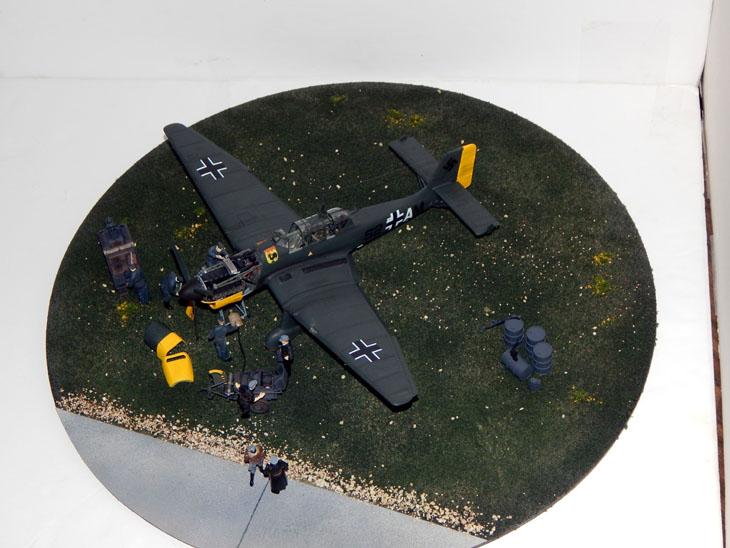
This week the diorama base for the Stuka is being built up. The base is a 16” diameter, 1/8” thick maple base. I started by painting the base with forest green and dirt tan in patches. Using the Scene-O-Rama accessories the base was sprayed with spray glue and sprinkled with the medium green and dark green “grass”. I then added some “weed clumps” and added some “yellow flower” spots on the weeds. A sheet of thin styrene was then trimmed to fit one edge to be part of the runway. I used medium gravel to trim the edge of the runway and sprinkled a few “rocks” around the base. The area where the aircraft and vehicles sit was then scraped to show bare spots.
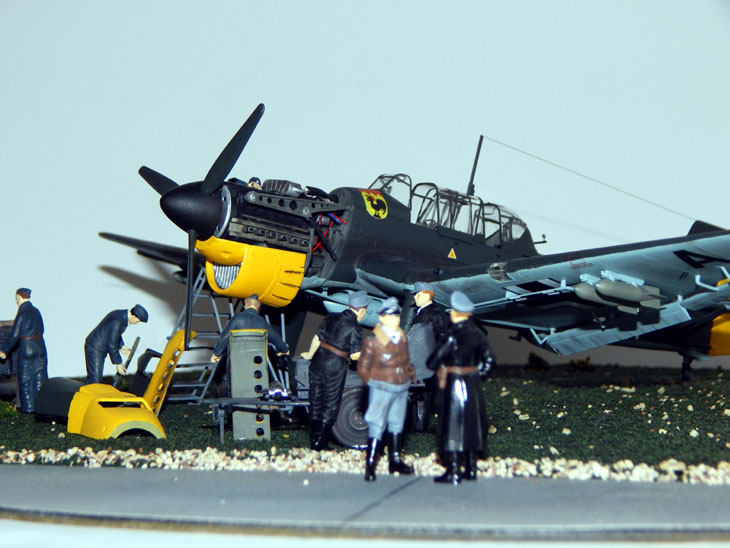
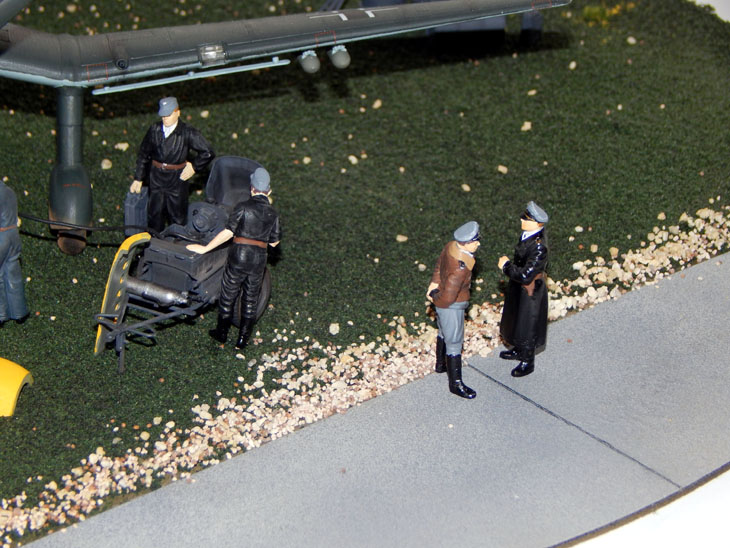
I then assembled the Kettenkraftrad. I painted it the dark green with leather seats. It was then weathered using black, dark gray, light gray, and mud brown pastel chalk. Once the vehicles and aircraft are mounted on the base I will add bits of grass and dirt to the wheels and tracks. I was looking over the figures and one of them shows a mechanic kneeling holding a tool. With the height of the aircraft engine off the ground I searched the internet and located a few photos of Stuka’s being worked on. They all show a maintenance platform with a sandbag keeping the wheels stable.
Using the photos I scaled out the size of the platform. I then used styrene rods to make up the frame and sheet styrene for the steps and platform. I then scaled out the wheels and sandbag. These were then put into Solidworks and finally 3-D printed. The platform was then painted medium gray and weathered. I then built up a couple of jerry cans and fuel drums to add to the display. Next I will be working on all the figures that will be used.
Let’s see, how about a gross of those and twenty of the gear carts? Really, if’n I was still doing models for clients I would like to include a display ladder like that. Very fine job, that! I would say you Nailed it ! Oh, would you be so kind as to include some larger or closer photos of the gear kart, please? That does pique my interest.
P.S. Are you working on Glass or Plexi? You can disassemble the Stuka snd ship it too. LOL! LOL! That is great just BECAUSE of the simplicity of it. NOTE:: I apologise for the request on the Kart. They hadn’t come through when I connected to your thread. I likum Kart too!
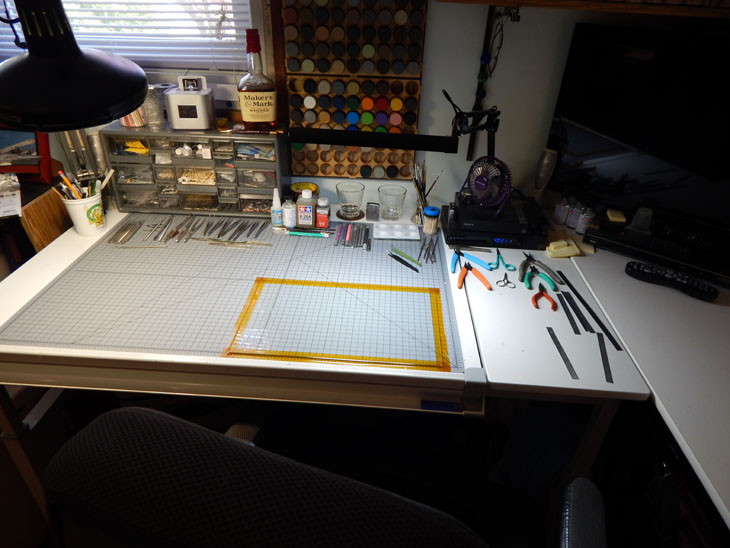
There is a piece of glass on the table. I find it makes a great surface for cutting photo etch parts, cutting styrene, making masks, and protecting mat of paint and glues. When a model gets completed I scrape the glass of glue and paint with a razor scrapper then wipe it with glass cleaner and I have a nice clean surface for the next project.
The glass is taped down with Kapton tape to keep it in place and protect the edges.
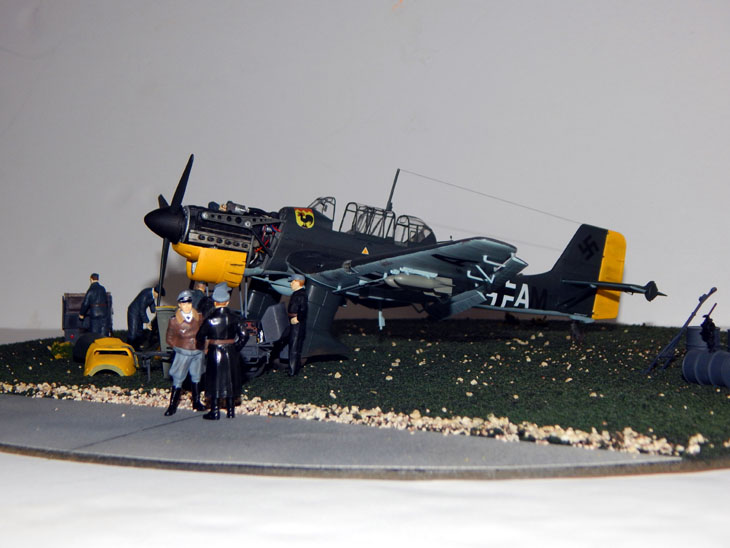
The Stuka diorama is now finished! I assembled, painted and weathered all eight figures. The figures came out fine considering this is the first time I painted full figures. The aircraft was then mounted to the base along with the accessory vehicles, aircraft panels, and the maintenance ladder. I placed the fuel drums and one jerry can off to the side. I then added the figures. Two high ranking officers were placed standing on the edge of the runway. Two others in uniforms were placed running the power cart with one of them bringing a jerry can. The four others in coveralls were placed with one getting ready to hook up the aircraft power, one grabbing a tool box on the tractor, one moving the aircraft panels, and one on the maintenance ladder working on the upper cooler. With everything in place I am happy with how it turned out.
The Airfix kit itself is a nice kit to build. The fit and details were very good. Only wish they would have provided an option to only have a couple of panels off. The kit decals that I used were all very good as well. It did not take an excessive amount of decal solvent to get them to conform to the underlying details. Thanks for following along, Now for the final photos: