Reasoned, I’ve never had much trouble there. I just make sure everything is glued down and dried. I just wipe away with the brush until I’m happy with the look. This method is sort of like the opposite of an oil wash I suppose. Oil washes scare me. This method is foolproof. I’m all about finding the easy way out and exploiting it.
Bvallot, no doubt, get one. I’m considering getting several more. Yes, it was the “perfect storm” so to speak for a tutorial, especially since it came with a PE fret. I hope the rest of the kit is as nice as the cockpit. Unfortunately all my reading so far on the kit says everything except for IP, the pilot seat and the gunner seat will be hidden. I’m glad I didn’t waste my time with the sidewall PE detail.
Rob, your welcome and welcome aboard. Some of the best modelers in the world lurk in this forum and they have taught me plenty, as they will you.
Mark, thank you.
Brandon, nice grab. Thats were I got this one (the other 40% off at Hobby Lobby when they carried the good stuff…thats another story)…and thanks for the compliment.
Jeez!! I just ordered an AM SBD-4 Joe!!! Like I needed another kit! lol I built a Monogram SBD that I used alot of parts from my spare Hasegawa SBD kit in the stash and after I built that one I had a desire to get an AM kit. Now that I’ve seen this build it was the tipping over that I needed to go ahead and grab one. Nice build and thanks for the interior build up tutorial. I’ll be using that!
That is some fantastic painting and shading that just adds tons to the cockpit. [B]
I have seen that wash either at Hobby Lobby or another hobby store and wondered how well that stuff works. I stay away from water based washes cause IMO they don’t flow the same as the solvent type but your method here sure looks like it worked like a charm. I just may pick up a bottle of that stuff next time to try. I recently purchased a couple of bottles of Vallejo washes and I don’t like how they flow, even with some Dawn in the mix to break up the surface tension.
Of course another stunning build! I really appreciate the cockpit tutorial, that is exactly what I needed to clear up my questions on your cockpits. I love your WIPs so keep them coming!
Thanks everyone. I hope some of you get some use out of the tutorial, which is my intent afterall. PJ, I can’t stand Vallejo washes either, or pretty much any of their “Air” product line. I just don’t see the reason for the hype. Its like trying to airbrush Tempura paints (remember these?). Maybe I just don’t know how to use the stuff, but as long as Tamiya paints are available, I’ll stick to those.
Anyways, I got some bench time in last night, which involved assembly of the airframe. This was bittersweet as you will see later. I closed the fuselage without to much issue. I had a little trouble getting the gunner seat in place, but a touch of Tenax took care of that. Everything seemed to line up ok.
I tried something different this time and actually followed the instructions (I usually use them as a “loose” reference LOL). I attached the fuselage to the lower wing, then glued the bottom front and the rear wing fuselage joint. On the latter I used CA so it would sit flat. I had some large gaps there that required putty. (Here we can again see where the original owner of the kit painted the inner wing.)
I then added the upper wings and the fit was good…no issues at all. I then started work on the front gun deck/ cowl area. It was here that I ran right into a brick wall. During test fitting of the forward fuselage and the gun deck above it, There was a 1/8th inch gap (See photo).
After about an hour of fiddling and cussing, I realized one of these two pieces (below) were wrong for the dash 3…but which?.
I briefly recalled that I did buy this kit second-hand, so something may have gotten mixed up. But no, I cut all parts off the sprues?..WTF? I then jumped on the net. Research then revealed that AM quaility control had dropped the ball and mixed up the cowl parts with the “Midway SBD 3” release (my kit) and their dash 5 release. Apparently the dash 5 was longer from the leading edge of the wing forward, which is why I have a longer gun deck piece and a huge gap.
Unfortunately I will have to shelve this guy until I come up with a solution (can you hear the balloon deflating?). Its my understanding that Academy is now boxing the AM Dauntless molds. Perhaps they will replace it for me if I promise to buy an F-86?
postponed until further notice…let’s see what happens…
That’s a bummer to hear Joe. I was just reading a review discussing the same thing. I wondered if you would find the same thing with your kit. I actually should be getting the Academy SBD-2 “Battle of Midway” boxing in the mail soon. I can peak inside and see if it looks any different.
I hope that you have better luck than me with Academy. I called their Edison NJ office several times and spoke to a gal named Ronny who though very polite, gave me the run around about my replacement part, a warped tank barrel. After months of waiting I finally gave up and fixed the part by carefully applying heat to counter the warp. Can’t you slice off a section of the part to make things fit and maybe re scribe lines if needed?
I hope your email gets to the right person. Please let us know what happens and good luck. It sucks when you are on a roll and hit a brick wall like this.
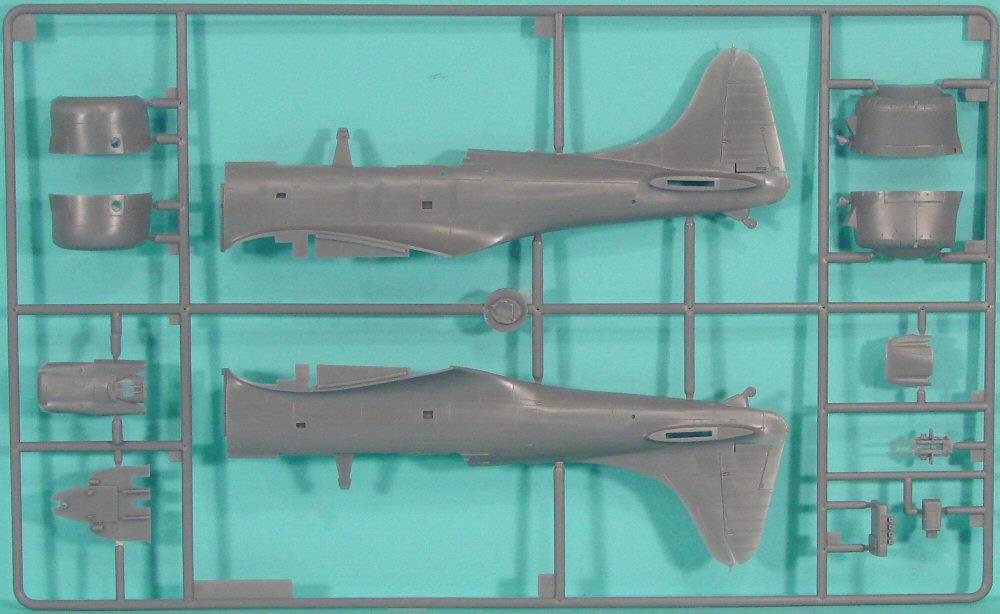
Ok, I have that exact kit. I just got it based on your current build here. So, WE gotta fix this. My kit was sealed and all the sprues were still in sealed bags for AM. I took these shots to give you reference to size based on what was in my “Midway SBD-2” to see if your kit is mixed up.
I’ve been enjoying watching this build, as i also have this kit in my stash.
Thank you for pointing out the error though, i’ll have to make a note and put it in my kit so when the time comes, i’ll know it’s not my poor modelling skills leading to the error.
It’s a shame there is so much detail on the gun deck, otherwise surgery might have been a viable option.
Hopefully you receive a decent response from Academy, if you do, they’ll be receiving an email from me.