I’m not really sure of the amount of white I added to the original color, but I was sure it was too light. I decided to push forward and spray lightly at first and see how it would go. Turns out it was good after all.
So I started into highlighting the entire tank.
I did not preshade or post shade as I went as the idea in my head didn’t need it for the results I want. Remember, this particular tank is pretty clean on a firing range so it won’t need a lot of muck built up as it would in the combat field.
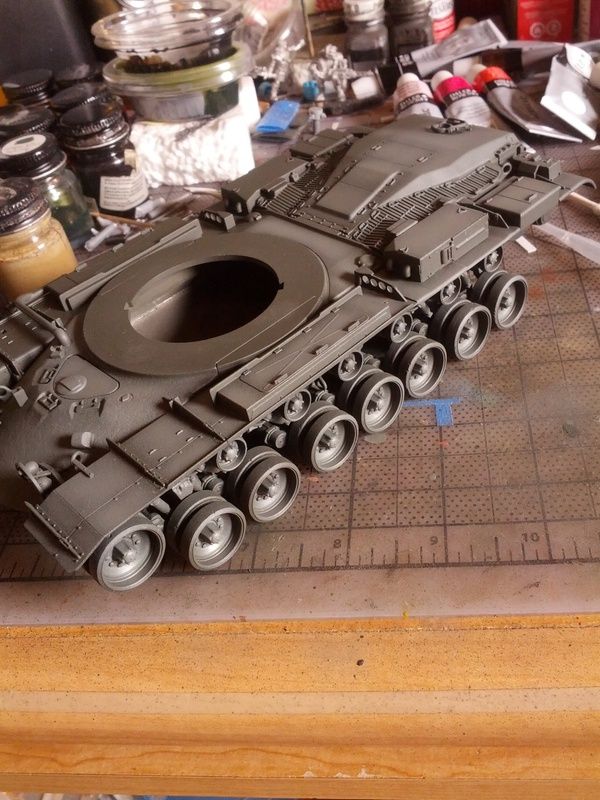
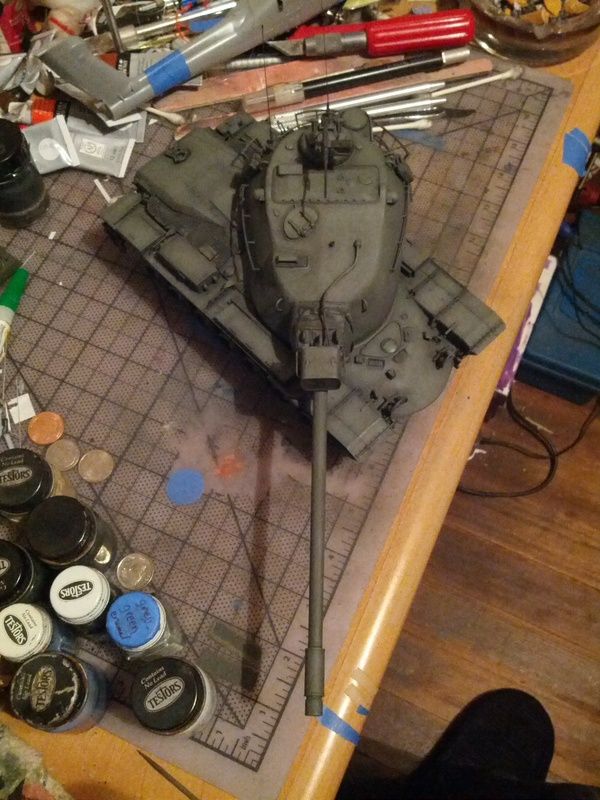
Alright. So here it is after the modulation is complete. Not really much of a drastic difference is there? The effect is natural and deceptively understated. Doesn’t look like I did anything at all.
Light just falls on it as it should and that lays the groundwork for the next step.
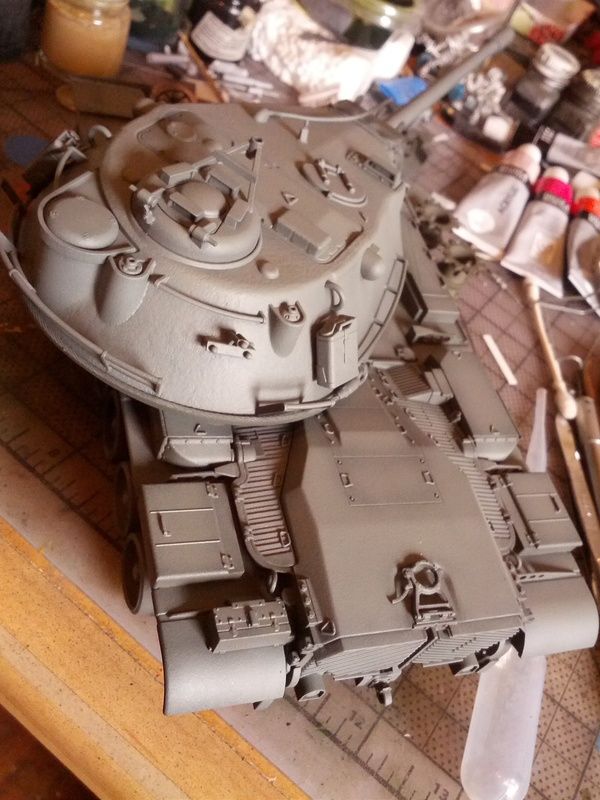
I left the paint unvarnished so I could get a “dirt stained” like effect with another black/green acrylic wash. I brushed it on really ugly and then let it dry to the touch. Somewhere around 15 minutes, and then gave it a scrub with water and an old toothbrush to loosen up the acrylic. After that I wiped up the excess wash with a blue mechanics paper towel (very useful because of the low lint they leave behind)
Minor spots were cleaned up with a few q-tips and this is what I got when that was done.
That;s looking really good, Mike. Did you add a little soap to that acrylic wash to help it spread? I found that that really helps to get an even dispersion.
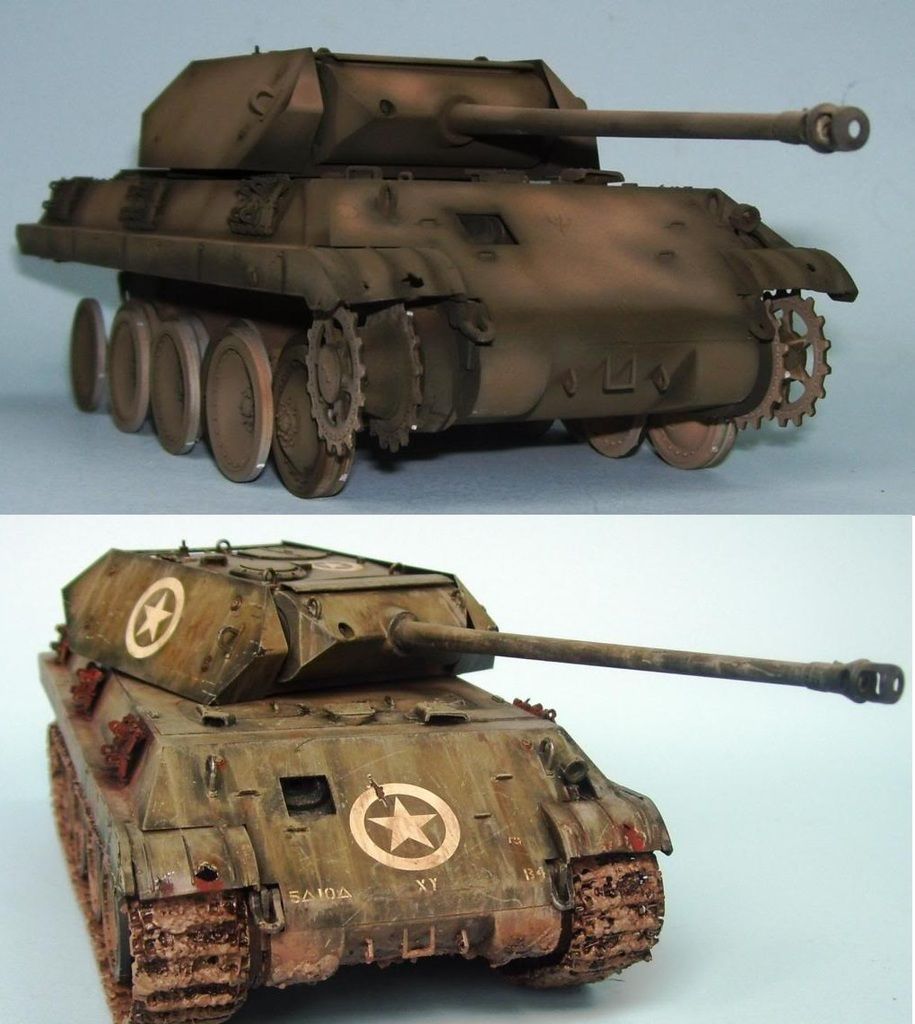
I would tell you not to worry too much about “too much white” or whatever lightening color you use when highlighting or modulating. I sometimes go REALLY radical in the color variation and then bring that back to tone in the weathering. Check out the variation in the M10 Panther here. In my experience, the biggest factor that contributes to a boring, monotone finish is to paint a vehicle in one tone, or to not be a little courageous in your shading. Washes of the same base color can bring a finish back to tone even if you go “too light”.
I think what you’ve got going is pretty good though. Get going on those pinwashes now. [;)]
Mike: Ah, I was wondering if you’d already finished and somehow I missed it a few weeks ago! I really like the results you’ve gotten there- looking forward to seeing everything come together.
Karl: Nice work there too, I tend to always underdo pre-shading- I like your results.
Karl, no I didn’t add any soap to it. I wanted it to pool up unevenly to slightly randomize the effect (like adding some oil streaking), but after the scrubbing it evened out mostly. The black-green wash was mostly meant to bring back my tone and it also worked a bit as a post shade which I’m happy with. It is supposed to be “clean” as was requested. No such thing, I know lol. Your M-10 Panther definitely has me thinking of going much bolder in the future though! Did I miss the thread for that somehow? Freaking gorgeous Karl. I’ve got a few spots that need minor attention and then I’ll be getting to the pin wash. I’ve also got a good primer on the tracks and I’ll be spraying those later this afternoon I think. They may have been a nightmare with the glue, but they don’t mind the paint. Odd, but I have some AFV Club indies if they decide to misbehave. Gamera, no I have not finished the Beast yet. It is how you see it in the pictures right this moment. There just wasn’t anything to write about concerning the final assembly of the fenders. The instructions were good and the parts fit without issue. Lol I’ve still got the back of the tank, wheels, and lower frontal armor to wash yet as I just realized. [Sigh] “Work, work.” Thanks for the advice Karl, I really want to try that! Gamera, keep an eye out buddy. Thanks for everything guys!
lol thanks Sprue! This tank never saw combat, but was deployed to Guantanamo Bay in the 50’s-60’s. So this is going to be a fairly clean looking tank without a lot of wear to it.
So yeah… those DS tracks… they ARE supposed to accept paint, right? I thought my primer was good, but it’s not sticking very well. It rubs off. Then I tried acrylic and that rubs off too. WTF are these things made out of? I heard they worked well enough, but I’m really doubtful they’re all that good. Does anyone know of any methods that do work? Should I scrub them with IPA or something?
Also have a future M60A1 build on commission coming up in the next month or two. Time to finish this one up.
Mike, thanks for the comments on the M10. That was a few years ago. Interestingly, Finescale bought the article, but it has yet to be published. It’s here online at M10
I am sorry to hear about your troubles with the tracks. I hate DS track because of the inability to sag them, but haven’t had trouble with paint sticking. I ope your set is an anomaly. Hope you find something that works, too!
Mike: A friend pointed me toward using ‘rubber bumper’ paint from the auto parts store as a primer on rubber type tracks. It usually works though I sometimes still get a little paint flaking off.
Thanks guys. I’m thinking of that plastic bonding Krylon at the moment. I’ve used it in the past on things like PVC without issues and I’m probably going to save some change for a can later. I’ll stick to what I remember works and I should have thought of it sooner lol.
Bu that rubber paint is definitely worth experimenting with later.
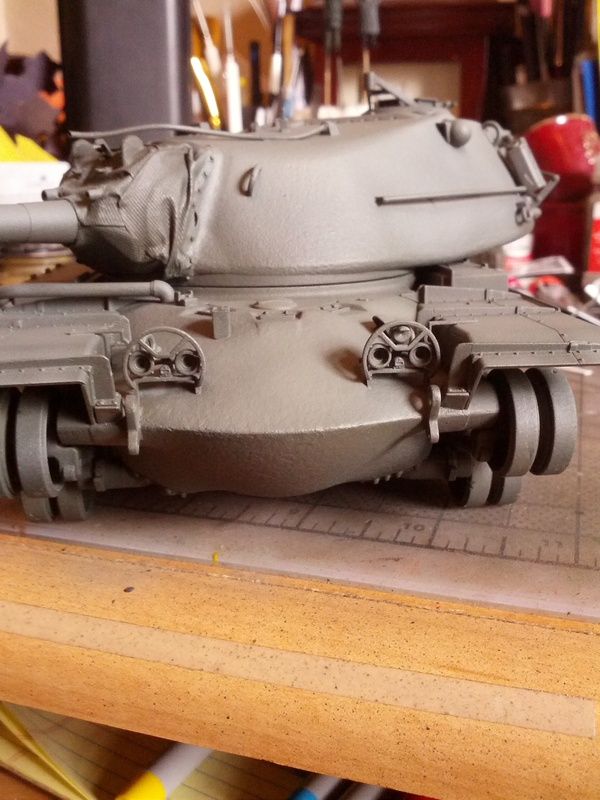
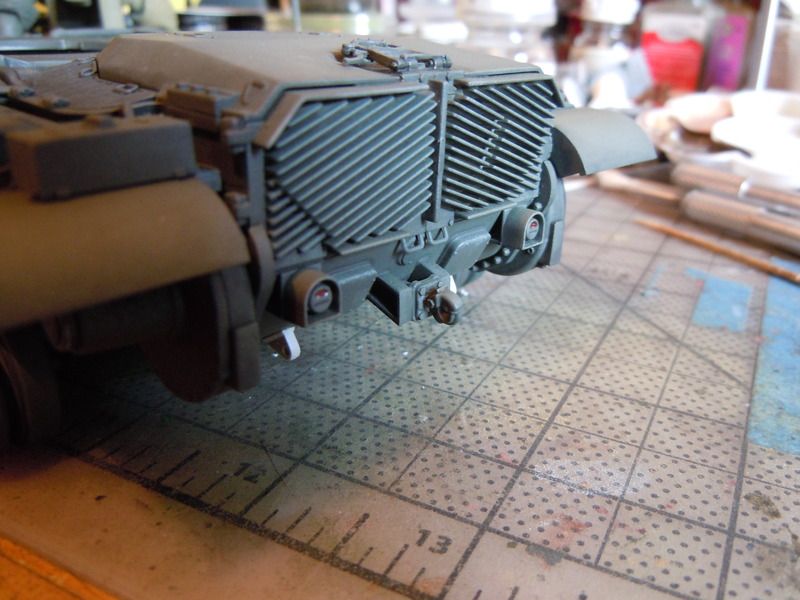
Update time. Not much done but one more step towards the end goal. I’ve started sorting out some of the minor details such as headlights and tail lights. I’ve got the black-green filter wash over the lower half of the tank now and it’s really starting to look better than real as it sits on my bench. “Pictures, or it never happened!”, right?
I’m going to clear it after this and then I need to sort out the wheels. Dad also sourced out some “Milk Shake” straws so I now have the accordion part of the gun tube shroud. Progress is in motion.
Oh, and the Krylon stuck to the DS tracks so now I have something for my acrylics to stick to.
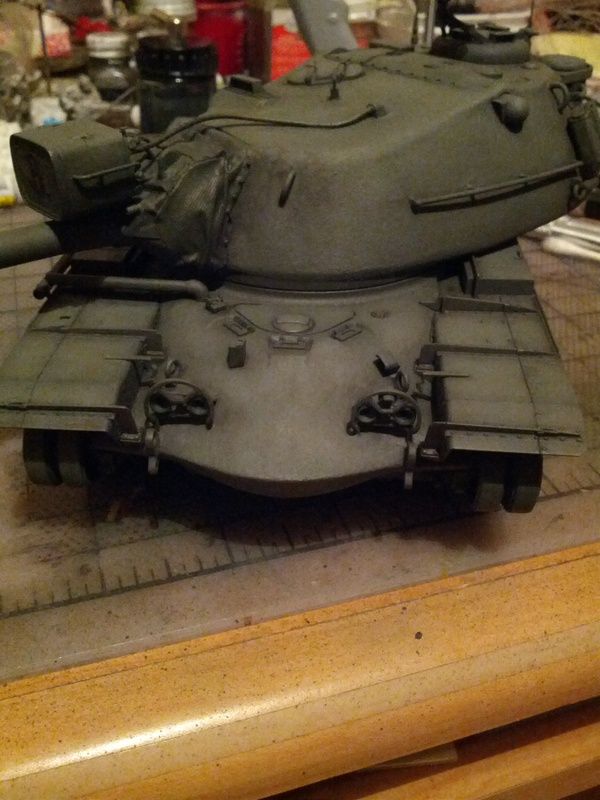
I finished up the mantlet cover. I tried every glue I have to get the straw I was using as an accordion gun tube recoil cover. Nothing would stick to it. So even if I had found a paint that would stick to the stupid thing, it would not have worked anyways.
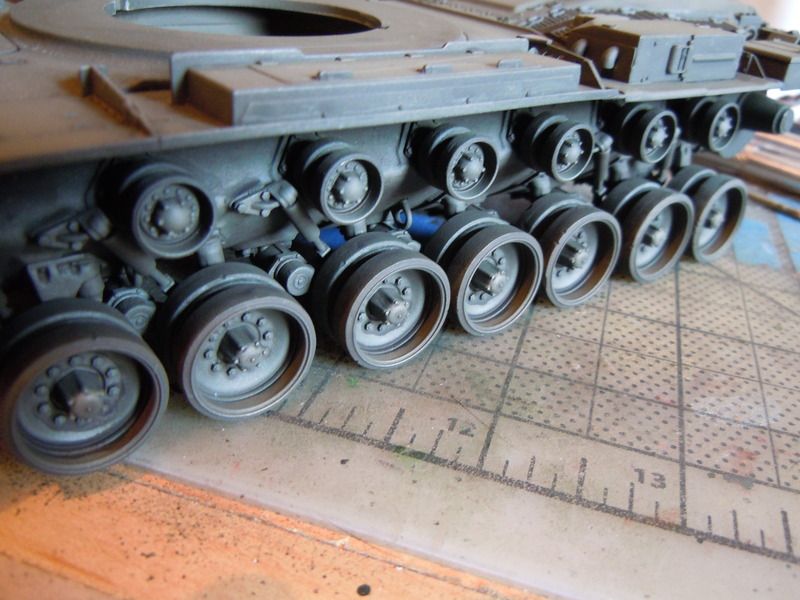
Also, the damage done due to clumbsy fingers has been repaired and you can’t even tell. I’m happy about that lol. (Dad and I fumbled it and broke off 5 wheels and some of the rails.)
I had to reattach the no. 2, 4, 5, 6, and 7 road wheels on this side.
If you look close you can see some of the spot filtering has taken place. I need to finish that part and then I will be adding more spot filtering after a gloss to seal up what I have.
Sorry for not getting this updated in so long. I’ve had it on the side in que till I figured out how to get the straw to work in the way that I wanted it to (screw that dumb thing lol).
What a great looking build Mike!!! May have to get me one of these beast. I have been on a Post WWII armor building kick lately and this would fit in nicely!!!
While the turret does have a sort of (deflated) football shape to it, you guys weren’t suppose to toss it around like that. [;)] Good save though. I can’t see where any damage occurred.
The straw not working…. I don’t have any better suggestions either. It looks fine as is now
That’s a nice looking build you have there Mike, nice work on detailing that searchlight. I am not familiar with the type, but it looks a bit of a beast.
Oh, no I have not actually used any actual cloth yet, but I have considered it yes. I work with all types of paper and most of them work really well. I’ve recently started using news print and the texture is amazing for 1/48th scale.
Thanks Bish I found out that the only time those covers were off of the searchlights is when the lead tank was on night patrol. Otherwise they were always covered, and so I had to cover it. Too bad for all that detail on the inside lol.